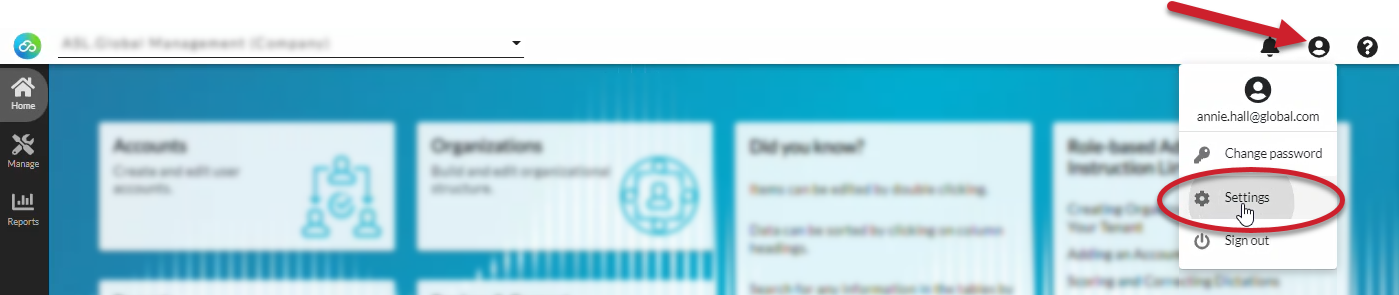
Click on the Account icon in the top right corner of nVoq Administrator to configure Settings for your account.
Time Zone
You have an opportunity to set your time zone the first time you log in to nVoq Administrator.
The time zone that is set in nVoq Administrator will appear on date stamp information, such as items on the Review & Correct page
To change your time zone:
- Click the Account icon near the top right corner of the page and select Settings.
- From the Time Zone drop-down menu, select a new time zone.
- Click the OK button.
- All data with a time stamp in nVoq Administrator will update to the new time zone.
Session Timeout
You have an opportunity to set your session timeout the first time you log in the nVoq Administrator.
Due to security requirements, the period of time that your nVoq Administrator account will stay logged in to nVoq Administrator when there is no activity can be set to either 15 or 30 minutes.
To change the length of your session timeout:
- Click the Account icon near the top right corner of the page and select Settings.
- From the Session Timeout drop-down menu, select either 15 or 30, which is the minutes of inactivity after which you will be automatically logged out of nVoq Administrator.
- Click the OK button.
Your session should not time out while you are actively preforming a task in nVoq Administrator, but if the session times out when viewing a page, you will be redirected back to the login page and see a message that states, "Session timeout expired. Please login again." After logging in again, you will be redirected back to the page you were viewing when session expired, and should see the same data you were viewing before the timeout occurred.