Create new custom Note Compose designs for the entire system.
Note Compose designs (other than "Clean and Format") are only available in nVoq Voice if Note Compose for structured notes has been purchased (or if the "advancedInteligentFormatting" property is TRUE for the account or organization).
Open the Note Compose page under the System menu.
Click on the + icon in the blue toolbar to open a menu of ways you can create a design. Select one.
Based On Example - Use an example of a clinical note that you want the formatting to follow.
Brief Description - Describe the type of clinical note you want the formatting to be.
Empty - This is a free text field where you can create your own formatting design manually.
The New Note Compose Design page automatically opens on the Note Compose Design tab.
Add a name for the design.
This is the name that will appear in the nVoq Voice Note Compose drop-down menu.
Your design cannot have the same name as any design in your tenant OR the same name as any design that exists at the system level. If you attempt to create a design with a name that already exists, a red notification will appear.
Optionally, turn off the Enabled toggle while you are creating your design.
Enabled designs are displayed in Voice (if the clinician has Note Compose for structured notes/"advancedInteligentFormatting" property is TRUE). For that reason you may want to keep your design disabled until it is complete and tested to make sure it works as expected.
Select a Type from the menu: structured or format.
Structured: This type of design pulls information from a clinical note and puts it into a specific structure, such as a SOAP Note. It also adds punctuation and capitalization, and may correct some mistakes and/or typos.
Format: This type of design adds punctuation, capitalization, and may correct some mistakes and/or typos.
Optionally, add a description of your design.
The description is only visible in nVoq Administrator.
Add the appropriate information in the text area for the type of design you selected from the menu in Step 2.
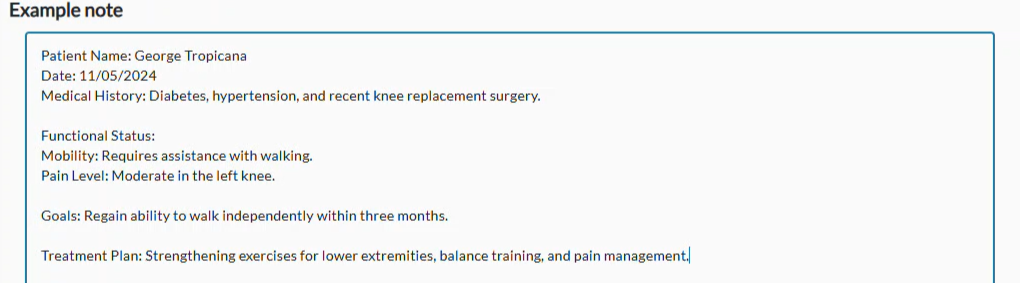
Based On Example - Enter an example of a clinical note that is already formatted the way you want the design to format a note.
Brief Description - Describe the kind of note you want the design to format.

Empty - Create your own note manually in the empty text area. Skip to Step 10.
Click the Convert to Design button below the text area.

This button only displays if you are creating a note based on example or description.
The Design text area displays the new design.
System-created headers display with a colon after them. You can keep or remove the colon.

Text that appears [between brackets] is where information from the clinical note will be pulled into the formatted note. These are called "placeholders".

Any text that is not a [between brackets] will be included as-is in the formatted note.

Make any changes you want to the note. You can use the Assistant buttons for more help.
Assistant Buttons:
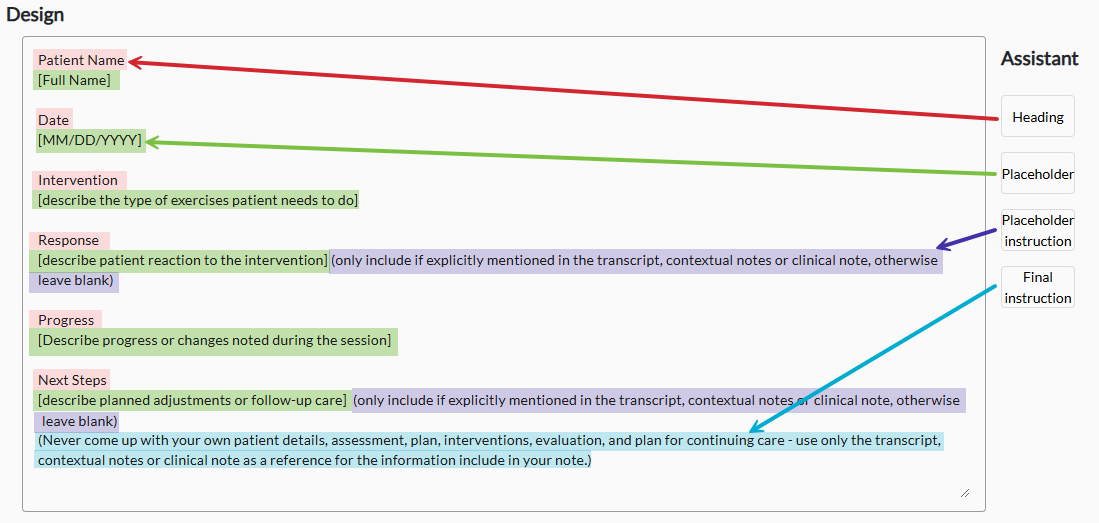
Heading - This button adds a new heading where you have your cursor in the Design field. Rename the word "Heading" to whatever you want the heading to say. You can also manually type headings. They do not have to be followed by a colon.
Placeholder - This button adds open and close brackets [] to indicate where information from the clinical note should be pulled into the design during formatting. Add the placeholder and then add what information from the clinical note should be added there. You can also manually add the brackets.
Placeholder Instruction - This button adds instruction to the artificial intelligence that can be added to any placeholder, basically telling it to only use text that is included in the clinical note and not to improvise anything. Press the button to add the instruction after a placeholder, outside the placeholder brackets. These instructions appear between parenthesis (). You can put them after as many placeholders as is needed. They do not appear in the final formatted note.
Final Instruction - This button adds instruction to the artificial intelligence that can be added at the bottom of a design, basically telling it to only use text that is included in the clinical note and not to improvise anything. These instructions are displayed (between parenthesis). If needed, you only need to add one of these to the end of your design. They do not appear in the final formatted note.
Any text added to the design that is not between brackets or parenthesis will be included as-is in the formatted note.

Try out your design on the Test tab to make sure it works as expected.
Click on the Test tab.
Enter an example of a clinical note that should be formatted like your new design into the Test Text area.
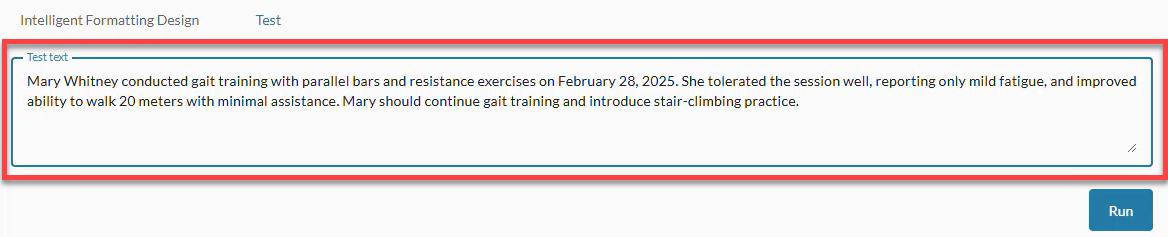
Click the Run button.
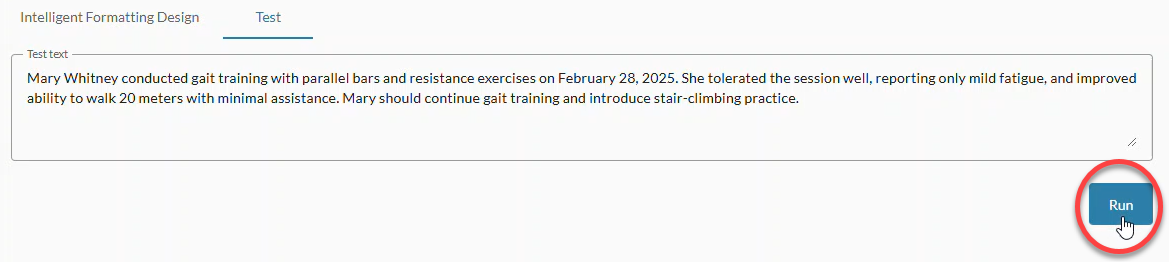
The formatted note appears below the Test Text area.
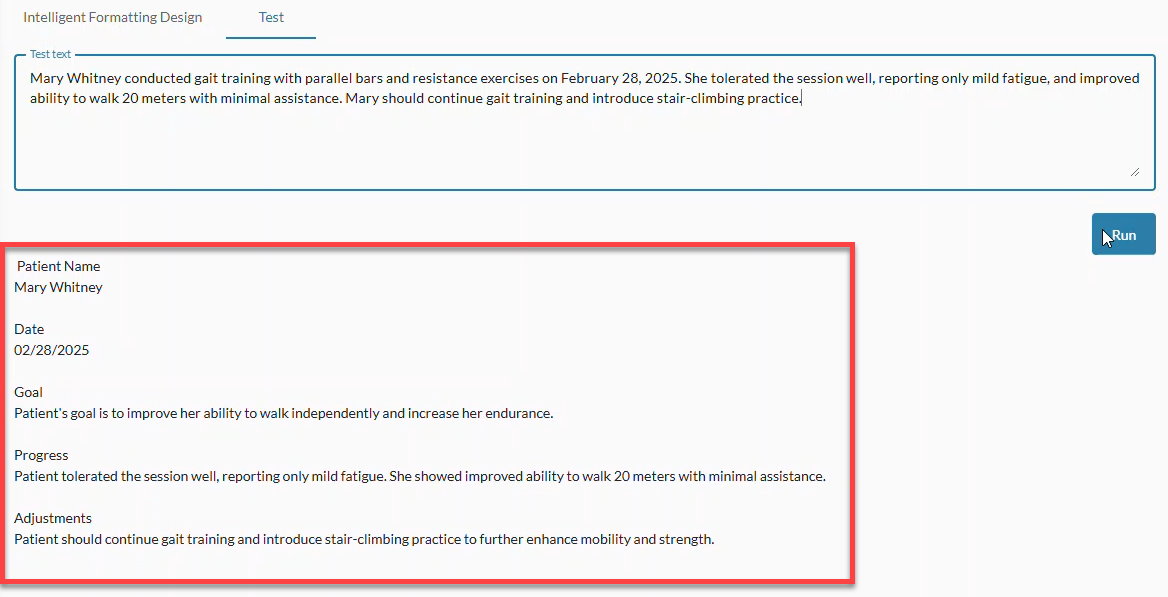
Test multiple example notes by replacing text in the Test Text area and then clicking the Run button again. Consider testing some example notes that are incomplete to see what happens.
Click the Save button to save your design. A green notification lets you know that your design was saved successfully.