You can copy a Note Compose design to use as a starting point for a new design.
You cannot copy a Note Compose design to a new organization level in the same tenant.
All designs exist at the tenant level of an organization.
Go to the Note Compose page in nVoq Administrator.
This page is only visible to system-level administrators and administrators with an Administrator Role at the tenant level.
In the list view, find the design you want to edit. Click on the actions menu and select Copy Item.
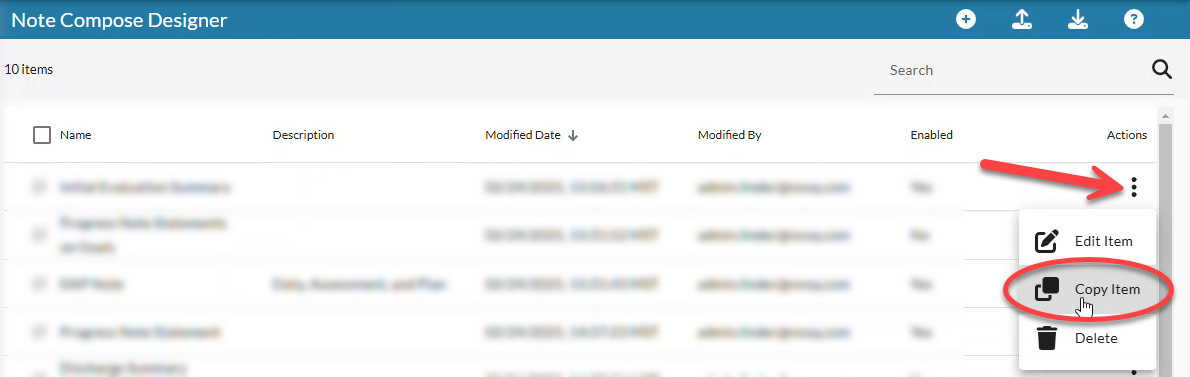
The Copy Note Compose Design page opens with the copied design (indicated by the word "copy" added after the design name). Use this as a starting point to create a new design.
Make changes to the design:
Name: This is the name that will appear in the nVoq Voice Note Compose drop-down menu. Your design cannot have the same name as any design in your tenant OR the same name as any design that exists at the system level. If you attempt to create a design with a name that already exists, a red notification will let you know.
Enabled: This toggle allows the design to be listed in the nVoq Voice Note Compose drop-down menu (as long as the clinician has Note Compose for structured notes). You may want to keep your design disabled until it is complete and tested to make sure it works as expected.
Description: The description is only visible in nVoq Administrator.
Design: This is where the formatting instructions display.
Headers may display with a colon after them, but they don't have to.
Text that appears [between brackets] is where information from the clinical note will be pulled into the formatted note.
Text that appears (between parenthesis) are instructions for the artificial intelligence. These do not appear in the formatted note.
Any text that is not [between brackets] or (parenthesis) will be included as-is in the formatted note.
Optionally use the Assistant buttons to add to the design:
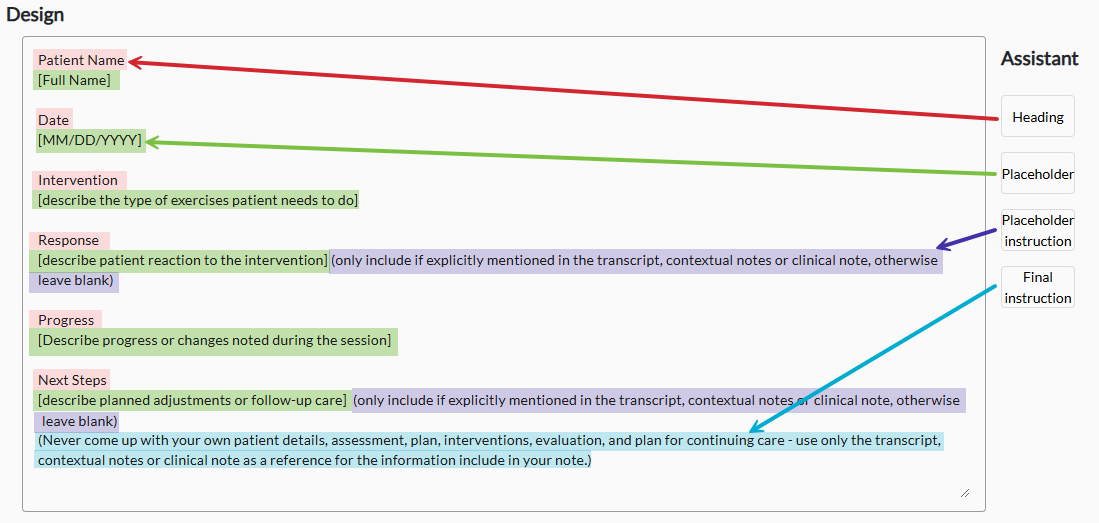
Heading - This button adds a new heading where you have your cursor in the Design field. Rename the word "Heading" to whatever you want the heading to say. This text will appear as-is in the formatted note. You can also manually type headings. They do not have to be followed by a colon.
Placeholder - This button adds open and close brackets [ ] to indicate where information from the clinical note should be pulled into the formatted note. Between the brackets add the description of the information from the clinical note should be added there. You can also manually add the brackets.
Placeholder Instruction - This button adds instruction to the artificial intelligence that can be added to any placeholder, basically telling it to only use text that is included in the clinical note and not to improvise anything. Press the button to add the instruction after placeholder, outside the placeholder brackets. These instructions are displayed between parenthesis (). You can add these after any placeholder. They do not appear in the formatted note.
Final Instruction - This button adds instruction to the artificial intelligence that can be added at the bottom of a design, basically telling it to only use text that is included in the clinical note and not to improvise anything. These instructions are displayed (between parenthesis). They do not appear in the formatted note.
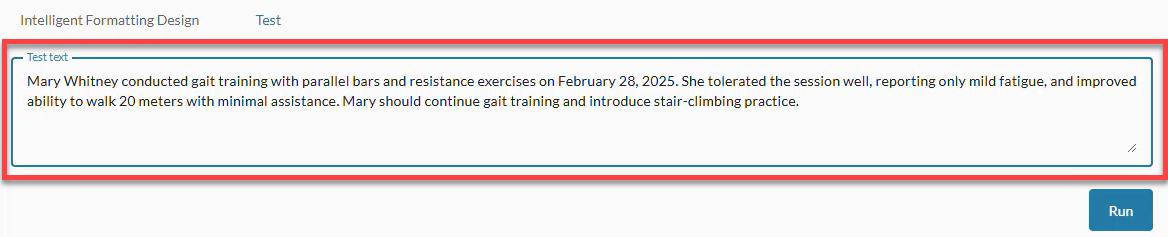
Try out your new design on the Test tab to make sure it works as expected.
Click on the Test tab.

Enter an example of a clinical note that should be formatted like your new design into the Test Text area.
Click the Run button.
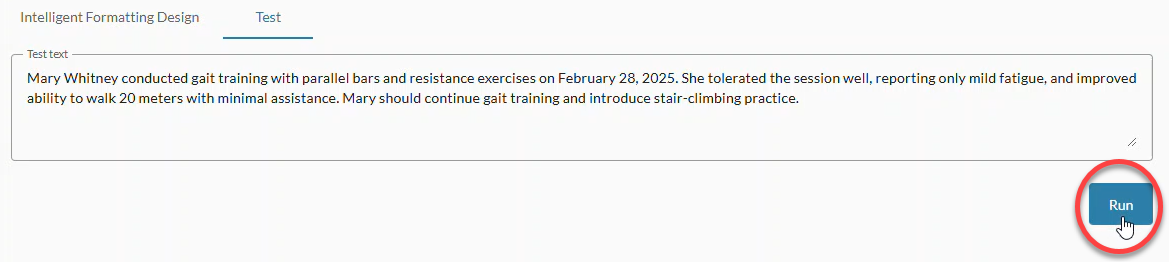
The formatted note appears below the Test Text area.
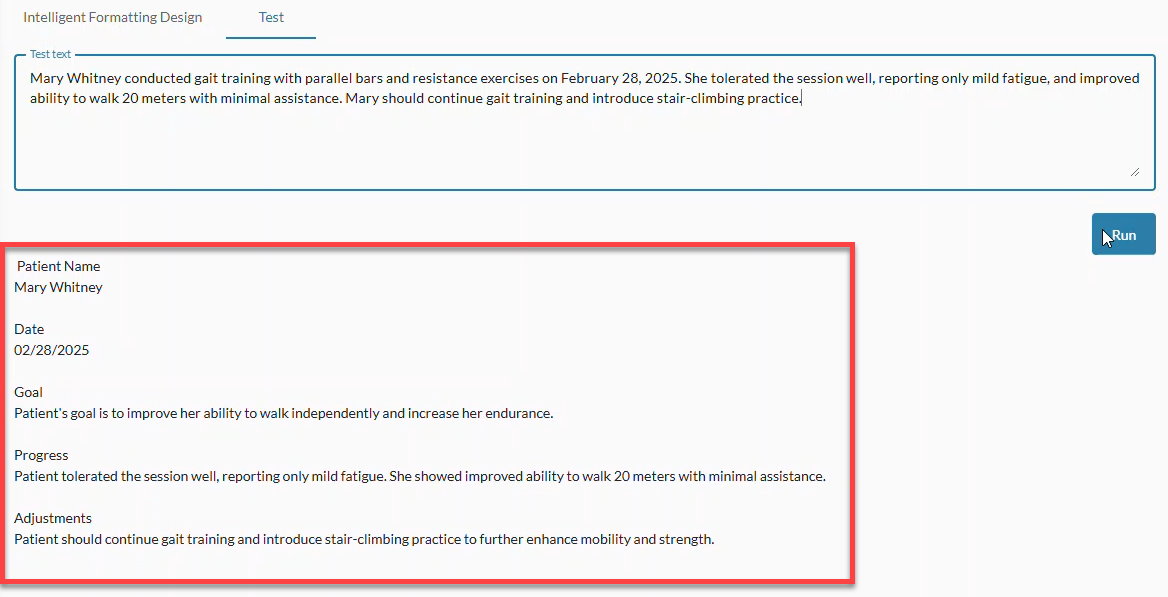
Test multiple example notes by replacing text in the Test Text area and then clicking the Run button again. Consider testing some example notes that are incomplete or irrelevant to see what happens.
Click the Save button to save your changes. A green notification lets you know that your new design was created successfully.
