On the Auto Provisioning Token page system or tenant level administrators can create accounts and tokens to be used with an identity provider to create nVoq accounts through that provider that can sign in using SSO. Tokens can also be deleted on this page.
Account provisioning on this page currently only works with Okta and Microsoft Entra ID.
Account provisioning is not supported with any other identity management service at this time.
Create a New Token
- Click on the actions icon
 next to an identity provider on the Identity Providers page and select Auto Provisioning Token.
 - On the Auto Provisioning Token page, click the Create new token button.

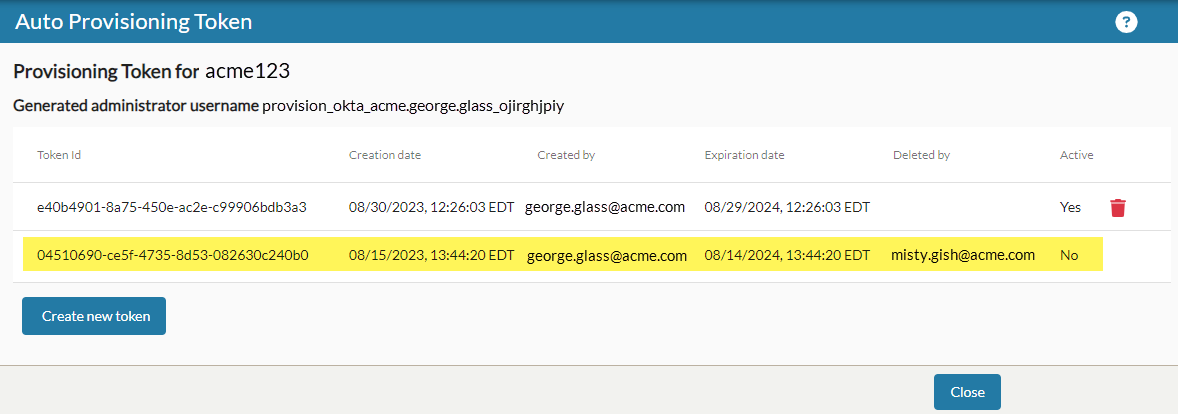
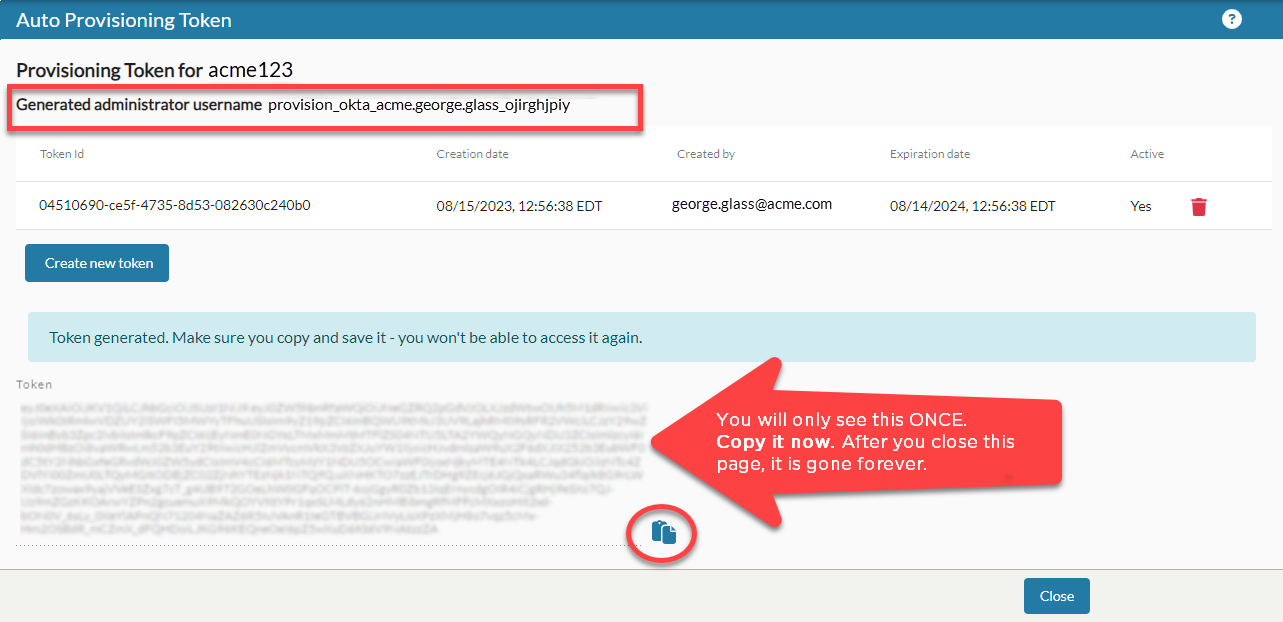
- When a new token is created for the first time a provisioning account with a Generated Administrator Username (near the top of the page) is created.
- This non-billable account is visible on the Accounts page at the tenant level.
- The actual JSON Web Token (JWT) is displayed in an un-editable text area. You will only be able to see this token once. When you close this page (or click the Create New Token button again), it is gone forever.
- You can create a maximum of two (2) tokens per provisioning account. The second one allows you to update to a new token before the first one expires and stops working. If you attempt to create a token when two already exist, a red popup notification will appear in the top right of the screen stating, "Could not create token." A notification message (under the bell icon
 in the upper-right corner) explains that a token could not be created because "too many provisioning tokens already exist."
- When a new token is created for the first time a provisioning account with a Generated Administrator Username (near the top of the page) is created.
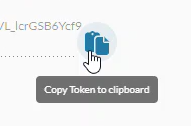
- Click the Copy token to clipboard icon next to the token to copy it to your computer's clipboard.
- Use the copied token together with the generated administrator username with your identity provider to create nVoq accounts that can be accessed via SSO.
- Using the provisioning account the Okta or Microsoft Entra ID provider can send SCIM data to the nVoq system. (The nVoq system does not send SCIM data to Okta or Microsoft Entra ID.)
- Using the provisioning account the Okta or Microsoft Entra ID provider can send SCIM data to the nVoq system. (The nVoq system does not send SCIM data to Okta or Microsoft Entra ID.)
- Your token will automatically expire one year from the date it is created. Tokens are deleted from this page seven (7) days after they expire.
- An email will be sent to all administrators with a Customer Administrator role at the tenant level to notify them of an upcoming identity provider token expiration.
- Notifications are sent 30, 14, 7, 3, and 1 day before the token expires.
Delete a Token
- Click on the actions iconnext to an identity provider on the Identity Providers page and select Auto Provisioning Token.
- Click the trash icon
 next to the token you want to delete.
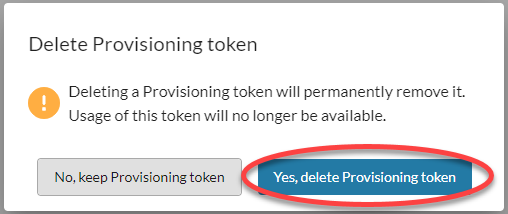
- You will be asked to confirm that you want to delete the token. Click Yes, delete Provisioning token to permanently remove the token.
- For troubleshooting purposes deleted token information remains on the Auto Provisioning Token page (along with the username of the person who deleted it) until the token's expiration date.