Depending on your organization's configuration, Note Compose can convert your text into structured documentation using formats such as SOAP Notes, General Summaries, or custom templates. It also includes Version History, which saves each formatted version of your note, allowing you to review changes over time and restore a previous version if needed.
The example here shows how to use a Note Compose “SOAP Note,” but you may have other options to choose from.
Your administrator may have configured custom formatting options for you, and they will also be listed in the Note Compose menu. You run them the same way as shown below for SOAP Note.
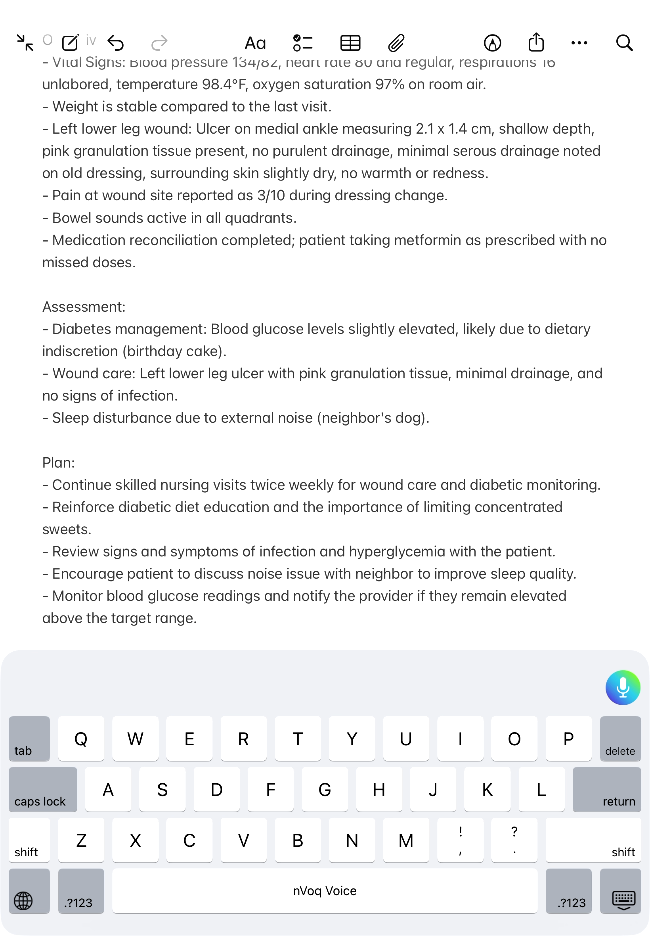
Dictate your notes the way you would say them naturally.
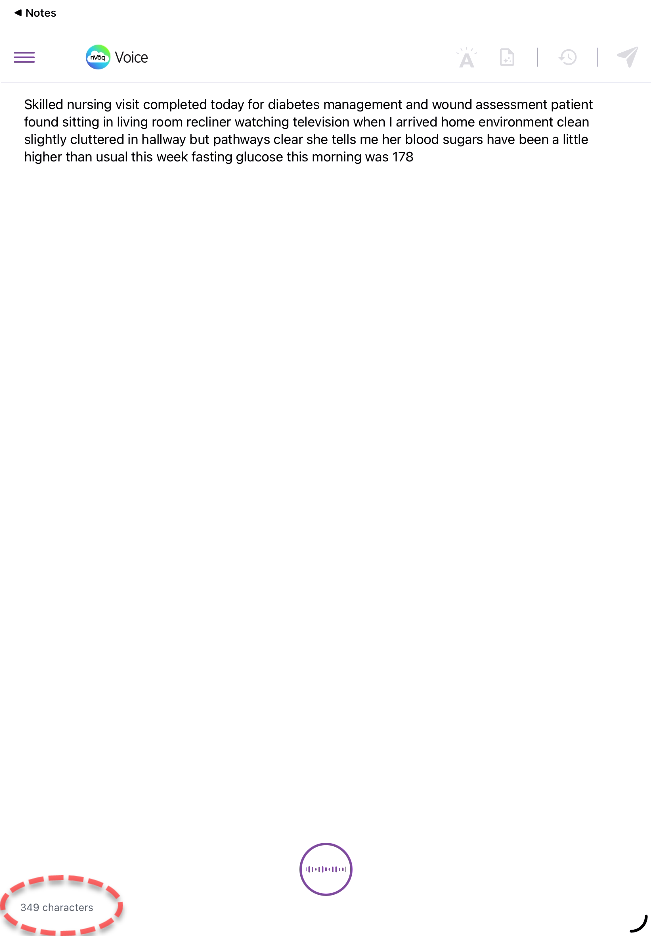
Keep your character count below 6,000 (that's about 1,050 words) to avoid getting an error message when you run formatting. A character counter is available on the dictation screen (see above) to help you keep track.
You don't need to say punctuation.
You can also type text.
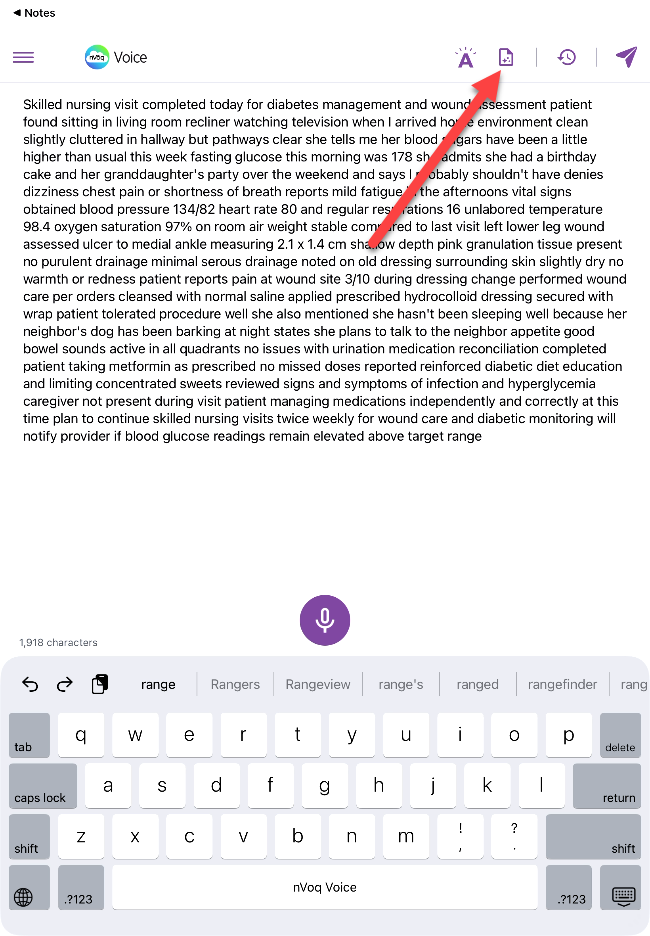
After you end the dictation recording (or finishing typing text on the dictation screen), tap the Note Compose icon, which is in the upper-right of the screen on a tablet.
 On a phone, tap the menu icon and select Note Compose.
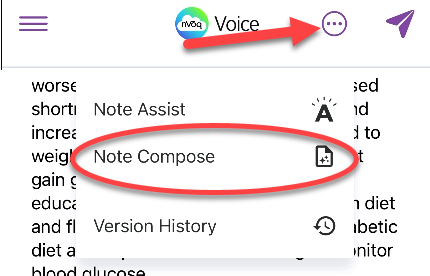
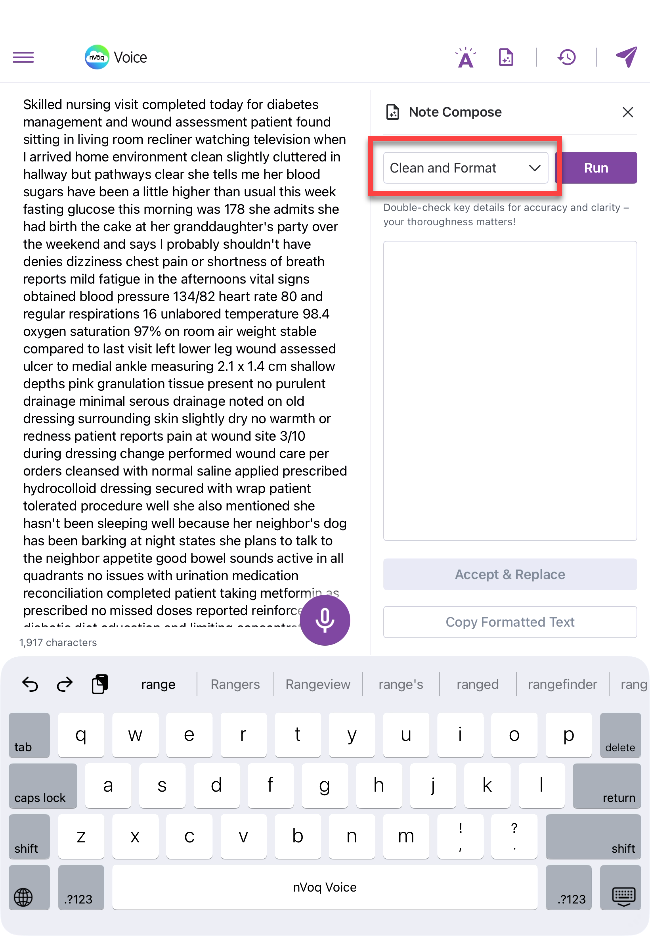
Note Compose opens with the Clean and Format option selected by default.Tap the menu to select a different option.
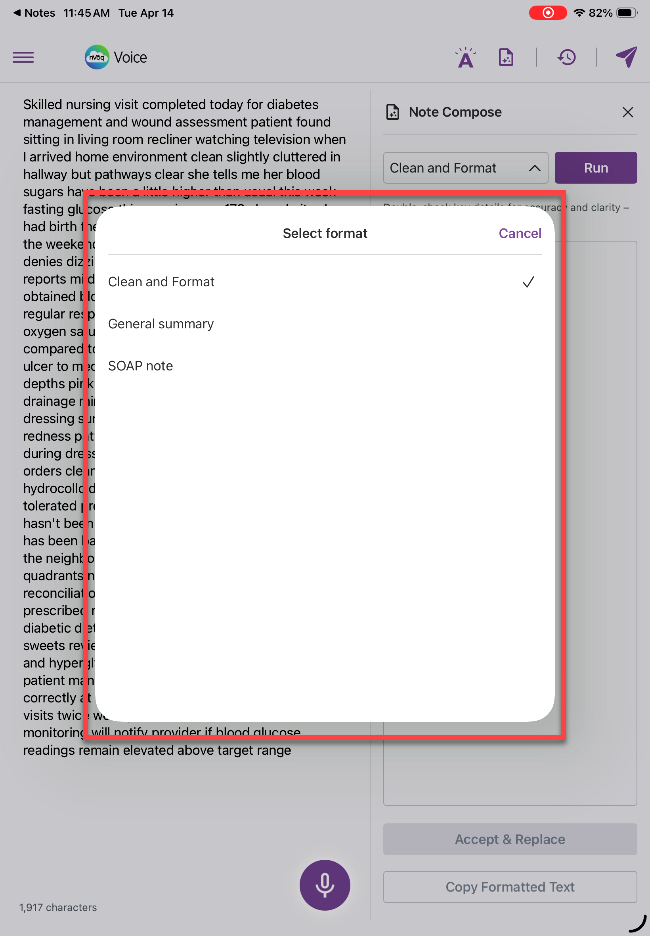
The Select Format options pop-up opens. Tap the formatting option you want to apply to your text. In this example we will use SOAP Note.
Clean and Format will add punctuation, capitalization, and may fix some errors.
General Summary will summarize your text. It will also add punctuation, capitalization, and may fix some errors.
SOAP Note will format your text as a SOAP note. It will also add punctuation, capitalization, and may fix some errors.
You may have custom formatting options listed here that were created by your administrator.
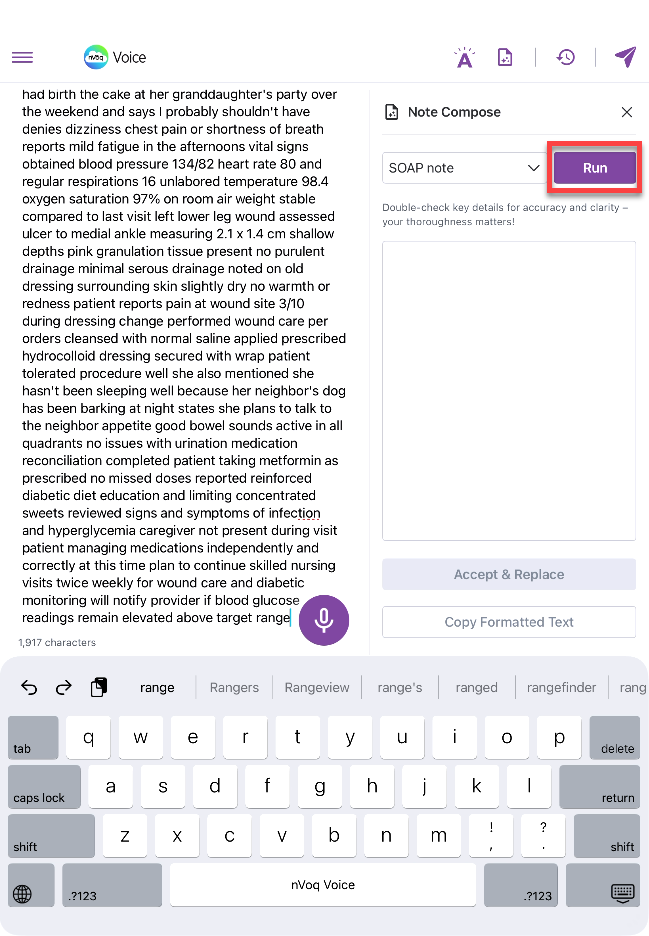
Tap the Run button to apply the selected formatting to your text. Keep in mind that extraneous information that does not directly support a SOAP note may be removed in this step.
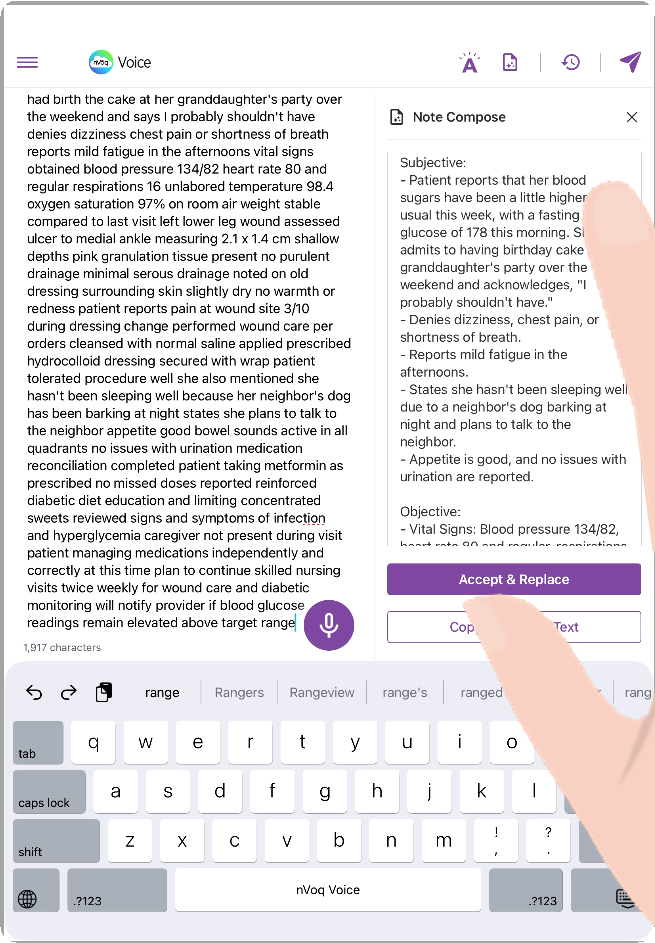
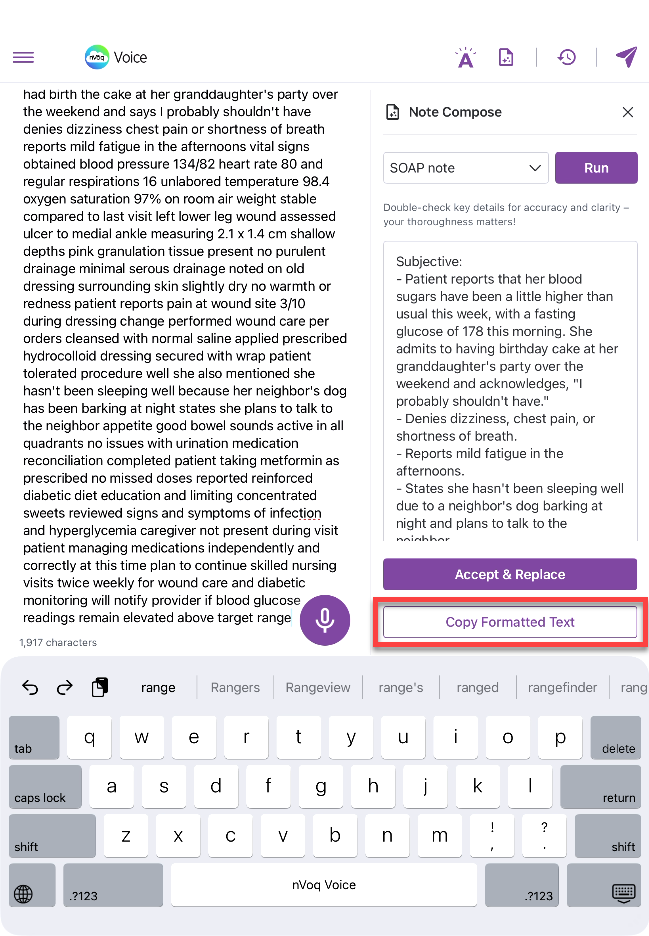
A preview of your formatted text appears under the formatting options menu. Be sure to REVIEW your formatted note. Remember that YOU are responsible for the accuracy of your documentation!
On a tablet, swipe up on the preview note to expand the viewing area.
On a phone, tap the Note Compose title and swipe up to expand the viewing area.
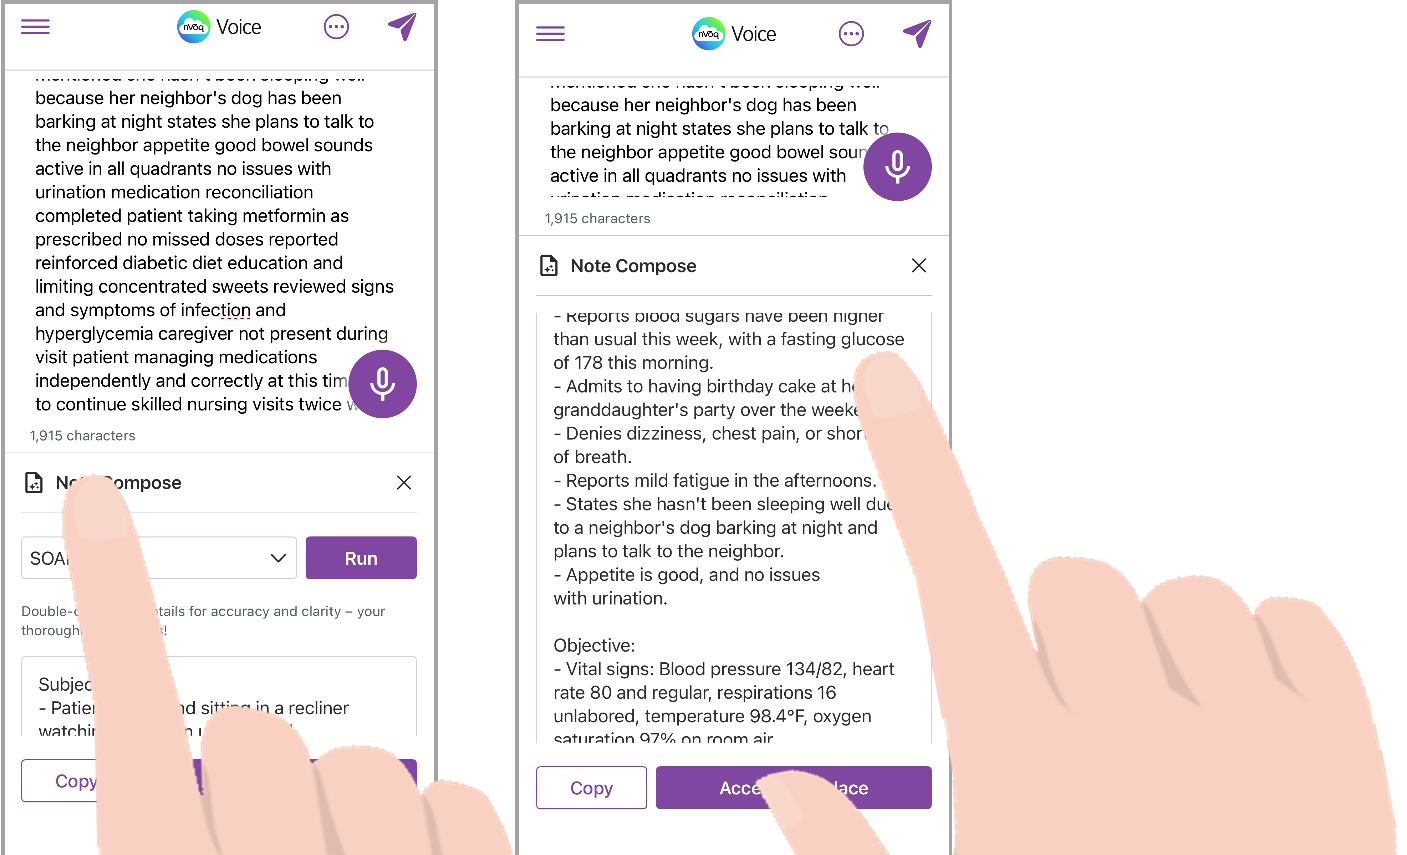
Optionally, tap the Copy Formatted Text button to copy the formatted text to your device clipboard so you can paste it anywhere you want.
On a phone this button is labeled Copy.
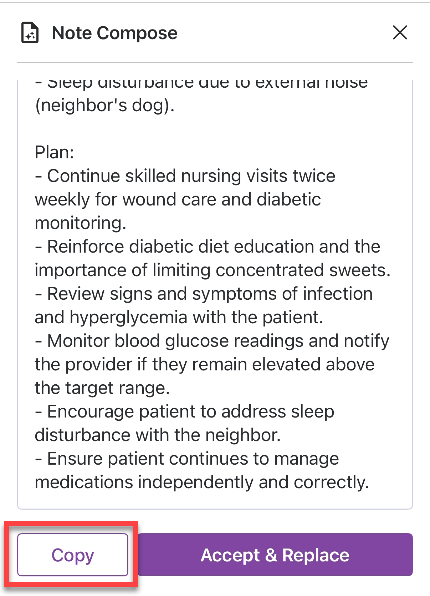
Tap Accept & Replace to update the text on the dictation screen with the new formatting.
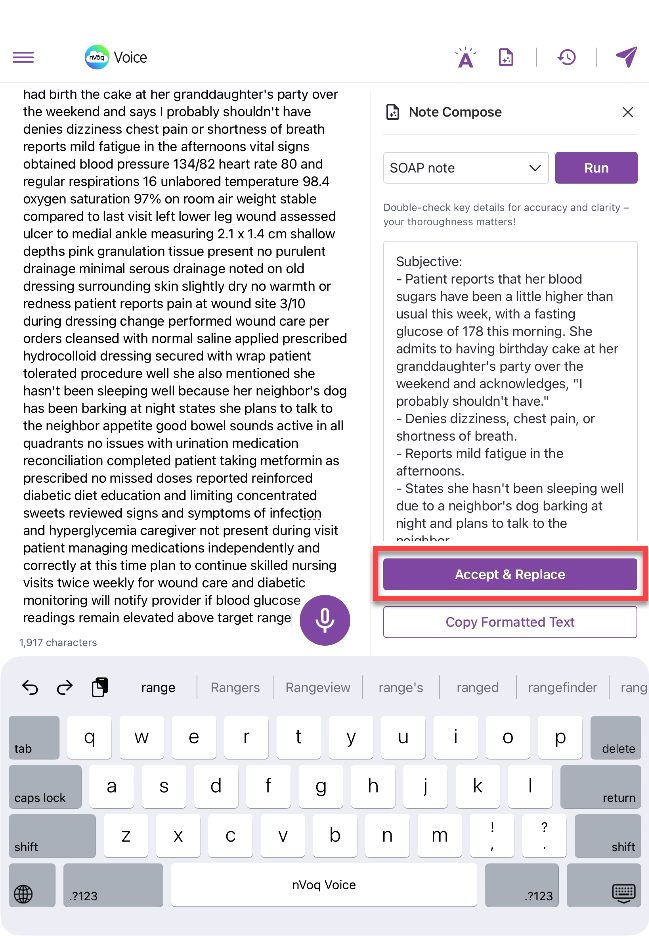
As soon as you tap Accept & Replace, that version of your note is saved in Version History.
Version History lets you view and restore previous versions of your formatted note, making it easy to track changes throughout the formatting process, even after closing and reopening the app.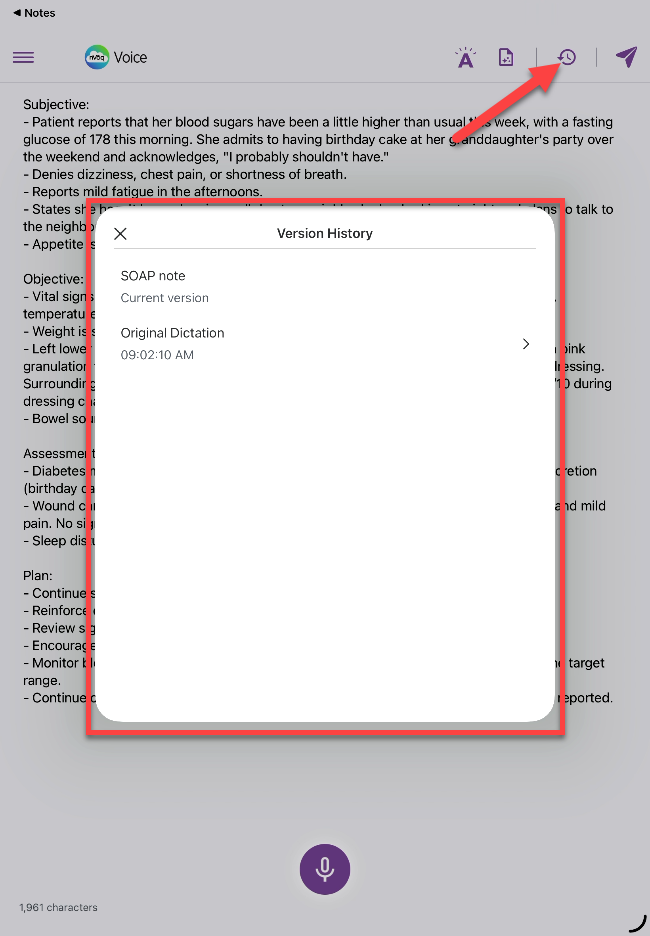
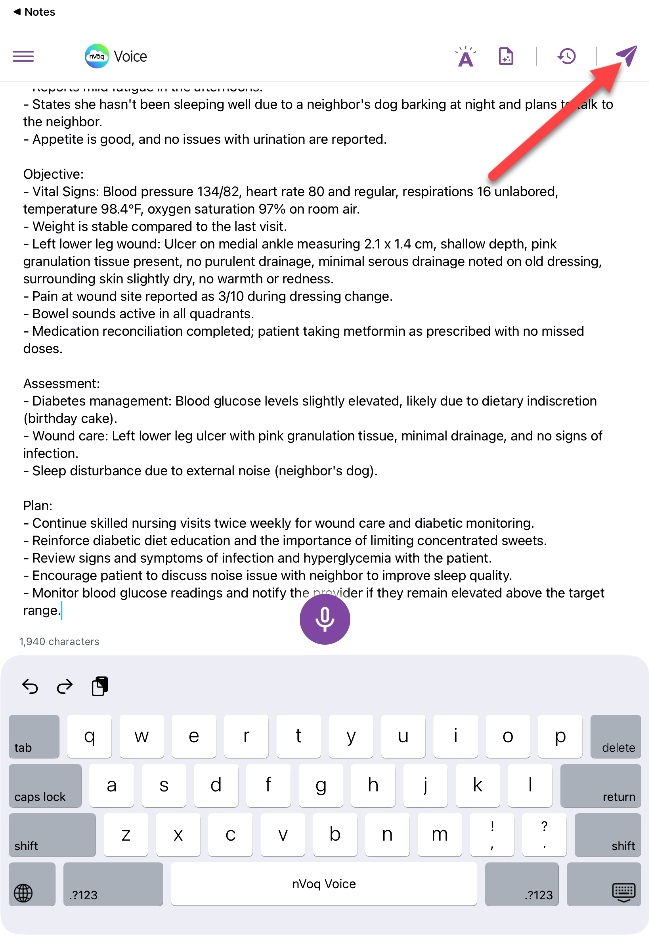
Tap the send icon to send the formatted transcript to your device clipboard.
After your tap the send icon, the transcript disappears from the dictation screen and is added to your clipboard and the message “Ready! Return to the app where you want text to appear,” reminds you to switch back to your original app.
You must go back to your application so that transcript will paste there. If you immediately start a new dictation, the previous transcript will be lost.
Tap the◀ link at the top-left of the screen. Alternatively you can swipe up from the bottom of the screen to view your open apps and then tap on your original application from there.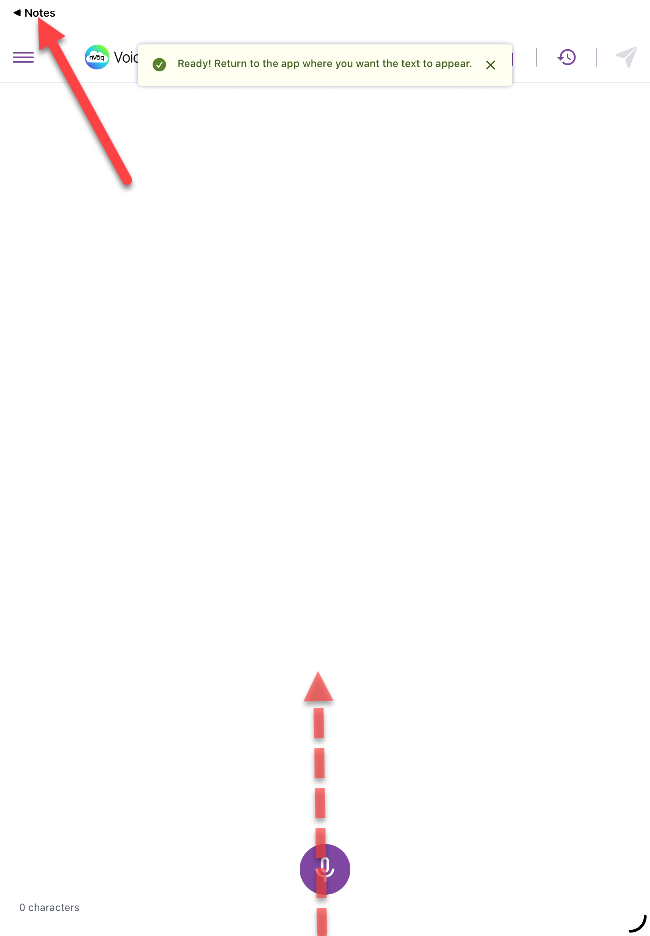
When you return to your original app, the text is automatically pasted. If it doesn’t appear, tap the cursor in the text field to paste it.