You can change turn logging on (or off) for a user with the Change Enabled setting.
The enabled status of an account is listed in the Enabled column of the Logging page.
- If logging is enabled for the account, this column lists "Yes".
- If not, the column lists "No".
The Change Enabled setting changes this status from "Yes" (on/enabled) to "No" (off/disabled) or vice versa. You can change the Enabled status of logging for one account at a time or for multiple accounts at once.
- When logging is enabled in nVoq Voice, the logging level is increased to "DEBUG" and logs are sent automatically to the administrator console each time the user signs out of Voice.
Enable/Disable Logging for One Account
- Go to the Logging page in nVoq Administrator.
Optionally, click the Manage icon in the sidebar to hide the sidebar while you work.
- Select the appropriate organization from the organization menu at the top of the page that includes the account for which you need to enable (or disable) logging.
Navigate this menu by using the Expand All button to open all organizations, by clicking the > arrow next to each organization level to open it, or by typing an organization name in the Filter text field.
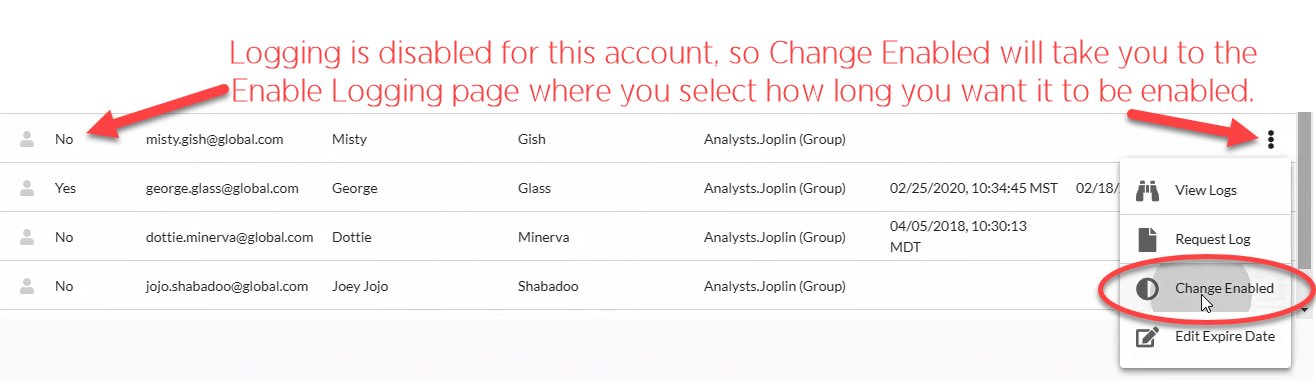
- Find the account in the list and make sure that logging is not ALREADY enabled.
- You can click on any column header to sort information to find the account, or you can use the Search field at the top right of the page to search for text in any of the columns. Enter all or part of a word or name.
- Make sure there is a "No" in the Enabled column next to the username. If logging is already enabled for this account, you can Edit the Expiration Date for the account.

- Click the Actions menu
 next to the account and select Change Enabled. This setting brings up the Enable Logging page.
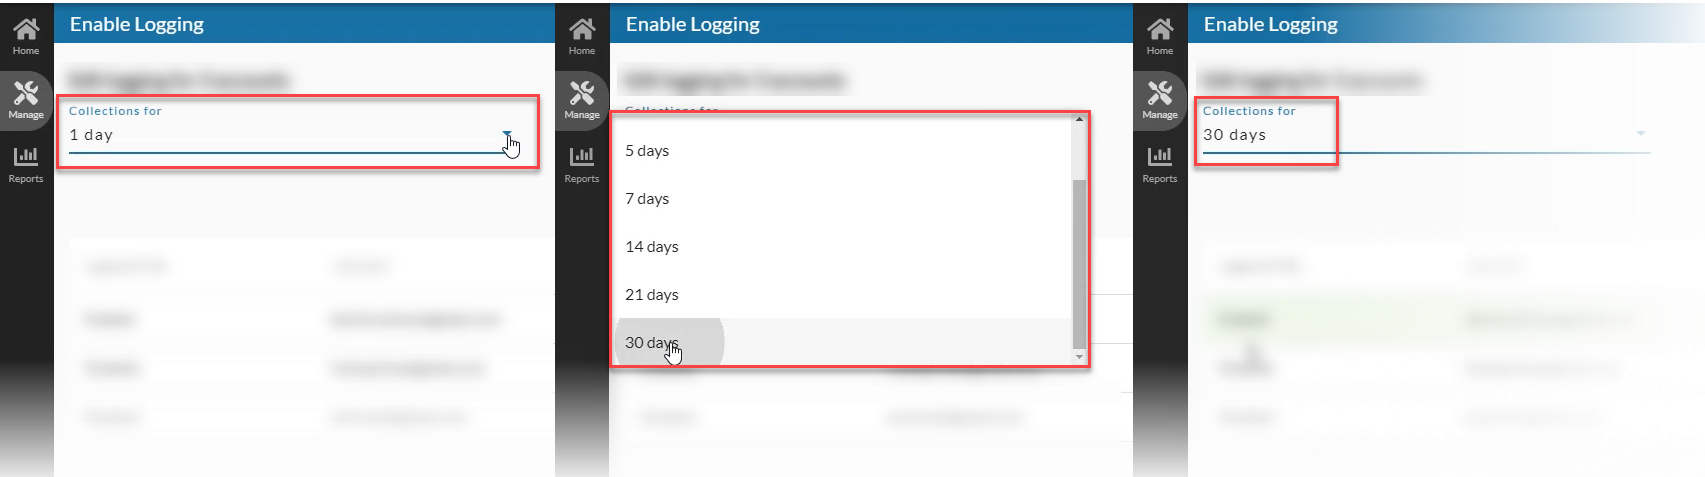
- On the Enable Logging Page, select the number of days that you want logging to be enabled from the Collections for menu.
- This is the length of time that you want logging to be enabled for the account(s).
- Click on the menu to change the number of days to: 1 day, 3 days, 5 days, 7 days, 14 days, 21 days, 30 days.
- The New Expiration Date in the table below will change depending on the number of days selected here.
- Click the Save button at the bottom of the page.
If the user is currently logged in to nVoq Voice, logging will be enabled within 5 minutes. If not currently logged in, logging will be enabled the next time the user logs in to the client.
Enable/Disable Logging for Multiple Accounts
- Go to the Logging page in nVoq Administrator.
Optionally, click the Manage icon in the sidebar to hide the sidebar while you work.
- Select the appropriate organization from the organization menu at the top of the page that includes the accounts for which you need to enable (or disable) logging.
Navigate this menu by using the Expand All button to open all organizations, by clicking the > arrow next to each organization level to open it, or by typing an organization name in the Filtertext field.
- Hover the mouse over the account icon and put a checkmark in the box beside the accounts.
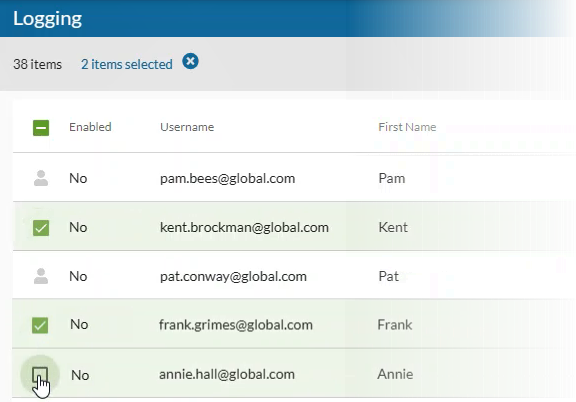
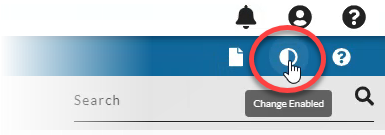
- Select the Change Enabled icon in the blue toolbar.
- If changing logging from ON (enabled/yes) to OFF (disabled/No), this setting just disables logging for the selected accounts. You'll see a green message in the upper right corner of the screen letting you know that the logging property has changed for the selected number of accounts.
- If changing logging from OFF (disabled/No) to ON(enabled/Yes), this setting brings up the Enable Logging page.
- If the user is currently logged in to nVoq Voice, logging will be enabled within 5 minutes. If not currently logged in, logging will be enabled the next time the user logs in to the nVoq client.
- If some accounts selected have existing logging enabled and others do not, the Enable Logging page will open from which you can select the number of days that logging will be collected for accounts that did NOT have logging enabled previously, and logging will be DISABLED for the accounts that initially had logging enabled.
Enable Logging Page Columns

Logging Will Be
This column lists whether logging will be "Enabled" or "Disabled" for the selected user after the Save button is clicked on this page.
Username
This is the username that the account holder uses to log in to the client.
First Name
This is the first name of the account holder.
Last Name
This is the surname of the account holder.
Current Expiration
The date that client logging will end or has ended since the last time logging was turned on for the user. Once the logging period has expired, the client will turn off logging and clear out the Log Collection Expires date the next time the user logs in to nVoq Voice.
New Expiration
This is the new date that logging will be disabled once you click Save at the bottom of the page. It changes when the number of days is selected from the Collection For menu at the top of the page to make the new expiration date the selected number of days away.