This page is only available to administrators with System level access.
On the Add or Edit Identity Provider page System-level administrators can add or update Microsoft Entra ID or Okta Single-Sign On (SSO) Identity Provider information for the tenant.
Add Microsoft Entra ID Identity Provider
- Click the New icon
 in the blue toolbar of the Identity Provider page.
 - Select the Entra ID radio button.
- Enter the Company ID.
- This is typically the company's email domain name (like, nvoq.com).
- This field has a minimum length of four characters and a maximum length of twenty characters. It can only include alpha-numeric values and a period.
- See SSO Setup: Microsoft Entra ID for more details.
- Enter the External Key.
- This is the Tenant ID from the Entra ID portal.
- The External Key validation occurs immediately when the field is exited.
- See SSO Setup: Microsoft Entra ID for more details.
- Put a checkmark next to MVOICE to add SSO functionality for nVoq Mobile Voice, and/or put a checkmark next to VOICE to add SSO functionality to nVoq Voice.
- At lease one client must be selected.
- External Client IDs are populated automatically.
- Click the Save button.
Add Okta Identity Provider
- Click the New icon in the blue toolbar of the Identity Provider page.
- Select the Okta radio button.
- Enter the Company ID.
- The company's employees will use this ID when logging into nVoq clients with Okta SSO. Typically, this is the company's email domain name (without the .com, .org extension).
- This field has a minimum length of four characters and a maximum length of twenty characters. It can only include alpha-numeric values and a period.
- This name must be unique in the nVoq system.
- See SSO Setup: Okta for more details.
- Enter the External Sign in Domain.
- This is the customer's Okta domain name through which users will authenticate.
- The Okta domain is found within the global header section on the upper-right hand corner of the Okta admin pages near the user's login name.
- The External Signin domain field validation occurs immediately when the field is exited.
- See SSO Setup: Okta for more details.
- Enter the External Key.
- This is populated automatically when the Identity Provider is created.
- Put a checkmark next to MVOICE to add SSO functionality for nVoq Mobile Voice, and/or put a checkmark next to VOICE to add SSO functionality to nVoq Voice.
- At lease one client must be selected.
- Click the Save button.
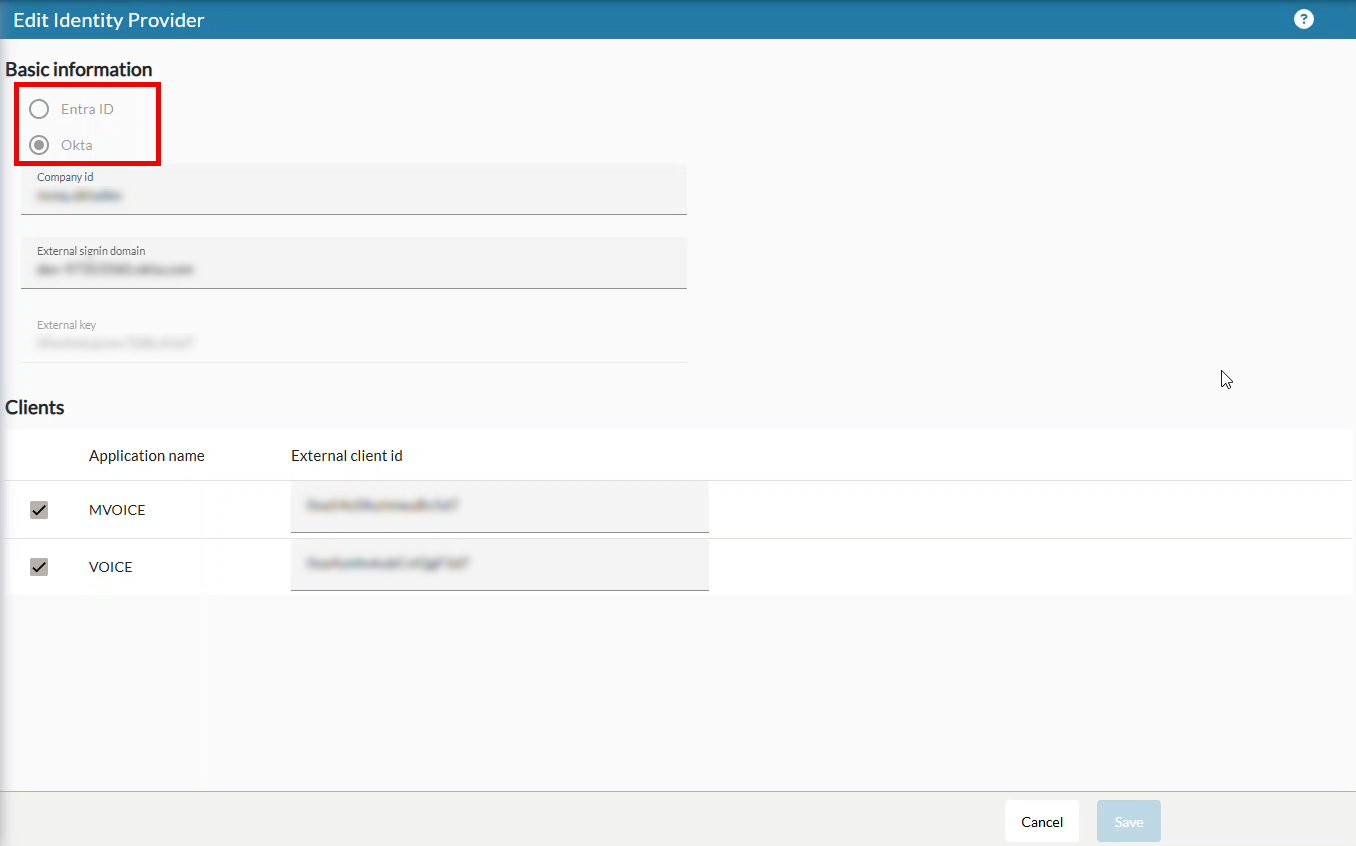
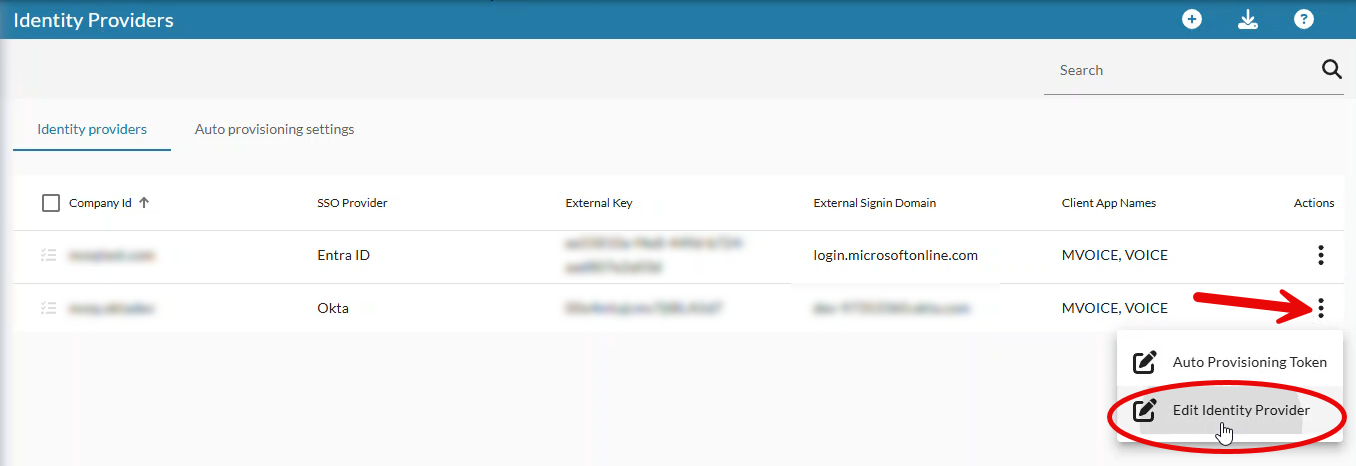
Edit an Identity Provider
- Double-click the row of an identity provider OR open the Actions menu and select Edit Identity Provider to open the Edit Identity Provider page.
- The Identity Provider (Entra ID or Okta radio button) cannot be edited.