You can open the app directly after installation or by tapping the app icon on your device. Then follow the Voice setup wizard.
Complete this setup with your device in portrait orientation.
If your device is in landscape orientation you will not be able to see all of the instructions or links on the screen.
- Open nVoq Voice by tapping the app icon on the home screen.
- Before starting the setup wizard, you’ll see a message asking to allow nVoq Voice access to your microphone. Tap Allow. This permission is required to record dictation.

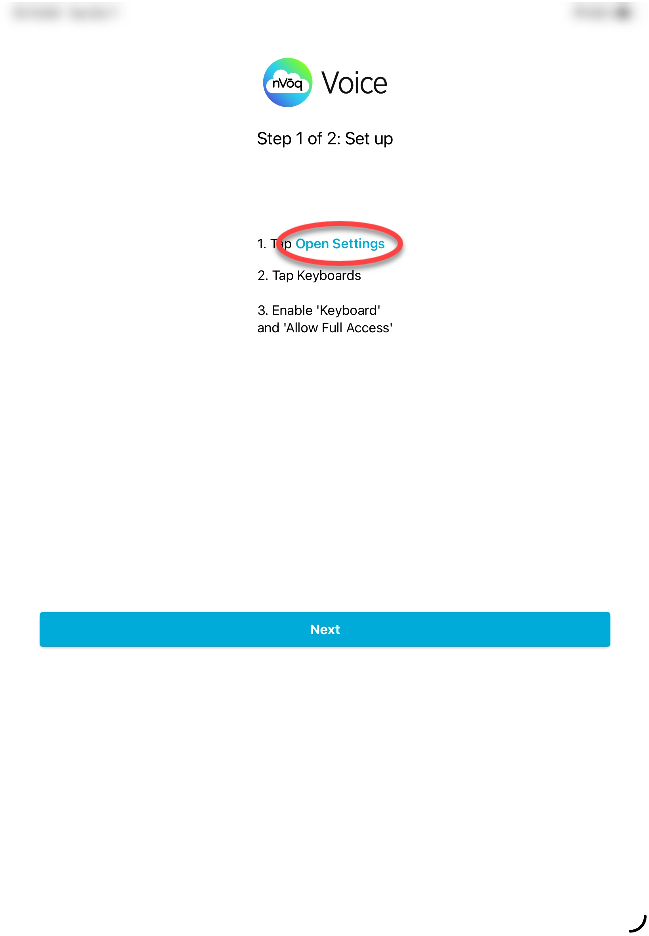
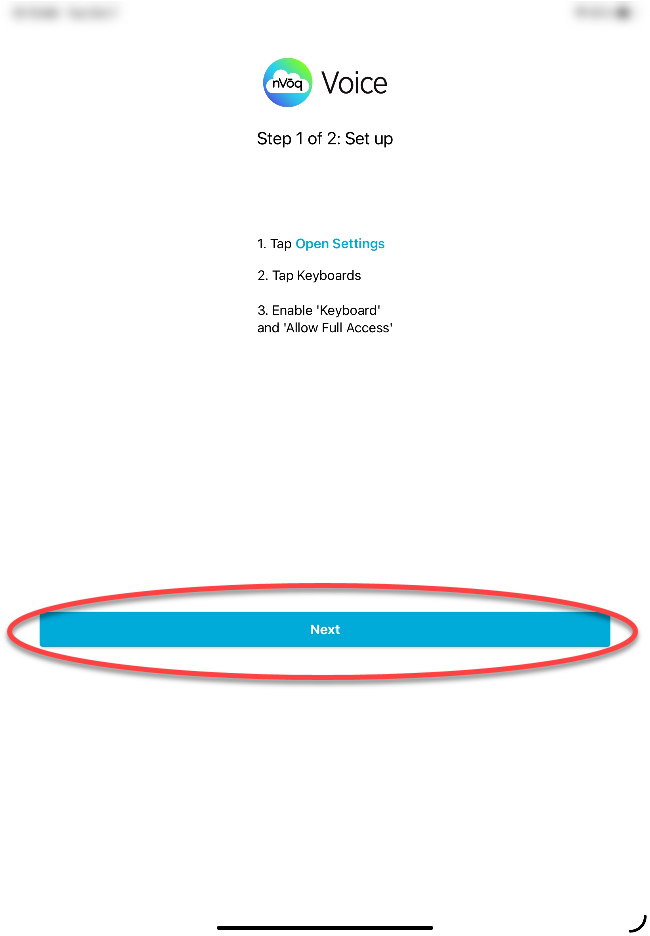
- On Step 1 of the setup wizard, read the instructions, then tap Open Settings.
- This takes you directly to the settings for nVoq Voice in your device Settings. Under Allow nVoq Voice to Access, tap Keyboards. The instructions from Step 1 of the setup wizard are displayed on this page as a reminder for you.
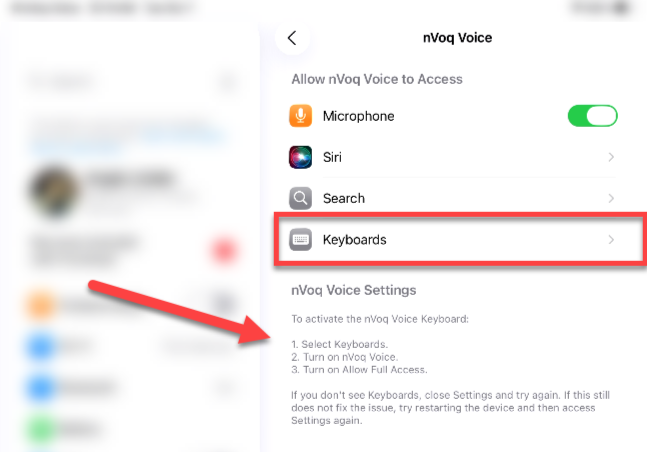
- Slide the toggle to enable Keyboard.
 Once you enable that setting, the Allow Full Access setting appears. Slide the toggle to Allow Full Access.
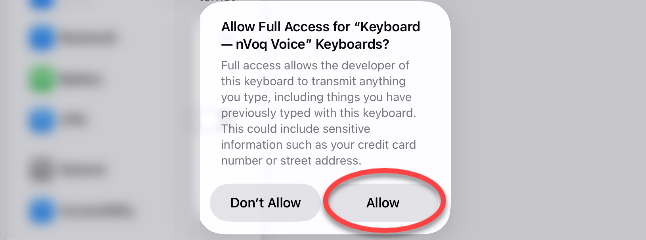
- A confirmation dialog appears asking to allow full access for nVoq Voice. The message warns that full access permits the app to transmit what you type, including sensitive information. Voice for iOS is HIPAA-compliant, so this is safe. Tap Allow to continue.
- Navigate back to nVoq Voice. Tap the ◀ nVoq Voice link at the top-left of the screen.
(Alternatively you can go back to the home screen by swiping up from the black line at the bottom of the screen, and then tapping the app icon.)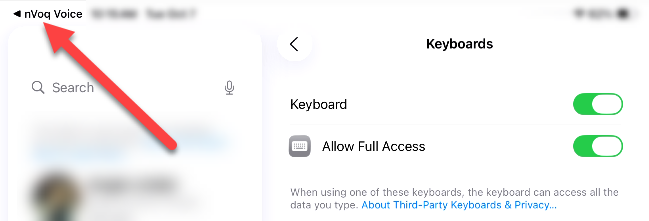
- Back in the setup wizard, tap the Next button.
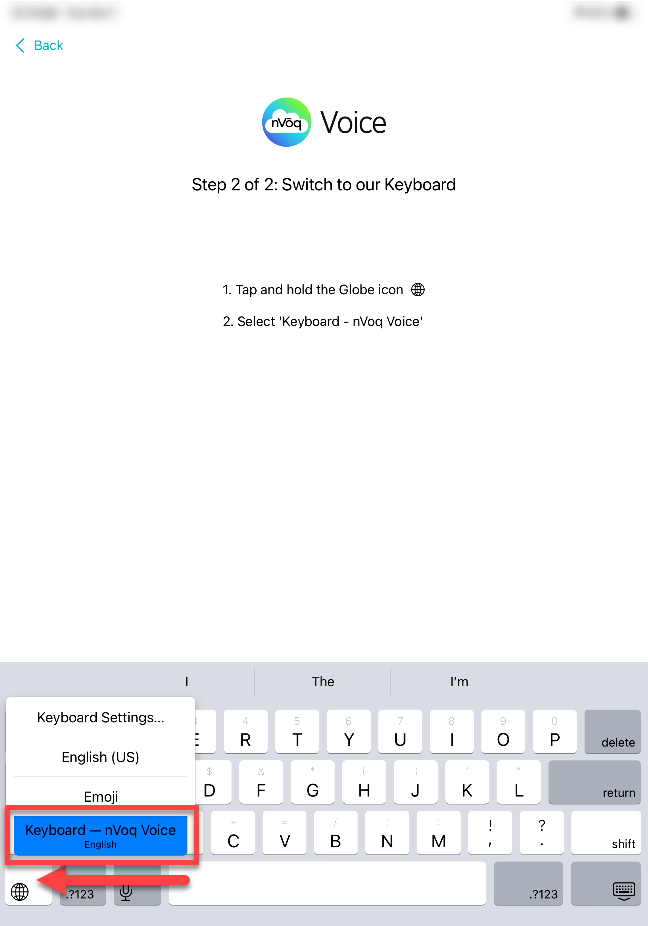
- This advances to Step 2: Switch to the nVoq Voice Keyboard. If your device isn’t already showing the nVoq Voice keyboard, press and hold the Globe key at the bottom left of the screen, then select Keyboard – nVoq Voice.
- You should now see the nVoq Voice keyboard, it says “nVoq Voice” on the spacebar. When the message appears, tap GOT IT to continue.

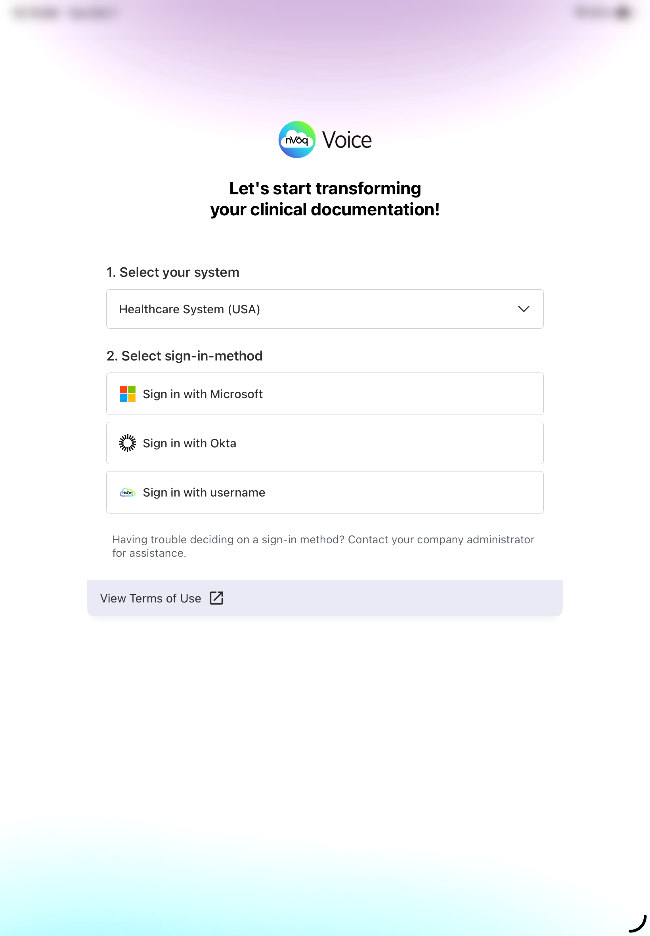
- You are taken to the sign in screen but must first respond to a popup message asking if you will allow nVoq Voice to track your activity.
- Tap Allow if you want to be able to send crash reports to nVoq so we can fix issues in the keyboard that may occur.
- Tap Ask App Not to Track if you do not want to send crash reports to nVoq.

- Next you need to sign in. See nVoq Voice for iOS: Sign In.