
In this release Voice Assistant is only available for limited group of early-access users.
This feature will be coming soon for preview by end-users in a later release.
Use Voice Assistant Conversation Capture in Voice for iOS to record, transcribe, and summarize multi-speaker discussions with your care team or patients. Capture details in real-time so you can stay fully present and engaged in the conversation.
Record a Conversation
To get to Voice Assistant, open the quick access menu and select Voice Assistant.
Note: When switching between the Dictations and Voice Assistance tabs, the text in the dictation editor does not clear.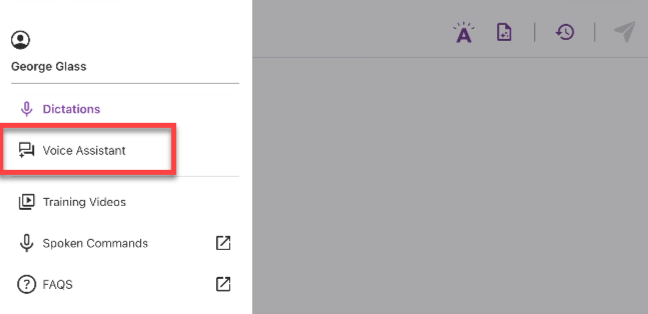
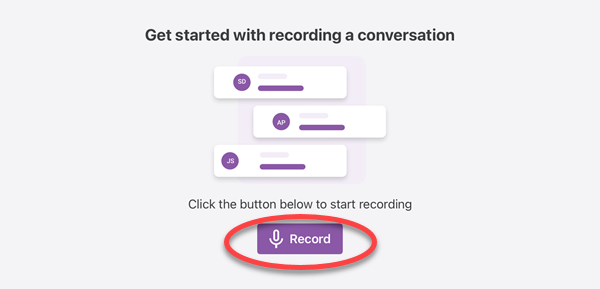
If this is your first recording, tap the Record button to record your conversation.
 After your first recording, tap New in the top-right corner of the Voice Assistant home screen to begin a new recording.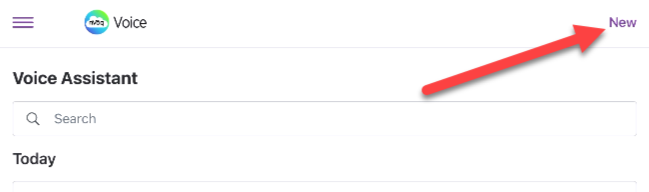
Tap Confirm and Continue once you’ve gotten permission from everyone in the conversation.
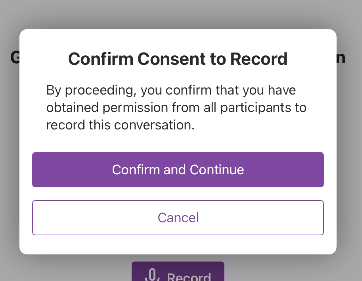
Recording begins automatically.
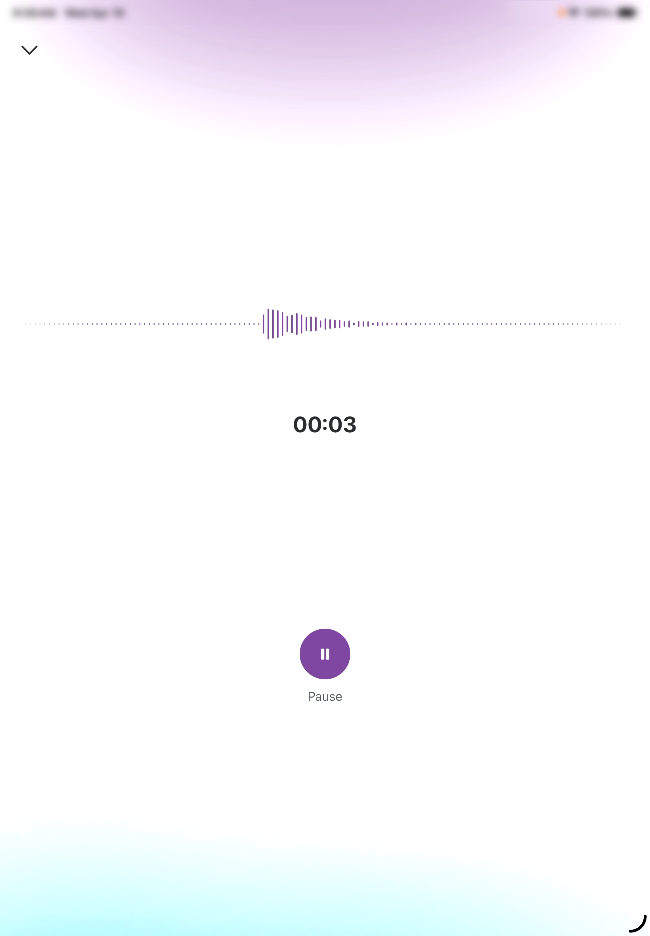
Your device screen may go dark during recording, but recording will continue in the background. (The Keep screen on during dictation setting does not apply to Voice Assistant recordings.)
If the app is closed or the device restarts, transcription processing continues when the app is reopened, and recordings are not lost during the process.
If you see the message, “nVoq Voice Would Like to Access the Microphone,” when you tap the dictation button, microphone access was not granted during the initial setup. Tap Allow to give nVoq Voice permission to use your device's microphone.
You can leave Voice Assistant, switch to another app, or lock your device screen, and recording will continue in the background. While recording is active, a system notification displays the recording status and elapsed recording time. Tap the notification at any time to return to Voice Assistant.
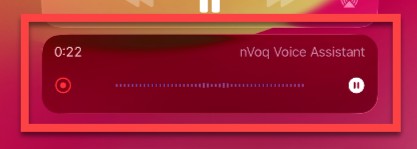
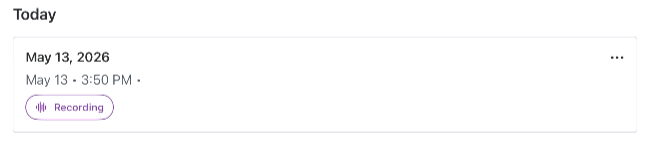
You can also return to the recording by tapping the nVoq Voice icon on the home screen and then tapping the recording card for the visit.
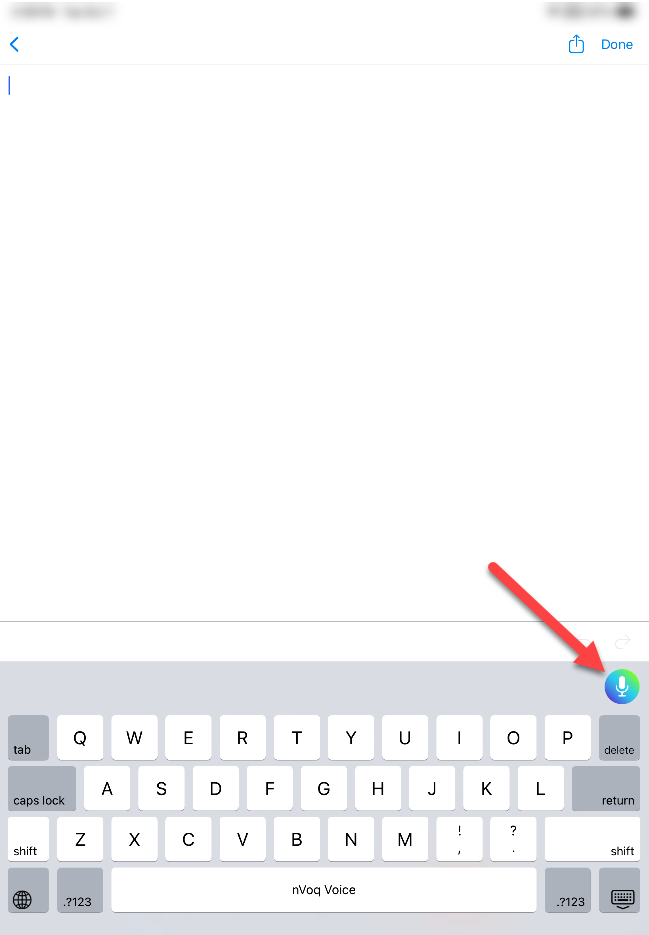
You dictate into another app while a Voice Assistant recording in progress. Voice Assistant automatically pauses recording while dictation is active. Once dictation ends, Voice Assistant resumes recording automatically. For more information, see Dictate During a Recording.
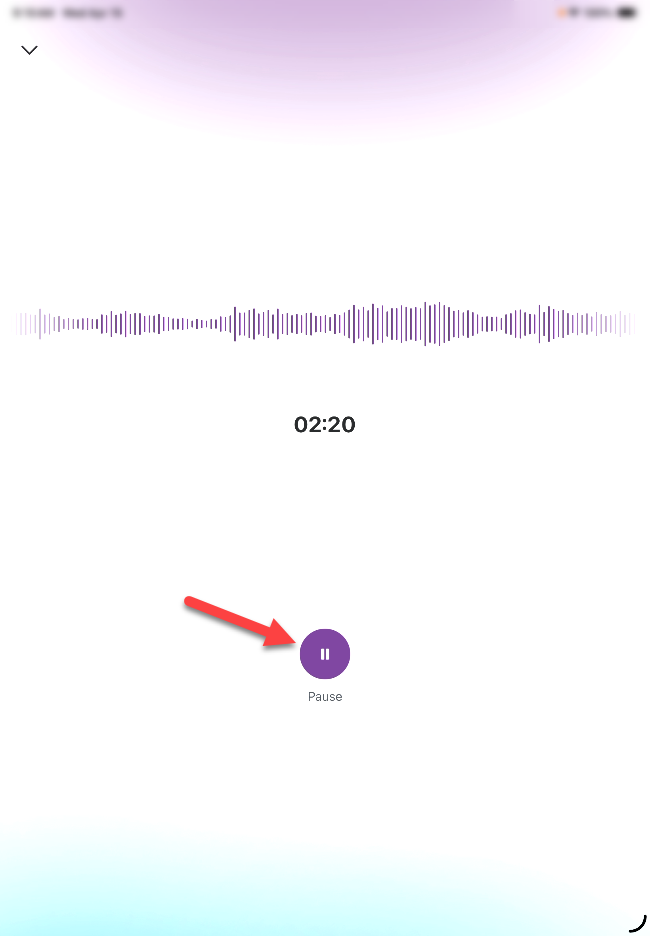
Tap the Pause button to pause, cancel, or end the recording.
When the recording is paused:
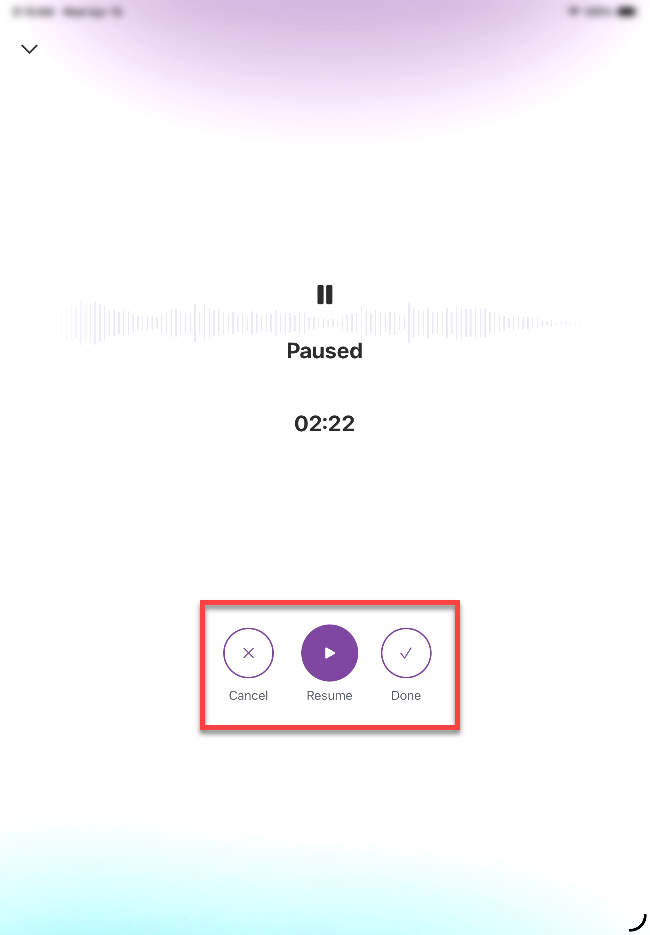
Tap Cancel to cancel the recording. A confirmation dialog will appear with the option to cancel or continue recording.
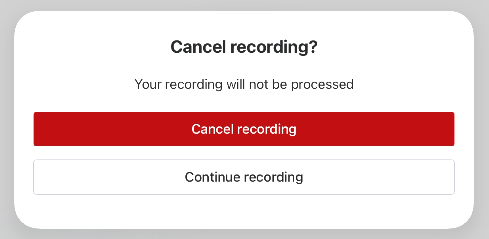
Tap Cancel recording the recording to discard the recording and return to the previous screen. Your recording is not saved on your device, but what was recorded up to that point will still appear in nVoq Administrator.
Tap Continue recording to keep the recording paused.
Tap Resume to continue the recording.
If you’ve left the recording screen, you can resume recording by tapping the nVoq Voice icon on your home screen, then selecting the recording card for the visit, and then tapping Resume.
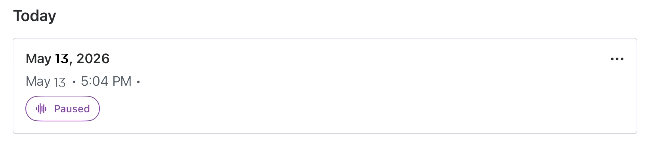
Tap Done to end the recording.
When you tap Done, the recording stops and you are returned to the Voice Assistant home screen (which includes a recording card for your recording). A message appears to let you know that your recording is being processed.
Tap Got It to dismiss the message.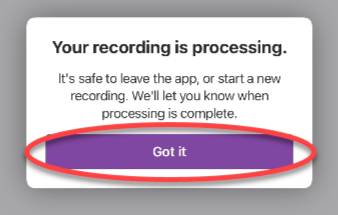
If your device is offline when the recording is ended, a message appears to let you know that your device is offline and processing will continue once connectivity is restored.
A new recording card displays at the top of the list with an indicator that it is still processing (or “in queue”).
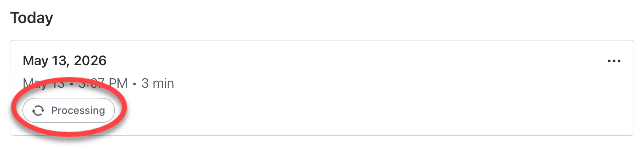
If the app is closed or the device restarts, the processing state is saved. When the app is reopened, the queue resumes processing.
You can start a new Voice Assistant recording while previous recordings are still processing. Multiple recordings can be uploaded, transcribed, and summarized independently, allowing you to continue documenting without interruption. Recordings continue processing in the background and become available when processing is complete.
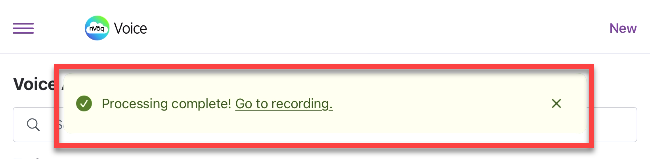
When your recording finishes processing, a message appears briefly to let you know that processing is complete. Tap Go To Recording on that message, or tap the recording card to view the recording transcript and summary.
The Summary tab displays a summary of your conversation. An audio player at the bottom of the page lets you listen to the recording.
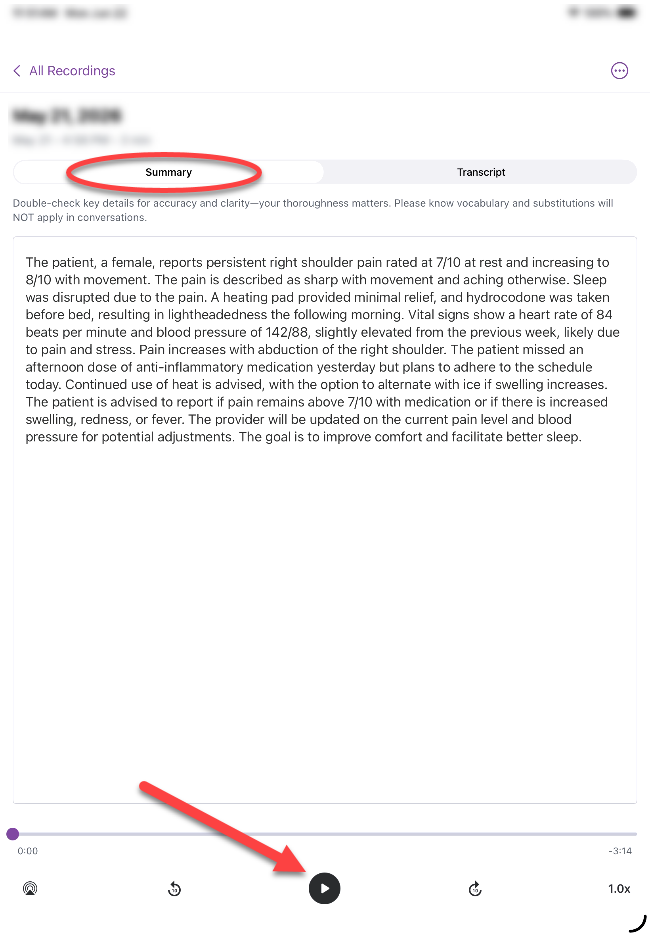
Tap anywhere in the summary to open the keyboard and edit the text using either typing or dictation. You can also edit using Note Assist
 or Note Compose
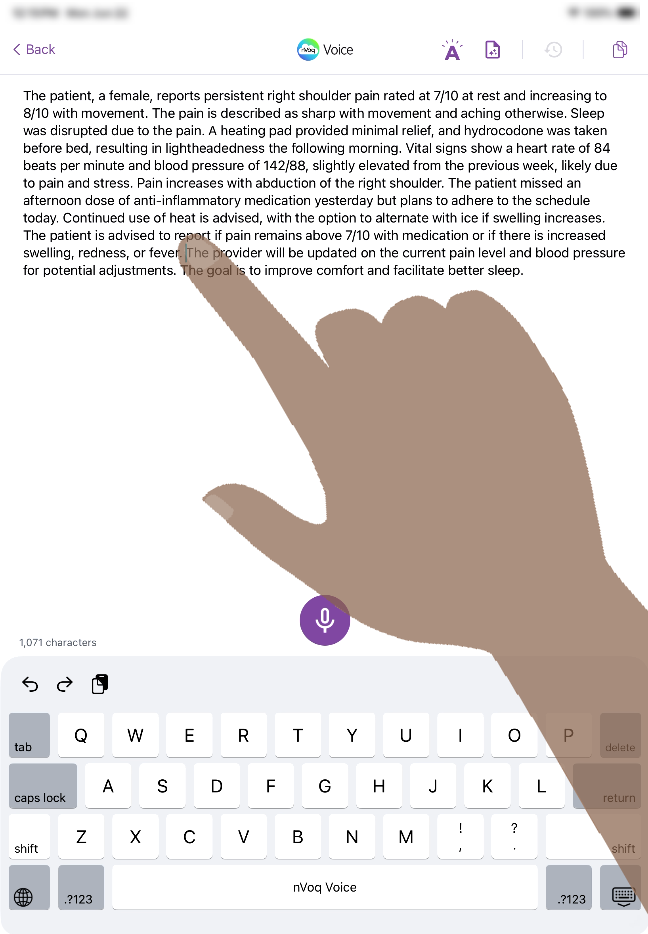
You can edit recording summaries even when your device is offline. Any changes you make are saved locally on the device, allowing you to continue working without an internet connection. See Recording Retention and Local Storage Cleanup.
Optionally, tap the copy icon to copy the edited summary to your device clipboard.
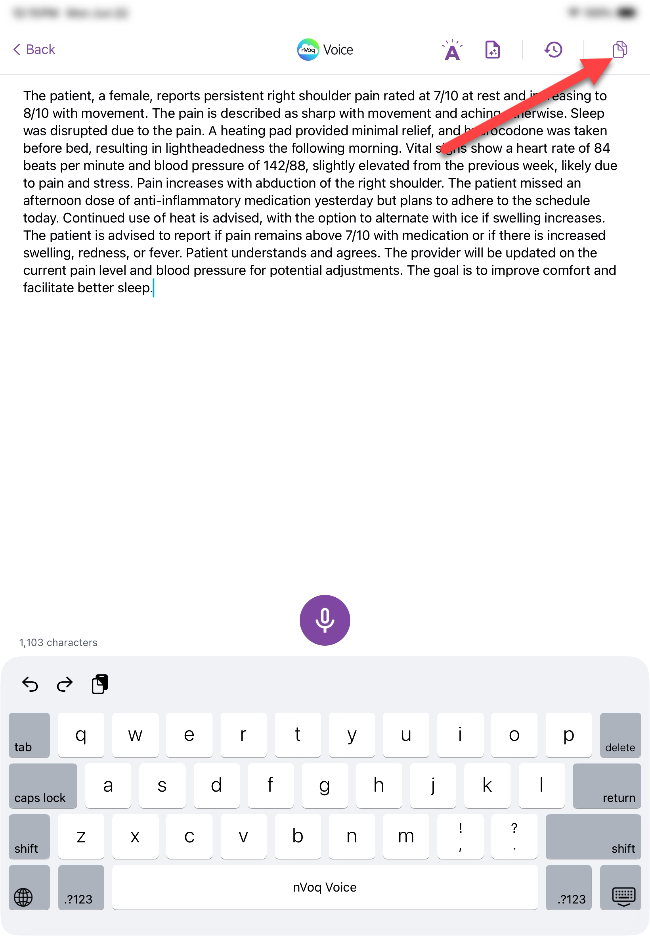
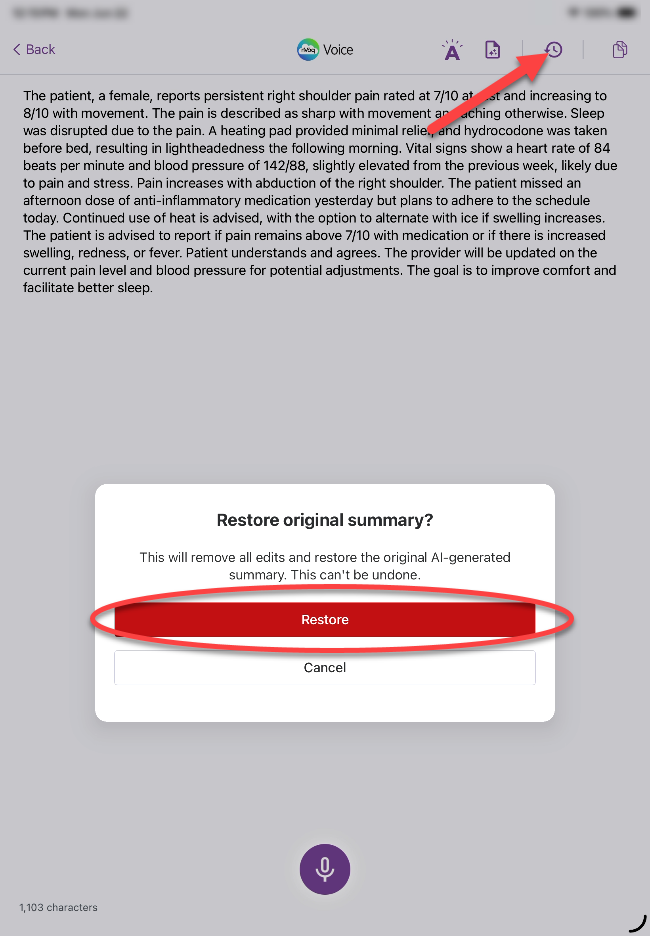
To restore the original summary and remove any edits, tap the clock icon, then tap Restore.
On a phone, open the three-dot menu, select Restore Original, and then tap Restore.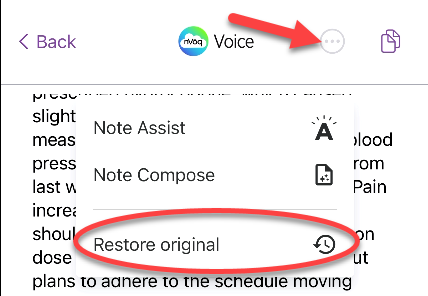
If you choose Restore while offline, the original summary can still be restored without requiring an internet connection, provided the recording data remains available on the device. See Recording Retention and Local Storage Cleanup.
Tap the Transcript tab to review the full conversation text. The audio player remains available at the bottom of the page so you can listen to the recording while reviewing the conversation.
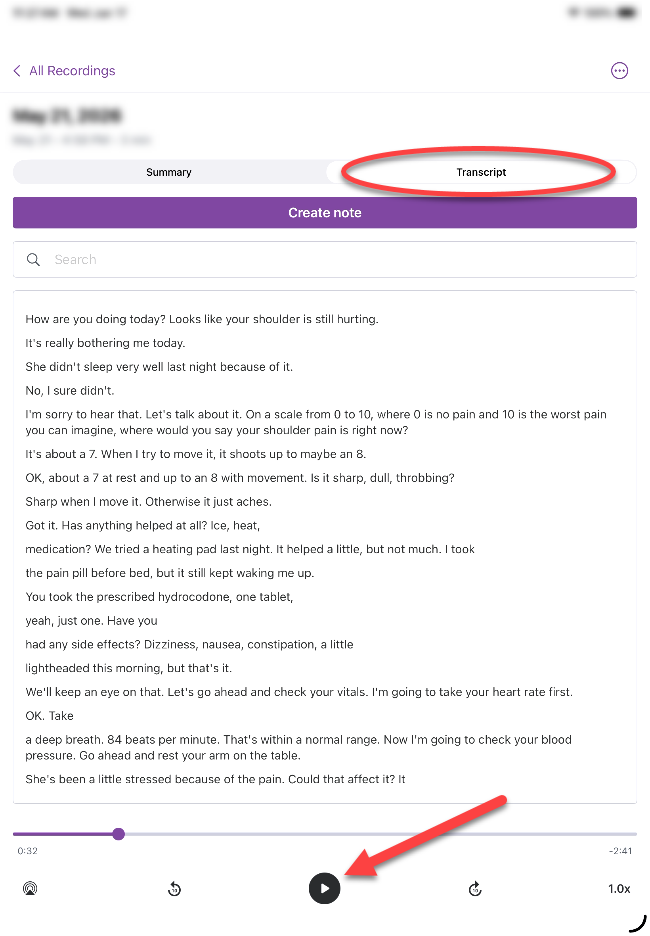
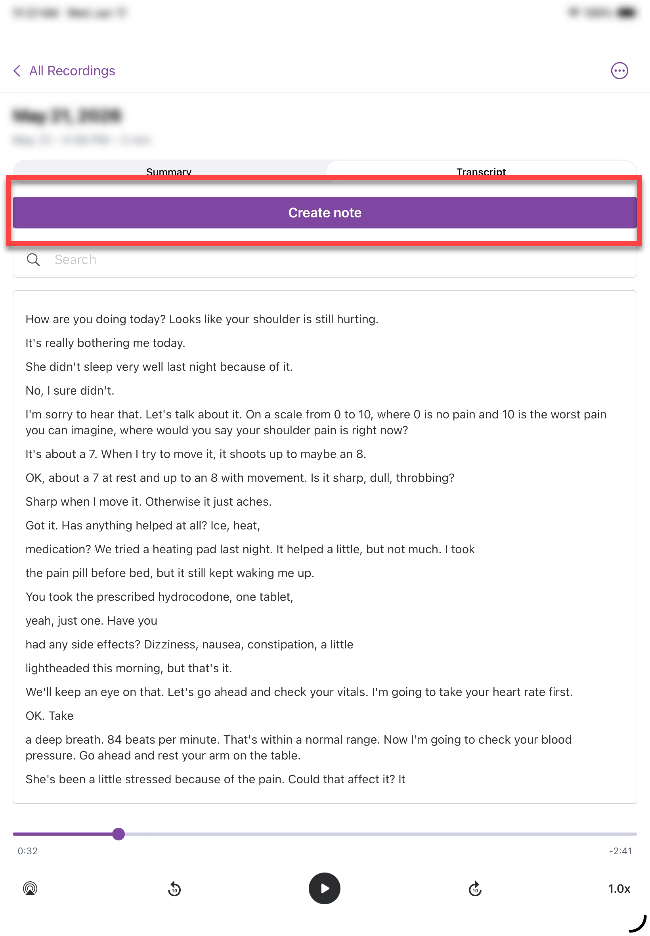
Optionally, tap the Create Note button to select a formatting option for the transcript.
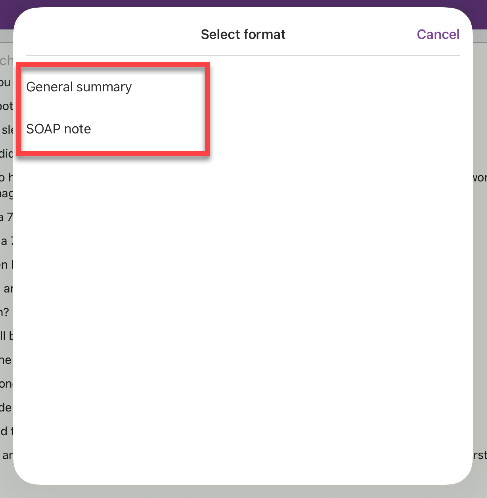
Tap the structured formatting option you would like to use.
A dictation screen opens with your formatted text. Here you have the option to change text using the keyboard or dictation.
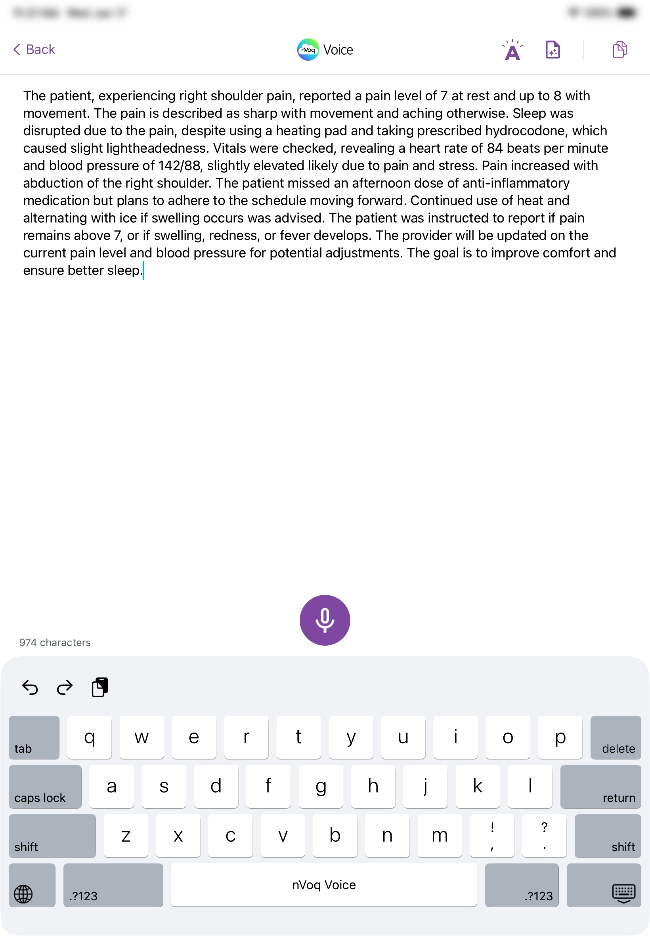
Optionally, tap the Note Assist icon (if available) to run Note Assist on your text.
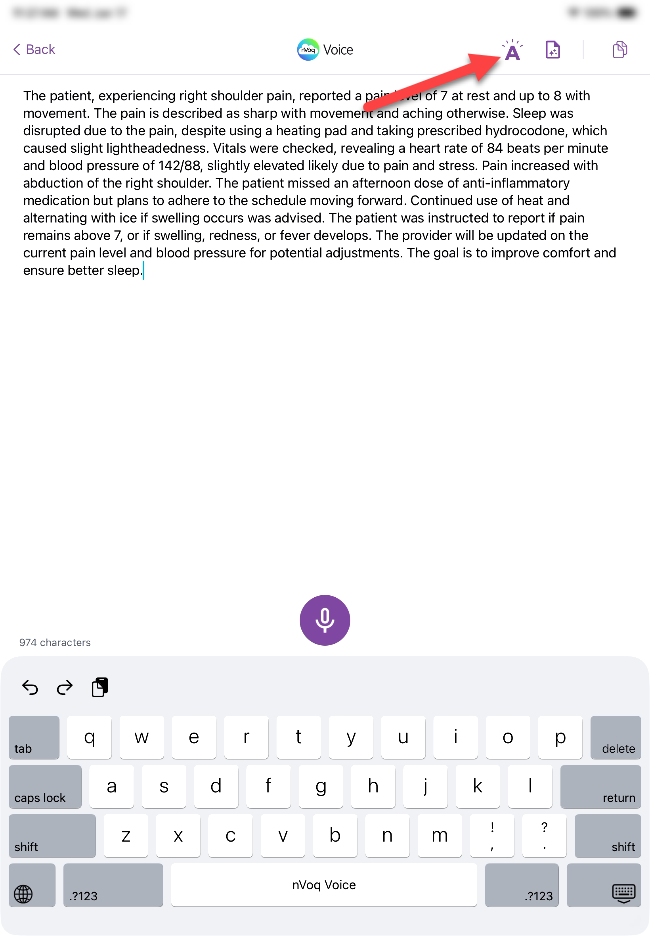
Be sure to REVIEW your summary before posting into your application. Remember that YOU are responsible for the accuracy of your documentation!
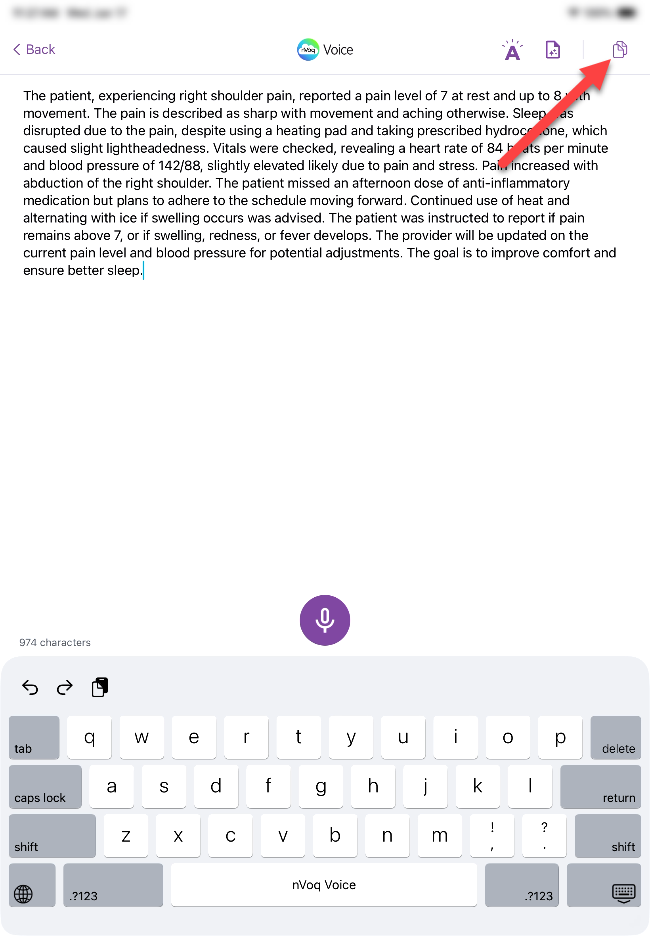
Tap the Copy icon to copy the formatted text to your device clipboard. which you can then paste into your EMR.
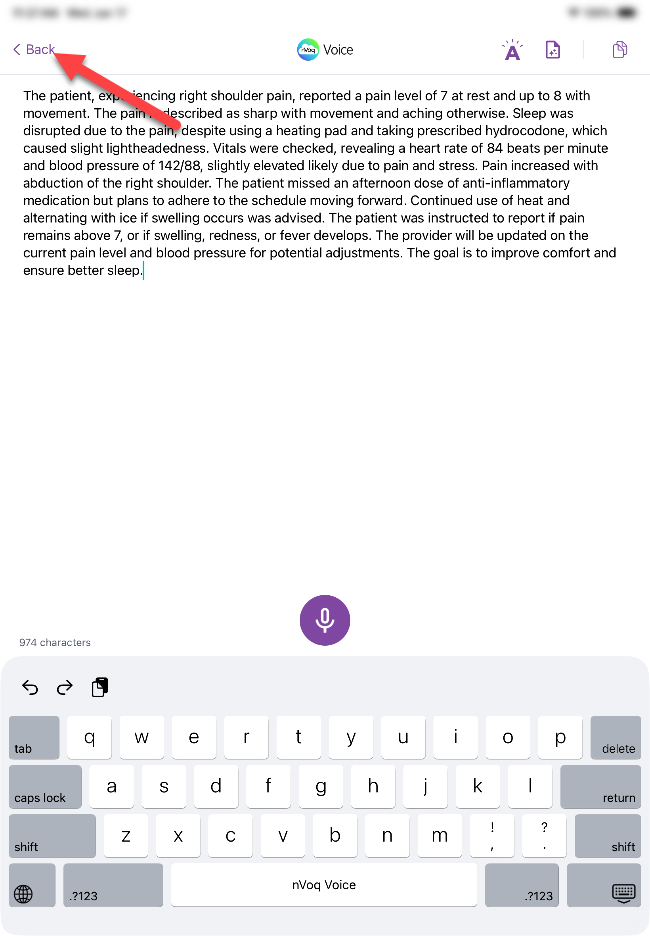
Tap Back to return to the Transcript tab.
Background Recording
Voice Assistant recordings continue even if you leave the app, lock your device screen, or switch to another app. Recording stays active in the background without interrupting audio capture, and the recording timer continues updating throughout the session.
While recording is active, your device displays a system notification showing the recording status and elapsed recording time. You can tap the notification at any time to quickly return to the Voice app and access the recording controls.
If your device enters low power or battery-saving mode, recording will continue whenever supported by the operating system.
Minimize While Recording
While recording, you can collapse the recording screen by tapping the Collapse icon.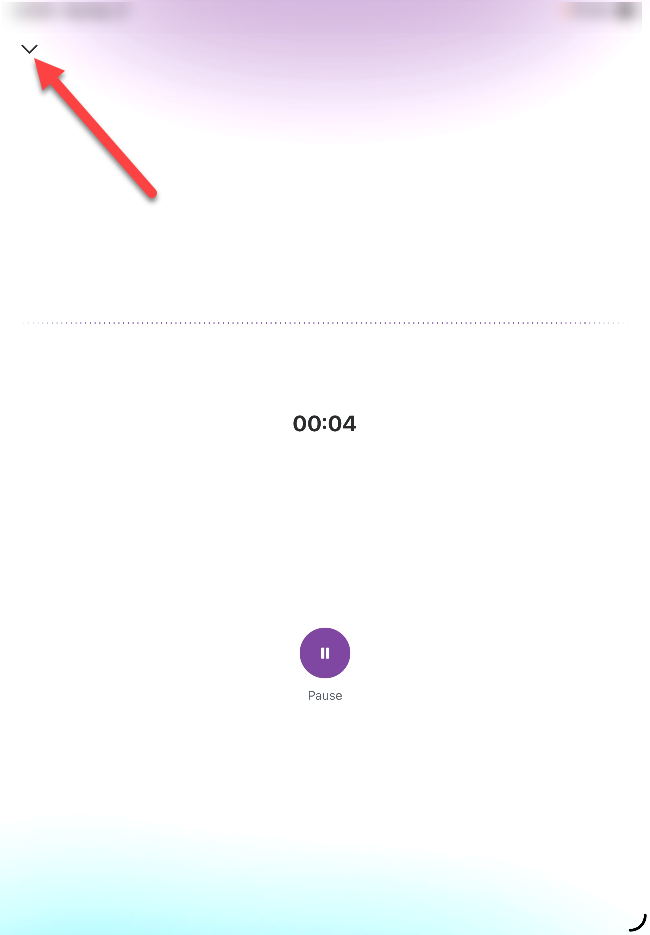
The recording screen is minimized and you are returned to the previous screen. Recording continues in the background.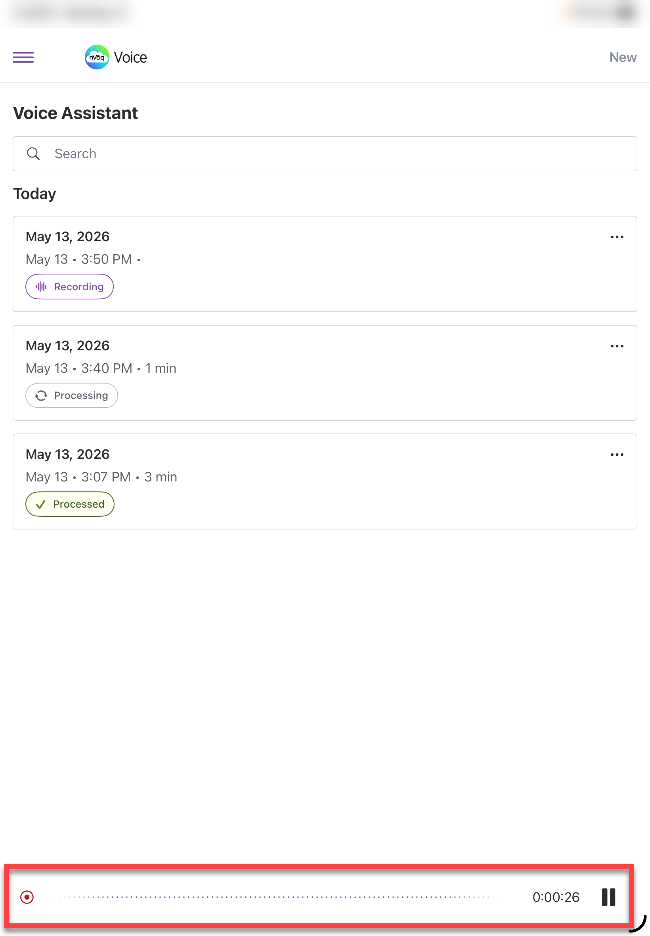
A minimized recording bar shows the timer, recording animation, and a Pause/Play button.
Pause/Resume: Tap Pause to stop, tap Play to resume recording.
Return: Tap the minimized bar to reopen the full recording screen.
Dictate During a Recording
You can continue to use regular dictation while a Voice Assistant recording is in progress, both activities can occur simultaneously. The recording continues uninterrupted in the background.
If you begin dictation while a Voice Assistant recording is in progress, Voice Assistant automatically pauses recording while dictation is active. Once dictation ends, Voice Assistant resumes recording automatically.
Voice Assistant recordings and transcripts include only content captured while Voice Assistant is actively recording and do not include dictated text.
If Voice Assistant was paused because dictation started and a phone call is received, Voice Assistant does not automatically resume after the call ends.
Phone Calls and Other Audio During Recording
Phone Calls During Recording
When a phone call interrupts an active Voice Assistant recording, the recording automatically pauses and the recording controls show the paused state. If Voice Assistant is open when the call ends, recording resumes automatically. If Voice Assistant is running in the background, you will need to return to the app and manually resume recording.
Other Audio Apps During Recording
If another app attempts to use the microphone while you are recording, the recording automatically pauses.
If another app begins using audio playback through the device speaker, such as YouTube or another media app, the recording also pauses automatically.
Notifications During Recording or Playback
Receiving notifications or similar alerts does not pause an active recording or audio playback.
Playing Older Recordings During an Active Recording
If you play an older recording while another recording is actively in progress, the active recording automatically pauses and the older recording begins playback. After the older recording stops or playback ends, the active recording remains paused and does not automatically resume.
If you press Resume on the active recording while an older recording is still playing, playback of the older recording stops and the active recording resumes.
Recording Limits and Automatic Stops
Voice Assistant recordings are limited to three hours of active recording time. When Voice detects that a recording has reached the three-hour limit, the recording stops automatically and a notification explains that the recording was stopped because the time limit was reached.
Voice Assistant also monitors available device storage. If available storage becomes too low during a recording, the recording stops automatically and a notification explains that the recording was stopped due to low device storage.
To help manage long-running recordings, Voice Assistant may also automatically stop a recording after an extended period of inactivity. If this occurs, you will receive a notification indicating that the recording was stopped automatically. When a recording is stopped automatically, it is saved and appears in your recordings list. The recording then follows the same processing workflow as a recording that you stop manually, including transcription and summary generation when applicable.
These automatic stop rules apply to both online and offline recordings.
Using Voice Assistant Offline
Voice Assistant can continue recording even when an internet connection is unavailable. If your device loses connectivity while recording, the recording continues uninterrupted and all recording controls remain available.
When a recording is completed while offline, the audio and recording information are saved locally on the device and placed in an upload queue. Queued recordings are identified by an In Queue status and remain available within the application until they can be uploaded.
Once an internet connection is restored, Voice Assistant automatically uploads queued recordings and processes them in the order they were created. No action is required to restart the upload process.
Offline Status Indicators
Voice Assistant displays notifications when connectivity is unavailable.
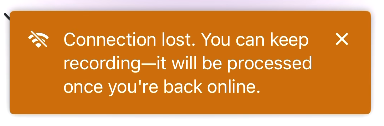
While recording, a temporary message may appear to indicate that the connection has been lost and that recording can continue offline.
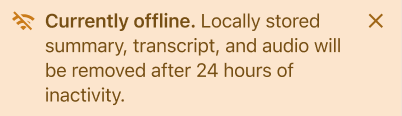
When viewing recordings while offline, an offline banner remains visible until connectivity is restored.

If you're offline but the recording is still stored on your device, you can continue to view the transcript and summary. An offline banner appears at the top of the screen to let you know you're offline. You can dismiss the banner, or it will disappear automatically when your internet connection is restored. If you close and reopen the recording while still offline, the banner will appear again.
If you're offline and the recording is no longer stored on your device, a message is displayed in the transcript and summary area indicating that the content is unavailable while you're offline. The message remains visible until your internet connection is restored.
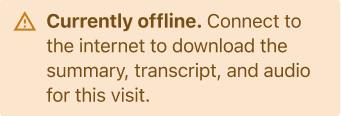
If a recording has been removed from your device and cannot be downloaded, an error message is displayed. The message is automatically dismissed once the recording data has been successfully retrieved.

Recording List
The recording list is the Voice Assistant “home” screen. It displays current and past recordings on “cards” under the date that each was recorded. Each recording card displays the recording title, the date, time, and length of the recording, and the current status of the recording.
Recording statuses include:
Recording = The recording is currently in progress.
Paused = The recording is paused.
Processing = The recording has ended and is currently being processed. If you open a recording in this state, a message indicates that the transcript and summary are still being generated.
In Queue = Your recording is saved on your phone and hasn't reached the nVoq server yet. You'll see this status when you have no connection, or one that's too slow or unreliable to send audio. The recording stays here until a good connection is available, then it's sent automatically.
Processed = The nVoq server has your complete audio, so there's nothing left to send. Your transcript and summary are being generated, and they're saved to your recording as soon as they're ready.
Accessing Recordings While Offline
Recordings that are waiting to upload or are still processing remain visible in the recording list. If a transcript or summary is not yet available, a status message is displayed to indicate that processing has not been completed.
View a Recording
From the recordings list, tap a recording card to open it. A new screen displays the Transcript and Summary view, and recording details appear at the top, including the title, date, and duration time.
The Summary tab is selected by default. Tap Summary or Transcript to switch views.
A recording player is available at the bottom of the screen, allowing you to listen to the recorded transcript while reviewing either the transcript or the summary. The player controls include:
play, rewind, fast forward, pause time progress indicator, and playback speed setting.
Audio Playback Outside of App
When you leave the app while viewing a Voice Assistant recording, the native iOS audio playback controls remain available, whether the recording is currently playing or paused. The Play and Pause controls can be used to start or stop audio playback directly from the native iOS playback interface. Audio playback while offline depends on whether the audio file is still stored on the device. If the local audio file is available, playback can continue normally. If the local audio has been removed as part of the retention policy, playback is unavailable until connectivity is restored and cloud-based content can be accessed.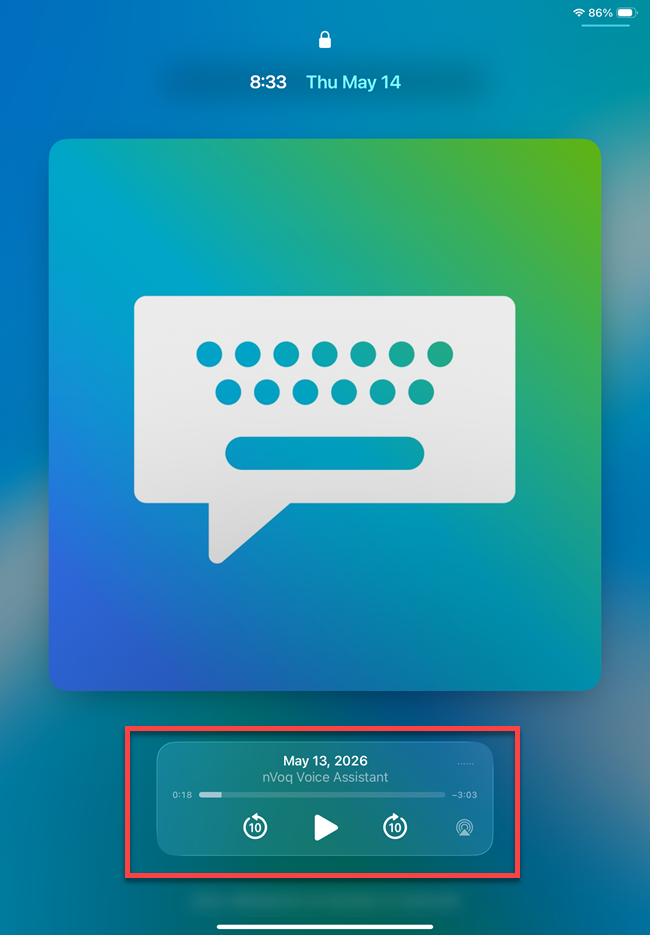
Search (Transcript Only)
To search for text within the recorded transcript:
Tap the Transcript tab.
Tap the search bar and enter a term that you want to find in the recorded transcript.
Matching results are highlighted. Use the up/down arrows to navigate between matches.
Options Menu
Tap the three-dot menu to access additional actions:
Copy Summary - Copies the summary text to your clipboard. A confirmation message appears briefly. The menu closes automatically.
Copy Transcript - Copies the transcript text to your clipboard. A confirmation message appears briefly. The menu closes automatically.
Edit Title - Opens the Edit Title dialog. See also: Change Recording Title
Delete Recording - Opens a confirmation dialog. See also: Delete Recording
To close the options menu, tap outside the menu or swipe down.
Expand, Collapse or Close the Recording
Swipe up outside the transcript/summary area to expand the view.
Swipe down outside the transcript/summary area to return to the normal view
Tap < All Recordings to return to the recordings list. The current view will close and return you to the previous screen.
Change Recording Title
On the Voice Assistant screen tap the More options menu (three dots) of the recording card.

Tap Edit Title.
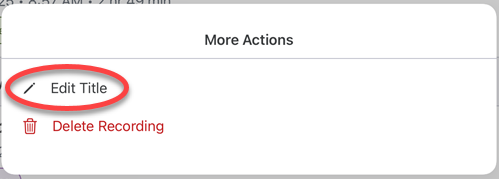
In the Edit Title box, type the new recording name in the text field, then tap Save.
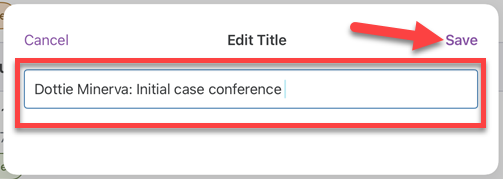
Your recording card displays with the new title on the Voice Assistant home screen.

Search Recordings
Use the search feature to quickly find recordings based on key details like title, date, time, or duration.
Open and Close Search
Tap the search bar to open the search screen.
On the search screen, tap Cancel to return to the previous screen.
Using the Search Bar
Start typing in the search field to filter recordings in real time.
As you type, matching recording cards are displayed automatically.
Search results update dynamically with each character entered.
You can search by title, date, time, or duration.
Note: Recording status is not included in search results.
Clear Search
When text is entered, an “X” appears in the search bar. Tap the “X” to clear the search text.
Clearing the search resets the full recordings list.
The search screen remains open after clearing text.
No Results Found
If no recordings match your search, the following message is displayed: “Sorry, we couldn't find any results.”
Delete Recording
Recordings can only be deleted after they are fully processed. The Delete option is not available while a recording is recording, paused, in queue, or processing.
To delete a recording:
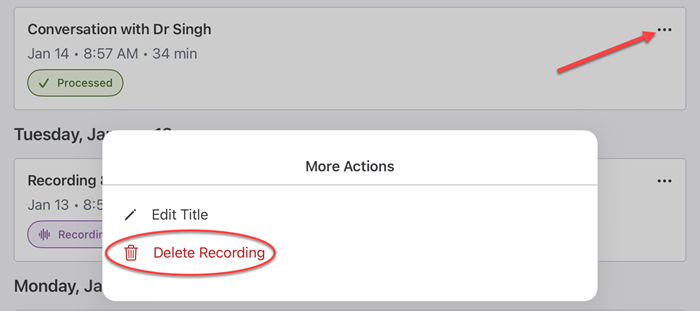
On the Voice Assistant screen tap the More options menu (three dots) of the recording card and then tap Delete Recording.
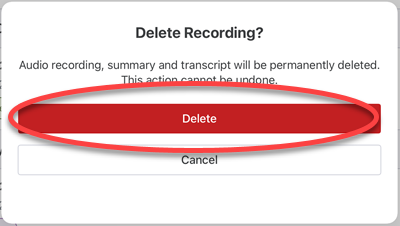
A confirmation will appear to let you know that the audio recording, summary, and transcript will all be permanently deleted from your device. Tap Delete.
The recording card no longer displays on the Voice Assistant home screen.
Voice Assistant Privacy & Security
When Voice Assistant is minimized and moved to the background, the nVoq Voice logo displays on the screen for privacy. This prevents any personal data from being accidentally visible. When Voice is reopened after being minimized, the app returns to the last screen in use, whether that is regular dictation or a conversation recording.
Data Security and Compliance
Local & Cloud Storage
To ensure your recordings are secure, protected from data loss, and always available when you need them, Voice manages recordings throughout their lifecycle, from capture to processing. Recordings are stored both locally on your device and in the cloud to provide reliability and accessibility.
While a recording is in progress, audio is continuously captured and periodically saved to local storage. If the app closes or crashes unexpectedly, audio recorded up to that point is preserved. Partial recordings can be recovered when you reopen the app. At the same time, audio is also automatically synced to the cloud.
When a recording is completed, the audio file is saved to secure local storage and remains synced to the cloud.
Once processing is complete, the transcript and summary are saved to your cloud profile and associated with the recording. They remain available across sessions and devices.
Data Encryption
When recordings are saved to your device, audio files are encrypted before being stored using HIPAA-compliant standards. Files cannot be accessed without proper authentication. Encryption keys are securely managed and never stored in plain text. Access to keys is restricted to authorized processes only. Additional safeguards are in place to prevent unauthorized access
When you play a recording, the encrypted file is temporarily decrypted for playback. Decrypted data exists only in memory during playback and is not saved.
All data encryption meets HIPAA requirements for protecting Protected Health Information (PHI) data storage complies with applicable regulations, including HIPAA and industry-standard security measures are enforced to safeguard data. These measures ensure that your recordings remain secure at all times, whether stored on your device or accessed during playback.
Recording Retention and Local Storage Cleanup
To help protect user privacy and reduce device storage usage, processed recordings are automatically removed from local device storage 24 hours after processing is complete. This cleanup applies only to recordings that have finished processing, including the audio file, transcript, and summary. Recordings that are still In Queue or Processing are not deleted.
When local cleanup occurs:
The recording card remains visible in the app
The recording, transcript, and summary remain securely stored in the cloud
Content can still be retrieved or downloaded from cloud storage
Only local device copies are removed. Cloud-stored data is not deleted during this process.
Offline or unprocessed recordings are not affected by the retention policy. If a recording is waiting for internet connectivity, it remains stored on the device until it can be successfully uploaded and processed. Once connectivity is restored, the recording uploads automatically and continues through normal processing.
Retention Period for Edited Recordings
When you edit a recording summary and the changes are successfully synchronized with the server, the 24-hour retention period is reset. This means the recording, transcript, and summary will remain available on the device for 24 hours after the most recent successful summary update. Each time a summary edit is synchronized, a new 24-hour retention period begins. This helps ensure that recently updated content remains available locally and is not removed immediately after being edited. Only local device copies are affected by the retention policy. The recording, transcript, and summary remain securely stored in the cloud and can still be accessed after local cleanup occurs.
You can edit recording summaries even when your device is offline. Any changes you make are saved locally on the device, allowing you to continue working without an internet connection. If you navigate away from the summary or close the editing screen while offline, your most recent changes are preserved and remain available the next time you open the recording. These locally saved edits are protected from automatic cleanup until they have been successfully synchronized with the server. When internet connectivity is restored, Voice Assistant automatically uploads any pending summary changes. Once the updated summary has been successfully synchronized, the local pending-edit status is cleared. If synchronization cannot be completed, the app continues to retain the changes and automatically retries the upload when a connection becomes available.
Automatic Locking
To better protect sensitive information, Voice for iOS automatically locks after 30 minutes of inactivity for users with Voice Assistant enabled.
After 30 minutes without interaction, the app locks and a lock screen appears. To resume, you'll need to re-authenticate using your PIN or, if your device is configured for it, biometrics such as Face ID or fingerprint. Authentication is handled by your device's operating system, so the experience matches how you unlock other secure apps.
Any time you interact with the app, the 30-minute inactivity timer resets. As long as you're actively using the app, it won't lock.
If you're recording when the app locks, the recording continues uninterrupted. Audio capture is not affected, the timer keeps counting, and no data is lost. Once you re-authenticate, you'll return to exactly the screen you were on before the lock, with full access to your recording controls.
Automatic Session Timeout
To help protect sensitive information, users are automatically returned to the login screen after 6 hours of inactivity, or 24 hours of continuous login time. Only one forced logout occurs within a 24-hour period.
Users are not logged out while actively recording or while a recording is paused. If the 24-hour session limit is reached during an active recording session, logout is delayed until the recording is stopped.
If text remains in the editor when a timeout occurs, the content is preserved and restored after the user signs back in.
When a forced logout occurs due to the 24-hour session limit, a notification message is displayed on the login screen.
Bluetooth Audio Privacy Warning
Voice Assistant helps protect patient privacy by warning you when audio playback may be routed to a Bluetooth speaker.
If a Bluetooth speaker connects while audio is playing, playback pauses and a warning message appears before audio continues.
A warning may also appear when you tap Play after a new Bluetooth device has connected, or after extended inactivity.
Bluetooth headphones are considered private and will not trigger the warning.
Playback through built-in speakers and wired audio devices is also considered safe and will not display the message.
The warning does not appear when the iPhone Keep Audio with Headphones setting is enabled, since iOS prevents audio from automatically switching devices in that cas
When the warning appears:
Tap Continue to resume playback through the connected Bluetooth device
Tap Cancel to keep playback paused
Visit Recording Re-download
If recording data has been removed from the device, including the recording, transcript, and summary, users can re-download the content from cloud storage as long as the recording card has not been deleted.
When a user opens an existing recording card, the audio file automatically downloads from cloud storage. The transcript and summary also automatically download. The recording becomes available for playback after the audio file has finished downloading.
Re-downloaded recordings, transcripts, and summaries follow the retention policy. If re-downloaded data remains on the device for 24 hours, it is automatically deleted from the device.
Re-downloaded data follows the security and encryption standards (listed above).