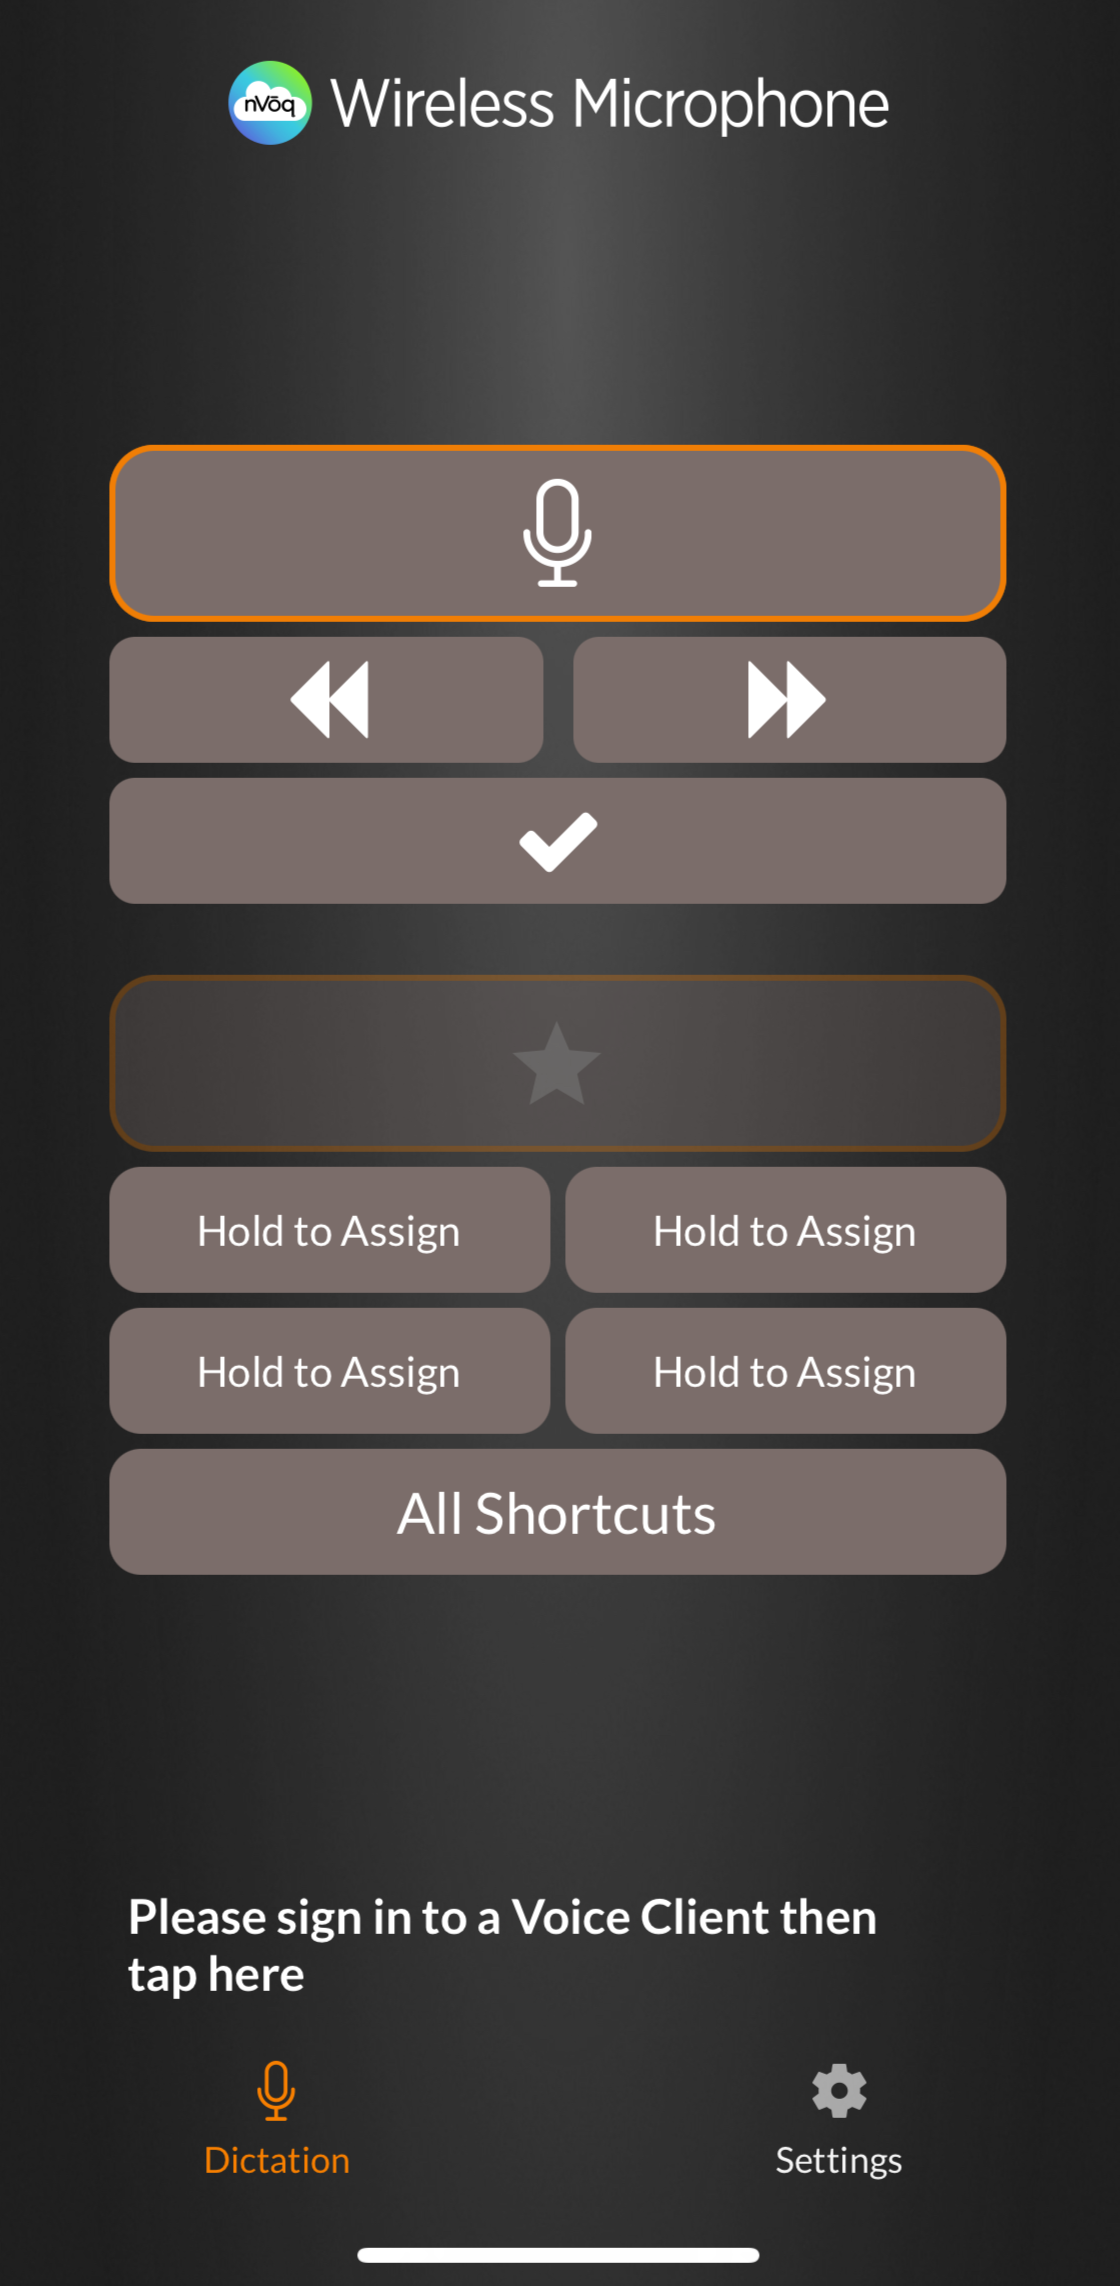
 Dictation Button
The button with the microphone icon is used to record dictation.
See Dictation for more information on using that feature.
Forward and Back Buttons
Tap the forward arrow button (▶▶) and back arrow button (◀◀) to move forward and back through form fields in a web browser on your desktop when linked to nVoq Voice.
Play Button
Use the play button (▶) to listen to your last dictation recording.
Checkmark Button
This no longer has functionality in any current nVoq application.
Voice Shortcut Button
This no longer has functionality in any current nVoq application.
The button with the star is used to run shortcuts saying a voice command. See Shortcuts: Voice Shortcuts.
Quick Access Shortcut Buttons (Hold to Assign)
On the dictation screen there are four buttons that initially say Hold to assign. You can assign each of these buttons to a frequently-used shortcut that you can use with a tap of your finger. See Shortcuts: Quick Access Buttons.
All Shortcuts Button
Tap the All Shortcuts button at the bottom of the dictation screen to see your list of all available shortcuts. See Shortcuts: All Shortcuts Button.
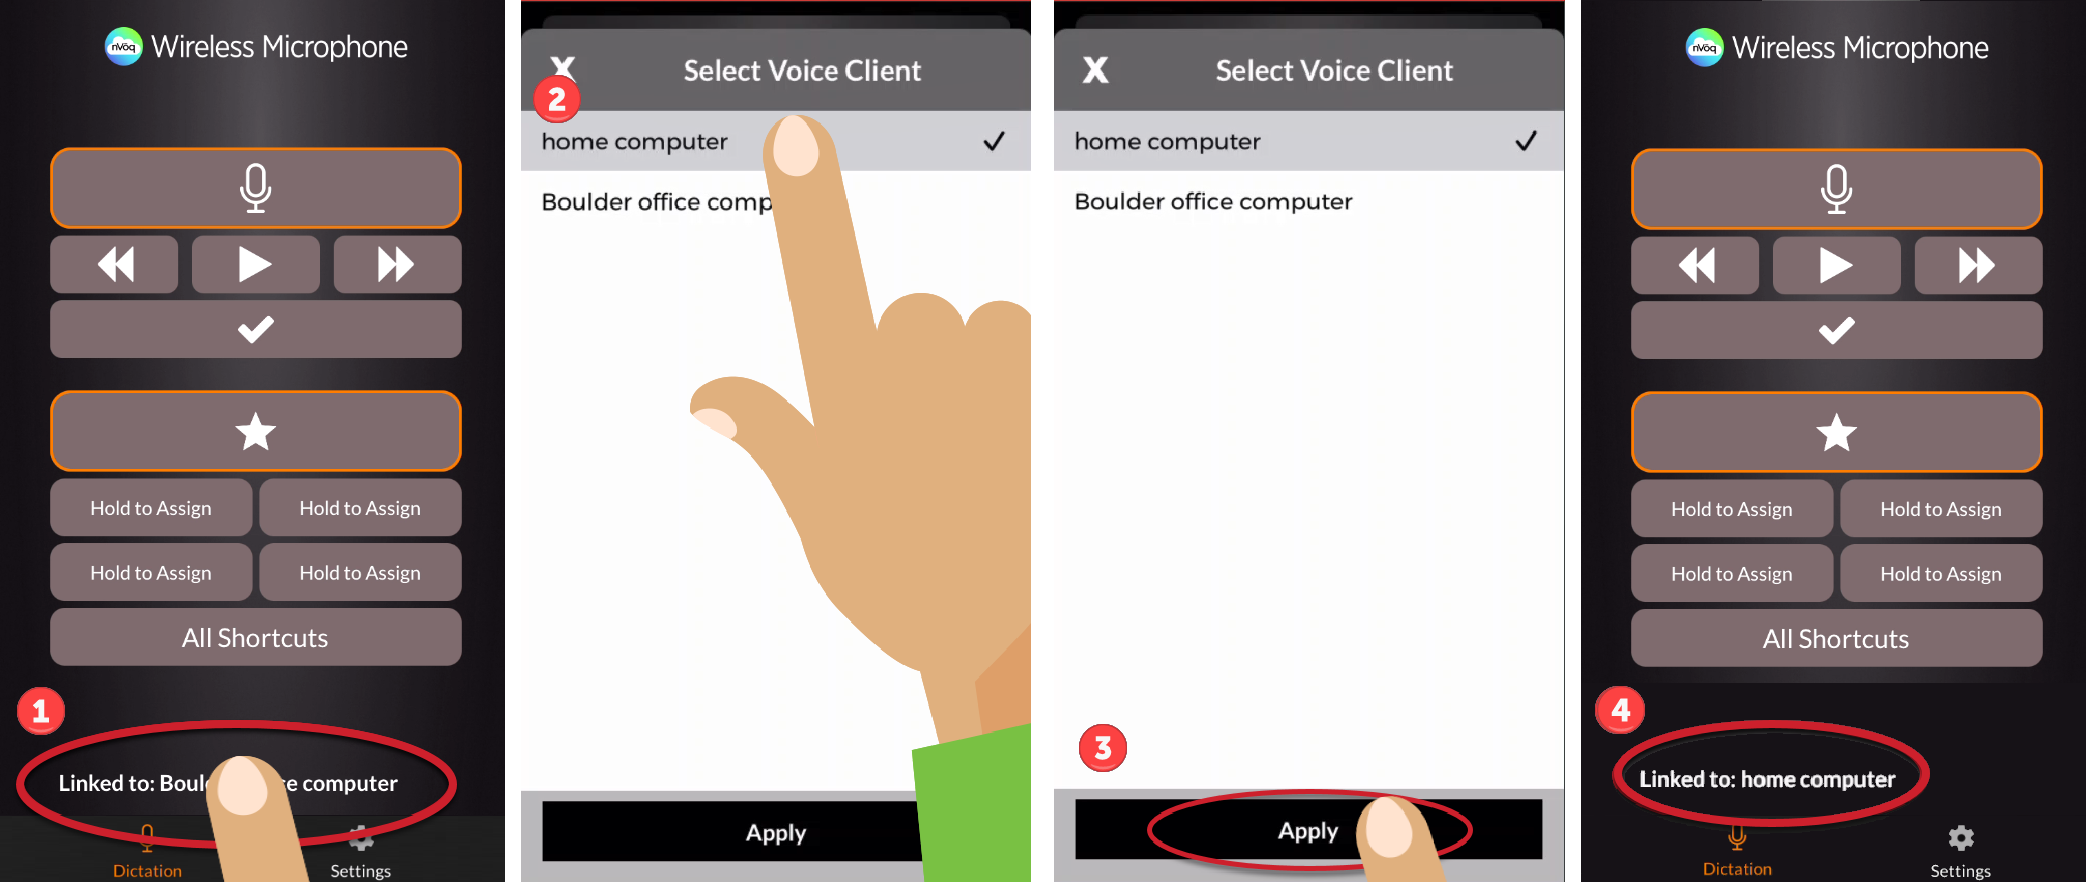
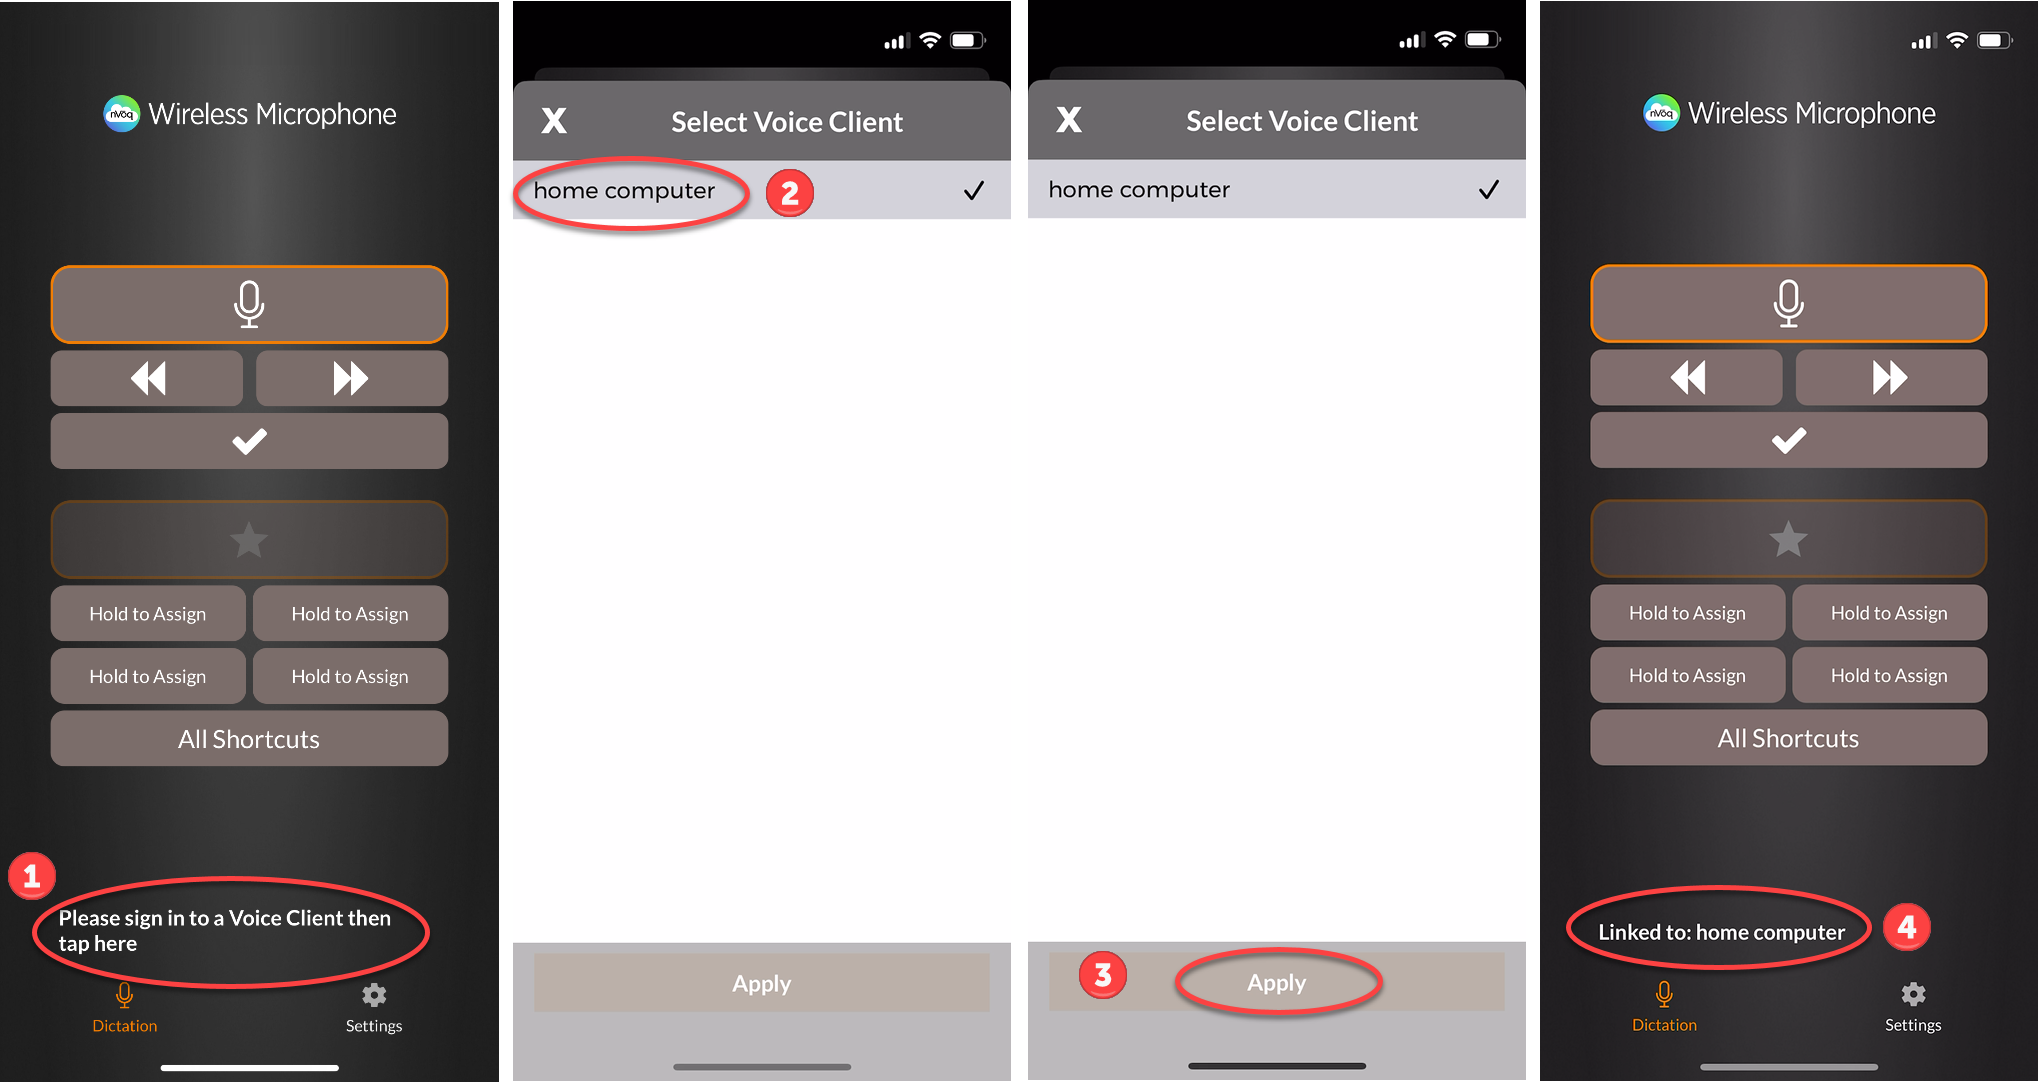
Please sign in to a Voice Client then tap here / Linked to: [Computer Name]
If the Wireless Microphone is not linked to any voice client the screen will say, "Please sign in to a Voice client then tap here."
Link to a Dictation Client
To link to a dictation client:
- Tap Please sign in to a voice client then tap here at the bottom of the dictation screen. (You must be already signed in to a dictation client on your computer!)
- On the Select Voice Client screen of the Wireless Microphone tap the name of the computer that is running the dictation client to put a checkmark beside it.
- Tap the Apply button at the bottom of the screen.
- The dictation screen on the Wireless Mic now displays the words "Linked to:" followed by the name of the computer on which you're currently running nVoq Voice. This is the computer on which dictation text will paste, and where shortcuts will run.
Link to a Dictation Client on a Different Computer
If you are logged in to nVoq Voice on multiple computers, you can switch to using the Wireless Microphone on a different one:
- Tap the computer name listed next to Linked to: to open a list of all computers on which you are currently running nVoq Voice.
- Tap another computer name in the list to switch to a different voice client on another computer. (You must be logged in to nVoq Voice on more than one computer using the Wireless Microphone as your recording device in order to see more than one computer in the list.)
- Tap Apply.
- The name at the bottom of the screen changes to the voice client/computer to which you are now connected.