From this page you can add or edit tenant settings or view and restore properties set for the tenant via API.
Add a New Tenant
The first steps in configuring an organization structure for a new customer is to set up a tenant.
Under the System section at the bottom of the left-side menu, click on the Tenants page.
Click on the New icon in the blue toolbar

Configure the tenant settings.
Click the Save button at the bottom right of the screen.
Creating a new tenant may take a few minutes to complete. The system creates the tenant in our primary database and then sets up the corresponding data in Snowflake. The process finishes once both parts are complete, so the save takes longer than it used to.
Edit a Tenant
Make changes to this tenant's tenant-level default settings, available subscriptions, or billing contact information.
Under the System section at the bottom of the left-side menu, click on the Tenants page.
Find the tenant in the list. Optionally use the search field to search by Name, Creation Date, or Enabled (yes or no).
Click on the Actions menu
 and select Edit Tenant.
Make the needed changes to the tenant settings.
Click the Save button at the bottom right of the screen.
Tenant Settings
Tenant Information
Name
The name of the tenant listed on the Tenants page in nVoq Administrator.
Field length is 45 characters maximum.
The following characters are NOT allowed: < >
Enabled
This setting configures whether or not user accounts in the tenant have an active billing subscription and are able to log in to nVoq Platform products.
This setting indicates whether a tenant is enabled/active (blue) or disabled/inactive (gray/white). Enabled is the default.
Show Audio and Text Links
This settings configures whether accounts with an Admin Role at a company, division, or group Admin Level have access to the Download Audio and Download Text links in the Detail window on the Review & Correct page. If OFF (gray/white), company, division, and group level administrators may still listen to transcripts and see the text returned, but they will not have access to the download links. (Tenant level and System level administrators will still see the links.) This setting is OFF for new tenants by default, but can be turned on or off at any time.
Trial Expires Available
Setting this to ON (blue) will allow new accounts in this tenant to have a Trial period, during which time the account is not billable. When enabled, the Trial Expires menu is available on the Accounts page for new accounts in this tenant.
Adding or removing the checkmark on this box to an existing tenant will only affect NEW accounts.
If you turn this OFF (gray/white), existing accounts will keep any trial expiration dates that were previously configured. The Trial Expires menu will still appear on the Accounts page for these accounts.
Conversely, if you turn this ON (blue) you will not be able to configure a trial period for existing accounts that are already billable. The Trial Expires menu will be visible on the Accounts page for existing accounts, but will be grayed-out.
Plans Available
The subscription plans selected here will be listed on the Accounts page when adding or updating accounts. You can edit a tenant to remove available options at any time, but you will NOT be able to remove options that are assigned to accounts in that tenant.
If there is only ONE plan available for a tenant, it will be selected automatically for administrators when creating accounts.
Monthly
Lines of Dictation
This is a monthly subscription plan that creates an account that is billed based on lines of dictation for the current month. Invoices are sent on the 1st of the month for usage in the previous month. Putting a checkmark in this box will make this this type of subscription available on the Accounts page for accounts in this tenant.
Shortcuts and Dictation
This is a monthly subscription plan that allows an account to use Shortcuts and Dictation and is billed on the 1st of each month for the current month. Putting a checkmark in this box will make this this type of subscription available on the Accounts page for accounts in this tenant.
Enterprise
Shortcuts and Dictation
These plans are paid up-front with a subscription that's tied to a parent. They allow an account to use both Shortcuts and Dictation.
Services
Accuracy Optimization Service
Accuracy Optimization Service (AOS) is a personalized service designed to maximize dictation accuracy and user experience with nVoq dictation. A specially trained team of medical transcriptionists review the user’s dictations, correct errors generated by the dictation engine, and tune the user’s account to maximize accuracy and usability. Putting a checkmark in this box will make this this service available on the Accounts page for accounts in this tenant.
Options
These options are only viewable by System Administrators with system-level access; System Admins with customer-level access cannot see them.
Enabling any of the options on the Add/Edit Tenant page displays the feature setting on the Add/Edit Account and Update Accounts pages in the tenant, and also enables the feature for all accounts in the tenant automatically.
All options are disabled by default when creating a new tenant.
Conversation Capture:
Automatically enables Note Compose Designer, which is required for this feature.
Adds the Conversation Capture checkbox to the Add/Edit Account page.
Enables the Conversation Capture feature for all accounts in the tenant.
Patient Visit Retrieval
Automatically enables Conversation Capture and Note Compose Designer, which is required for this feature.
Adds the Patient Visit Retrieval checkbox to the Add/Edit Account page.
Enables Conversation Capture, Patient Visit Retrieval, and Note Compose for all accounts in the tenant.
Form Completion:
Automatically enables Conversation Capture, Patient Visit Retrieval, and Note Compose Designer, which is required for this feature.
Adds the Voice Assistant and Note Compose Designer pages to the tenant in nVoq Administrator.
Adds the Form Completion, Conversation Summary, and the Note Compose checkboxes to the Add/Edit Account page.
Enables Conversation Capture, Patient Visit Retrieval, and Form Completion (Voice Assistant) for all accounts in the tenant.
Requires all accounts in the tenant to use a strong password. (When enabled, the password strength setting at the division level is locked to “Strong” and cannot be changed.)
Note Compose Designer:
Adds the Note Compose Designer page to the tenant in nVoq Administrator.
Adds the Note Compose checkbox to the Add/Edit Account page.
Enables Note Compose for structured notes for all accounts in the tenant.
Note Assist:
Adds the Note Assist page to the tenant in nVoq Administrator.
Adds the Note Assist option checkbox to the Add/Edit Account page.
Enables Note Assist for all accounts in the tenant.
If these tenant-level options are turned off, users in the tenant will no longer have access to these features.
The checkboxes for the features also removed from the Add/Edit Account and Update Accounts pages.
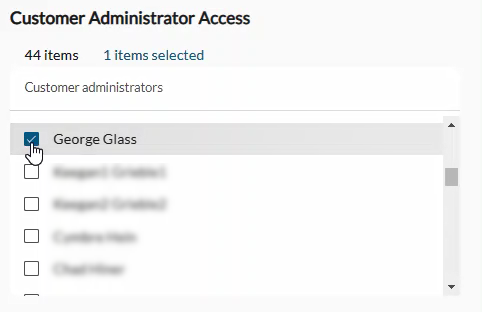
Customer Administrator Access
A menu in this section lists all of the system level accounts with "Customer Administrator" access that exist on this system. There is a count just above the list of the total available accounts in the list.
Put a checkmark in the box beside one or more accounts to grant access to the tenant.
A count above the list lets you know how many of the total available have been selected.
Disable / Delete a Tenant
Before you can delete a tenant you must disable it.
To DISABLE the tenant, find the tenant in the list that you wish to delete by using the Search field at the top right of the screen.
Open the Actions menu of the tenant and select Edit Tenant.
On the Edit Tenant screen, slide the Enabled toggle so that it's white/gray.
Click Save at the lower right of the Edit Tenant screen. This disables the tenant and all organizations and accounts below it.
Note: A disabled tenant can be enabled by going to the Edit Tenant screen and sliding the Enabled toggle so that it's blue. This will also enable all organizations and accounts in the tenant.To DELETE the tenant, open the Actions menu of the tenant and select Delete. You will see a confirmation message before the tenant is deleted.
You can also delete one or MORE disabled tenants by selecting the building icon/checkbox next to the tenant Name(s) and then clicking on the trash can icon in the blue toolbar.
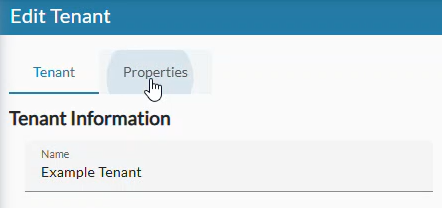
View or Restore Tenant Organization Properties
Click the Properties tab to view or restore organization properties that were added to the organization from an external web service/API call. See Tenant Organization Properties.