nVoq Administrator supports multi-tenancy, which means that your data is isolated from and invisible to other customers. It also uses a hierarchy to organize users, which allows you to limit access to data among your own administrators. When organizations are created, you start at the top and work your way down, and you can add as many of them as you want under each level. Each organization level includes specific settings which are configured for all organizations and accounts below it.
Organization Hierarchy

System: The first level of the hierarchy is the SYSTEM. nVoq has multiple systems, including Healthcare, Canada, and Test.
The Healthcare system is for production data in the United States and is compliant with U.S. compliance standards (HIPAA).
The Canada system is for production data for customers located in Canada, which has different compliance standards (PIPEDA).
The Test system is for user acceptance testing and includes changes that are coming to nVoq products in an upcoming release.
Tenant: The first level of your organization hierarchy on a particular system is your TENANT. You may have tenants on different systems, for example, you may have a tenant organization on healthcare.nvoq.com and also one on test.nvoq.com. nVoq creates your tenant for you and configures some default options for organizations and accounts there, like what plans or services you have available. Underneath the tenant are three organization levels which can be used to divide user accounts, and act as containers for resources and reporting data. Resources are things like vocabulary, substitutions, shortcuts, and sentence models. These can be added at any organization level, so consider who needs to use them when deciding how to set up your organization hierarchy. Resources added at the tenant level are available to all companies, divisions, and groups. A tenant includes one or more companies.
Company: The organization level under tenant is COMPANY. There are no settings configured at this level, but resources can be added at this level as well. Resources added at the company level are available to all divisions and groups below it. A company includes one or more divisions.
Division: The next organization level is DIVISION and this is where password and security settings are configured for nVoq client-only user accounts in groups below this organization. Resources added at the division level are available to all groups below it. A division includes one or more groups.
Group: This lowest organization level is GROUP and only users belonging to a group have the ability to use dictation. Client settings such as the dictation topic are configured for all accounts at this level. Data retention is also configured here. Resources added at the group level are available to all accounts in the group. A group includes one or more accounts.
Account: An account is an individual end-user. An end-user account may be created at any level of the organization hierarchy (such as a tenant-level administrator), but accounts must belong to a group to use dictation. Resources can also be added at this level, and these can only be used by the account holder.

BEST PRACTICE: Create a branch of the organization (Company, Division, and Group) for non-billable accounts assigned to individuals who support your end-users and manage items such as shortcuts, Note Compose designs, or Note Assist audits. This allows administrators to test their work on those features in a dictation client. Name the organizations with ADMIN in the name and include only non-billable accounts in it. This helps nVoq recognize these accounts as non-billable and also makes it easier for you to exclude non-billable accounts from adoption reports.
The Organization Menu in nVoq Administrator
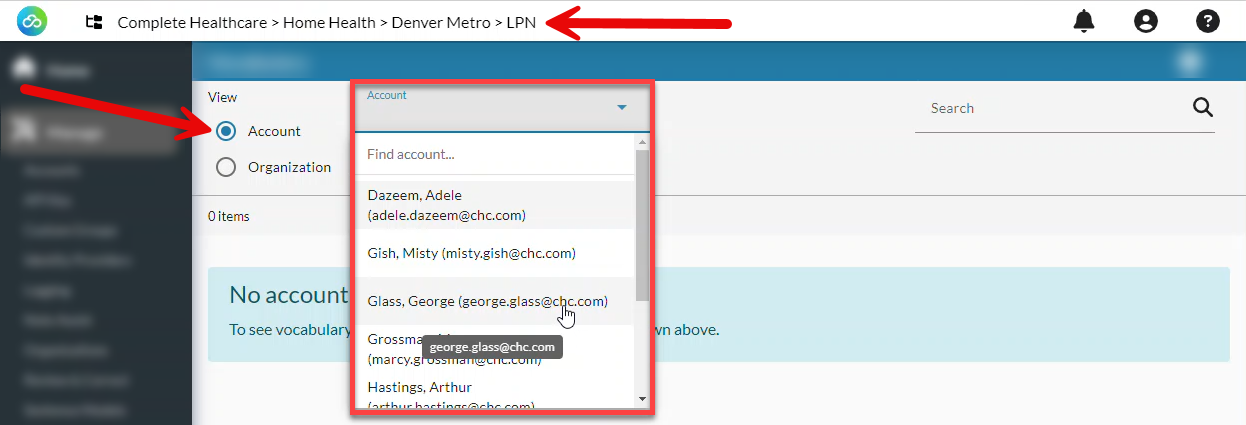
At the top of all nVoq Administrator pages is the Organization menu. This is where you will select the organization with which you would like to work on all pages you select under Manage or Reports, except for the Organizations page. (The Organizations page has its own menu, and it is explained in the documentation for the Organizations page.)

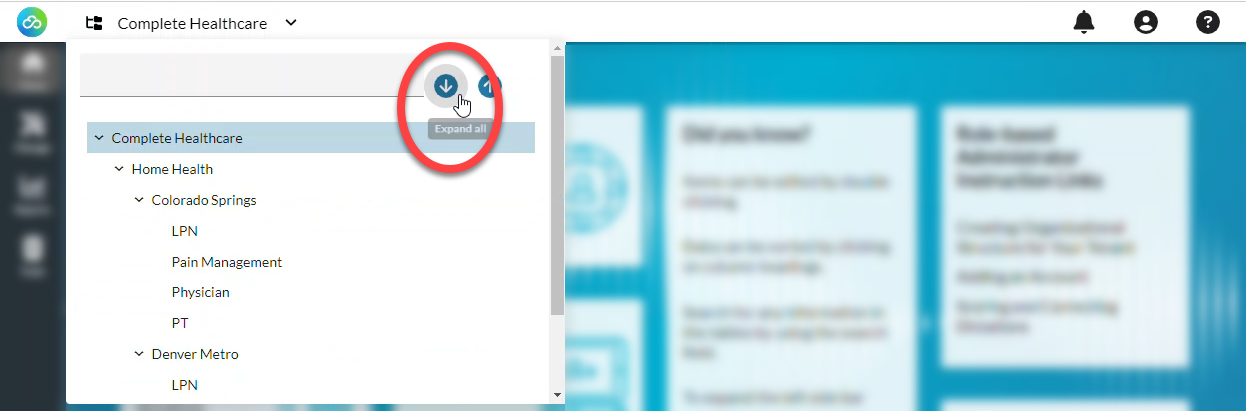
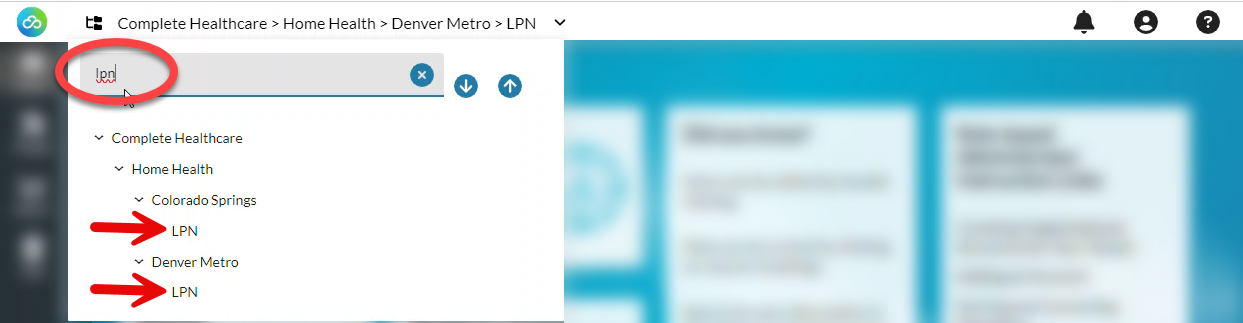
Select the organization level from this drop-down menu to view accounts or assets inside that organization.
- Click the Expand All arrow next to the Filter to open all organizations in the menu.
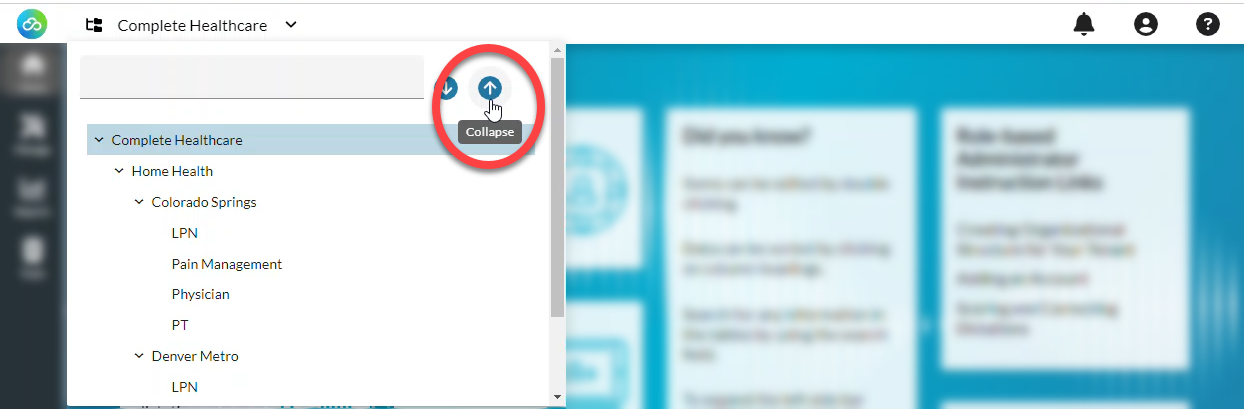
- To close all organizations except the one you have selected, click Collapse.
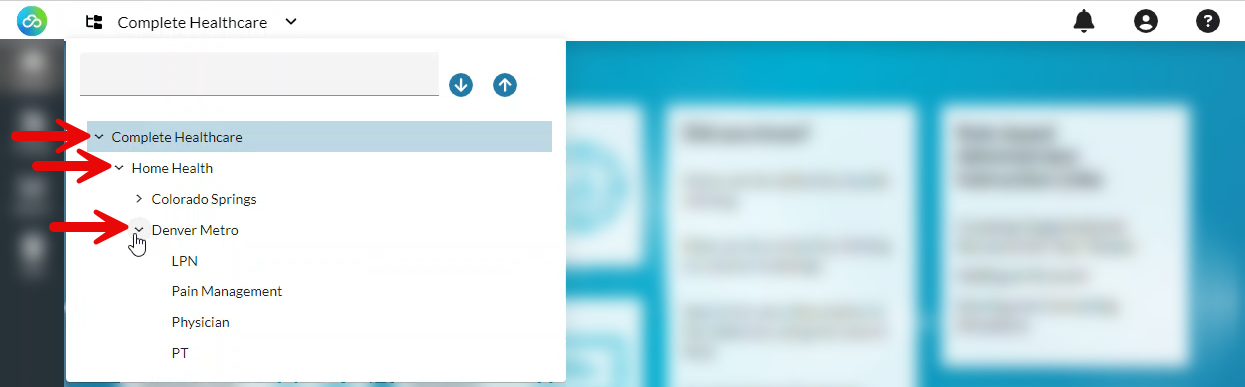
- To open organizations individually, click the > arrows beside organizations to view child organizations below.
On some pages in nVoq Administrator (like Vocabulary), select the Account radio button under View and then select an account from the Account menu to view items on the page for an account in the organization selected in the organization menu above.
Select the Organization radio button under View and then select one of three options under Show Organization menu:
- Selected and parents will show you items created in the organization selected in the organization menu and all parent organizations above it.
- Only selected will show you items created in only the organization selected in the organization menu and no others.
- Selected and children will show you items created in the organization selected in the organization menu and all child organizations below it.

Optional Hands-On Exercise: Create an Organization Hierarchy in nVoq Administrator
The first thing you need to do for a new customer is to create an organization structure for them.
Create a Company
- Go to the Organizations page in Administrator.
- Select the tenant level on the organization menu on the Organizations page and ensure that the View Organization Level is set at Company.
- Click the new icon at the top of the page (in the blue bar) to create a new company.
- Enter a Name for the company.
- Keep the Enabled toggle ON.
- In a real-life scenario you could optionally, disable this setting if you wanted to create an organization in which users could not yet log in to nVoq applications or use dictation and did not yet have an active billing subscription. You don't have to worry about that on the Test system!
- Leave the theme on the default setting ("nVoq").
- Click the Save then view children button at the bottom of the page to add a division below this company.
Create a Division
- Click the new icon at the top of the page (in the blue bar).
- Enter a Name for the division.
- Keep the Enabled toggle ON.
- Configure the settings under Password Policy, or leave them on the default settings.
- See Password Security for information about each setting.
- Note that the password settings configured at the division level only apply to client-only accounts in groups below this division. Accounts with an Administrator Role of any kind automatically adhere to Password Security Settings for Accounts with an Administrator Role.
- Click the Save then view children button at the bottom of the page to add a group below this division.
Create a Group
- Click the new icon at the top of the page (in the blue bar).
- Enter a Name for the group. You may want to add the name of the dictation topic, like "Zamboni General Medicine" for example.
- Configure the Client Settings. For this exercise, you can keep the default settings.
- Make sure the dictation topic is "General Medicine".
- Click the Save button at the bottom of the page.
Organization APIs
Please see the following resources for organizations using our API: