Sync Voice Assistant with PointCare to pull patient data from PointCare and record visit details with Voice Assistant.
Sync Patient Visit Data from PointCare to Voice Assistant
Setup nVoq EHR Sync App
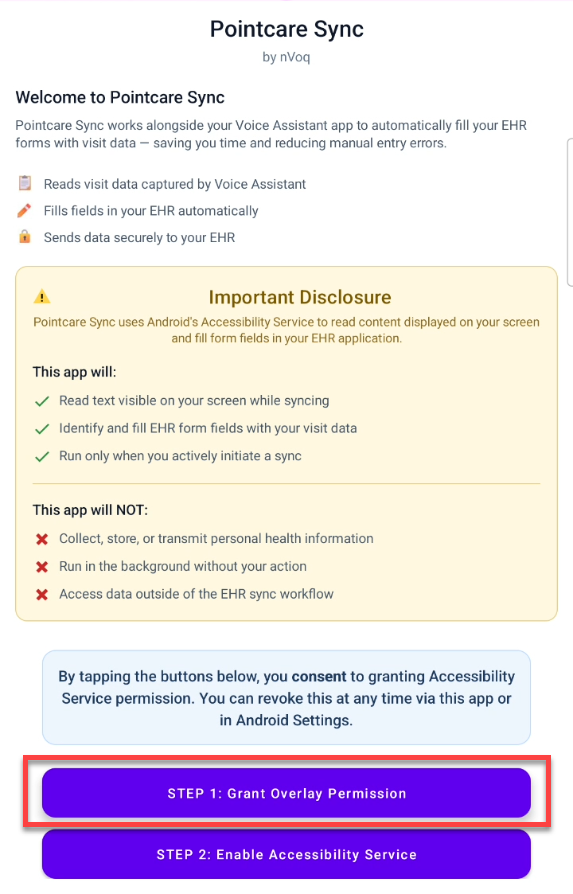
The first time you sync data from PointCare you will need to download, install, and setup the nVoq EHR Sync app. You only need to do this once.
Download the sync app from the Google Play store.
Open the nVoq EHR Sync app and perform the setup steps.
Tap the Step 1: Grant Overlay Permission button.
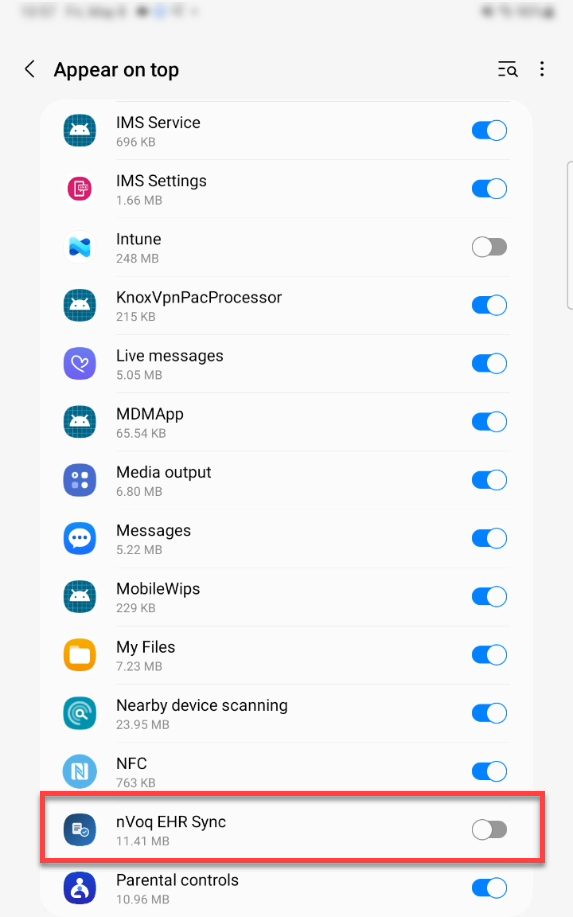
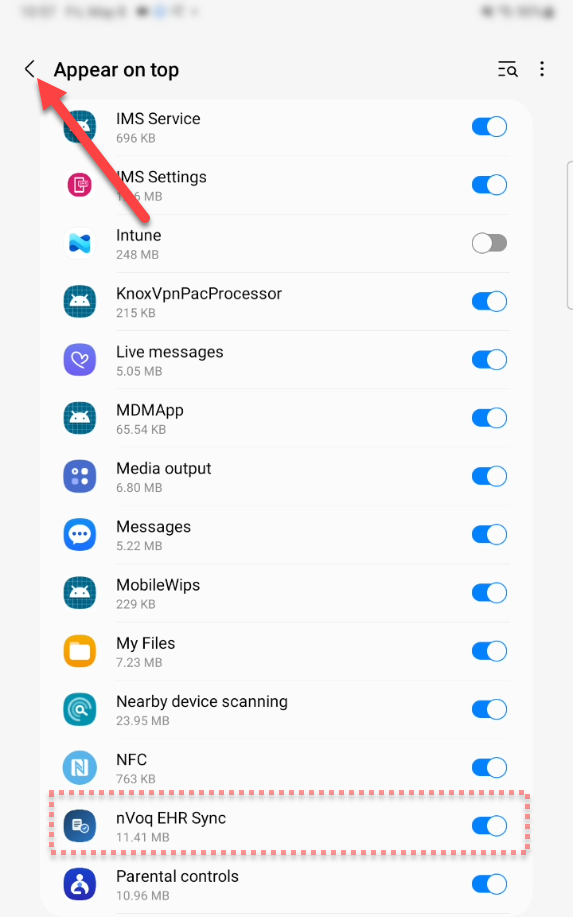
This takes you to the Appear on top screen. Enable the toggle next to nVoq EHR Sync.
Tap the back arrow to back to the EHR Sync app.
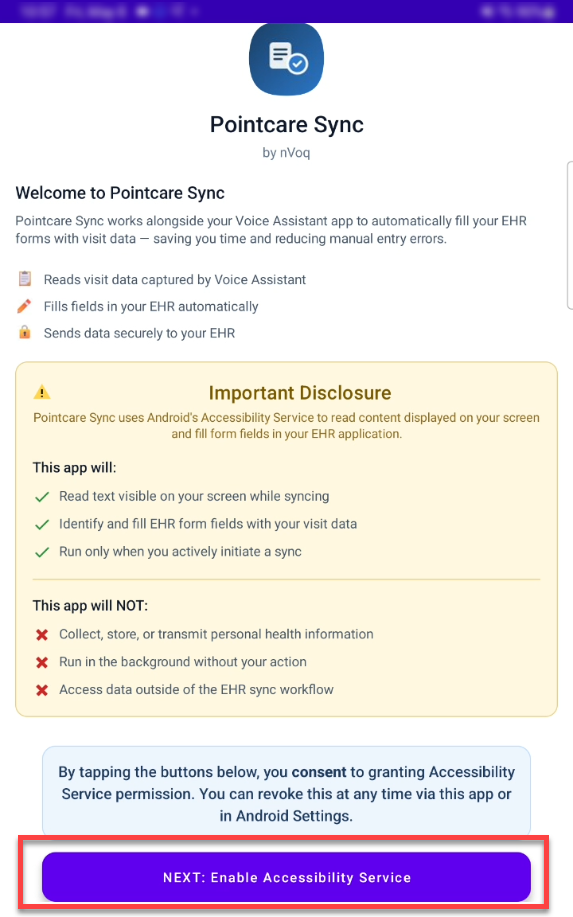
On the sync app screen, tap the button that says NEXT: Enable Accessibility Service.
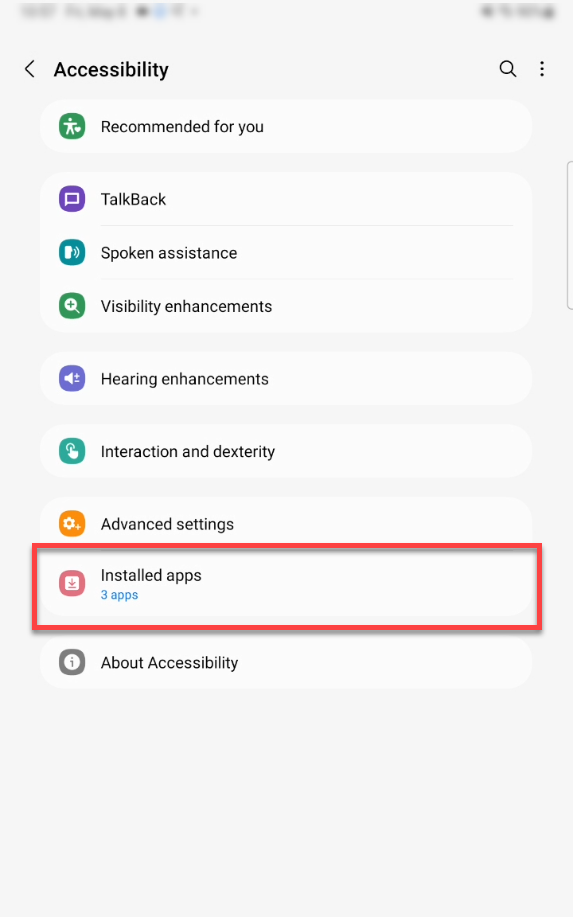
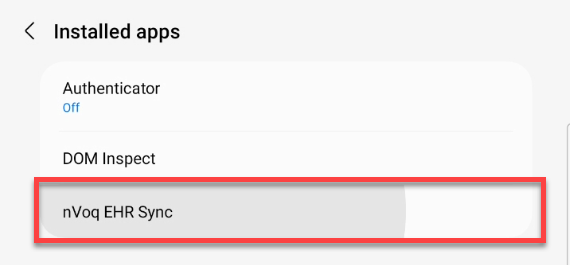
This takes you to the Accessibility screen. Tap Installed apps.
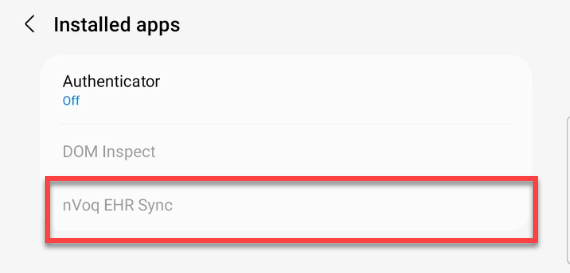
In the list of Installed apps, tap nVoq EHR Sync.
A message will appear letting you know that this is a restricted setting. Tap OK.
Note: This step is needed, as the menu option needed for the next steps will not appear unless you tap OK here.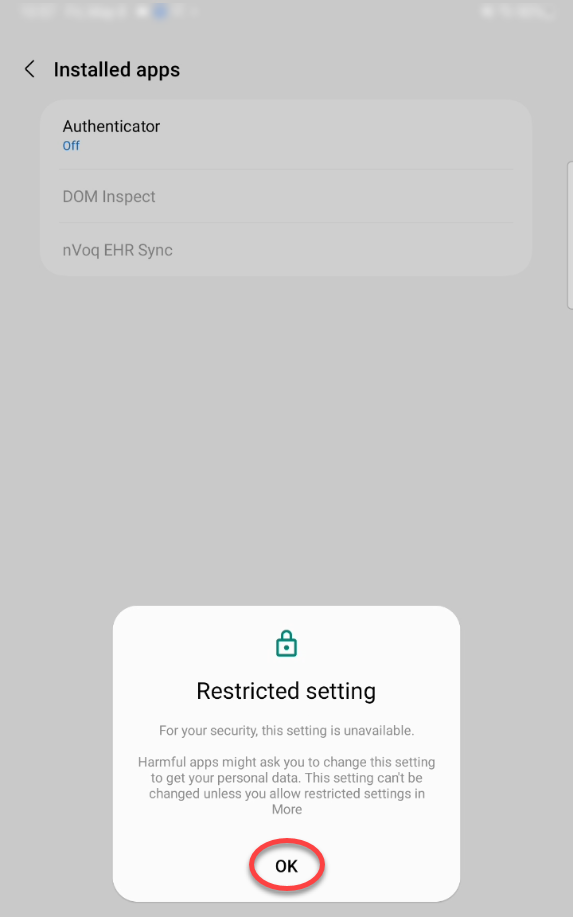
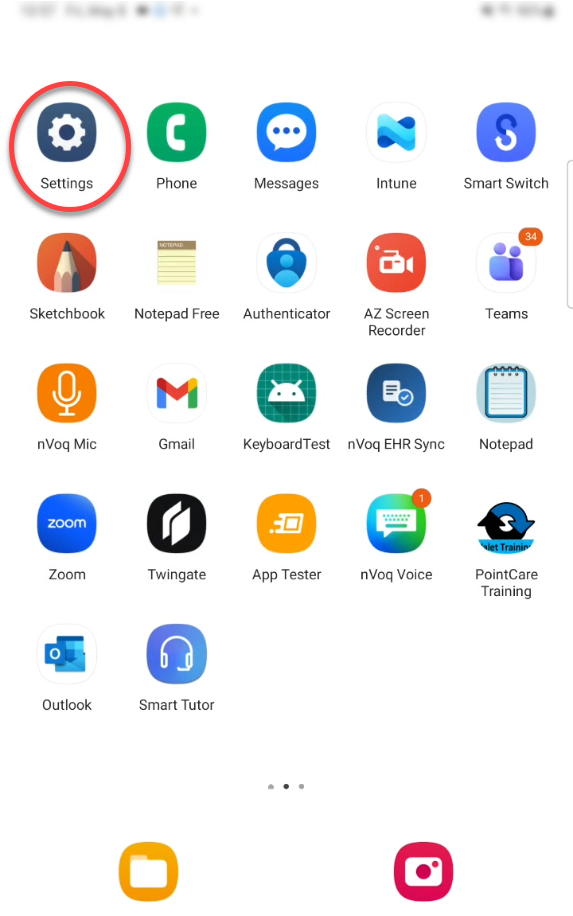
Go to your device home screen and open Settings.
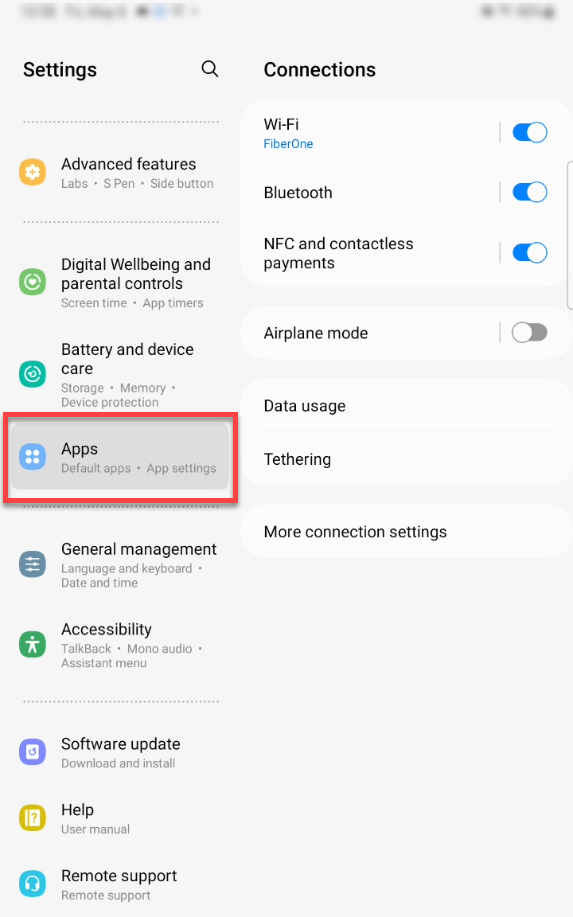
On the Settings screen, open Apps.
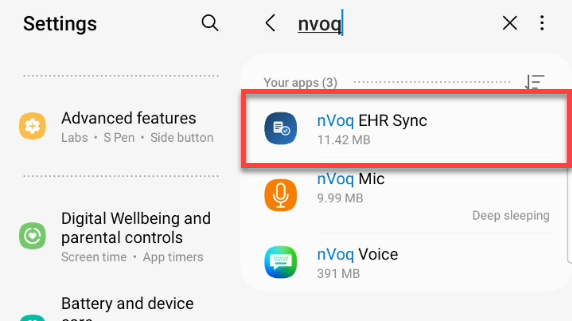
In the app list, scroll down or use the search feature to locate nVoq EHR Sync, then tap the app name.
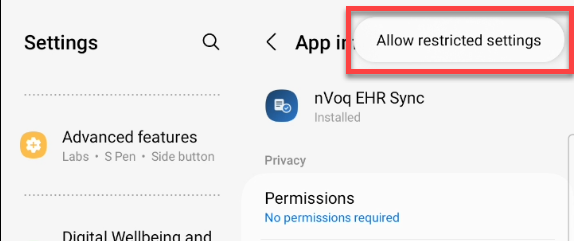
In the App Info for nVoq EHR Sync, tap the kabab menu in the upper-right corner.
Note: This menu will not appear unless you tapped OK on the message from step “g”.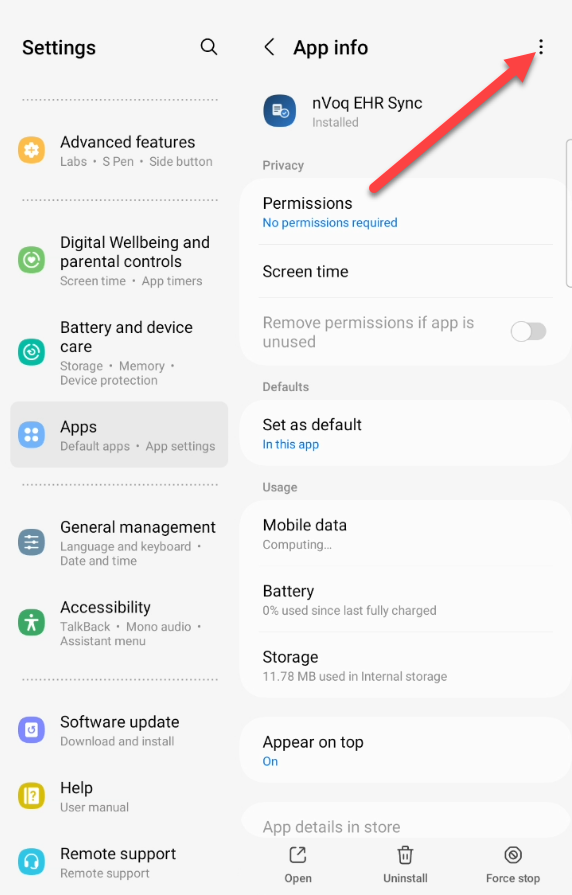
On the kabab menu, tap Allow restricted settings.
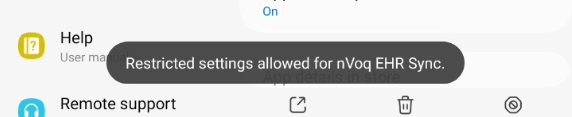
A message appears at the bottom of the screen to let you know that restricted settings have been allowed for nVoq EHR Sync.
Return to nVoq EHR Sync.
Tap the button to Enable Accessibility Serivce again.
This takes you back to the Accessibility screen. Tap Installed apps.
In the list of Installed apps, tap nVoq EHR Sync.(It should no longer be grayed out.)
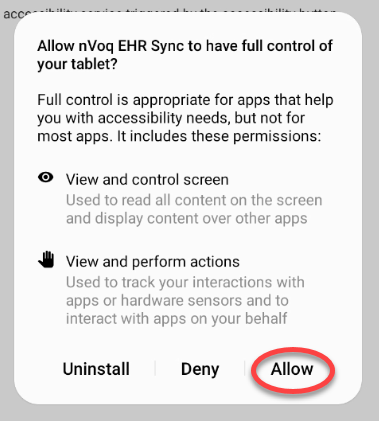
A message appears asking if you want to allow nVoq EHR Sync to have full control of your tablet. This is safe! Tap Allow.
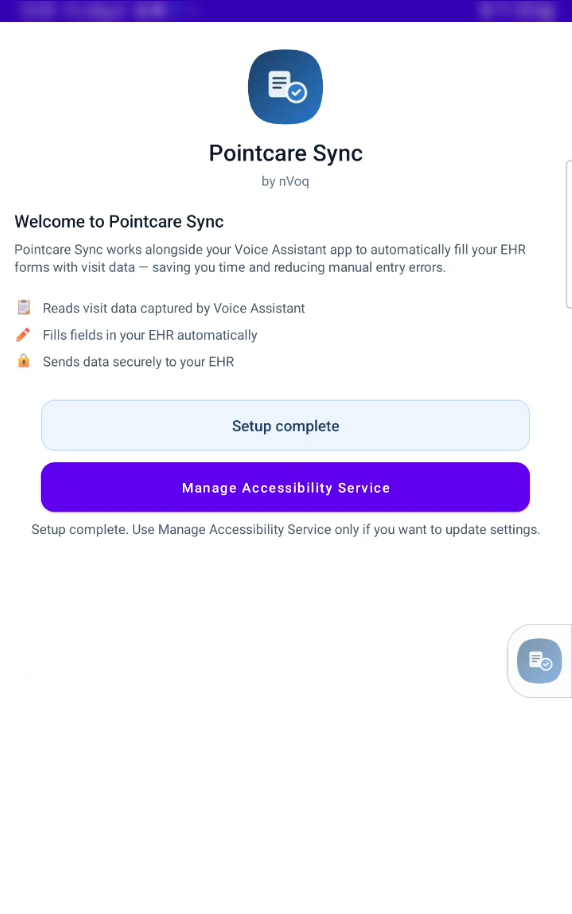
Return to the nVoq EHR Sync app. You should now see the screen below that says “Setup complete.” You’re now ready to sync data in PointCare to nVoq Voice Assistant!
Sync from PointCare
Once the nVoq EHR Sync app has been set up, go to PointCare to sync the data.
Log into PointCare.
On the rolling calendar screen in PointCare, the nVoq EHR Sync button will now display on the screen. You can move this button by dragging it. To sync patient data, nVoq EHR Sync button.

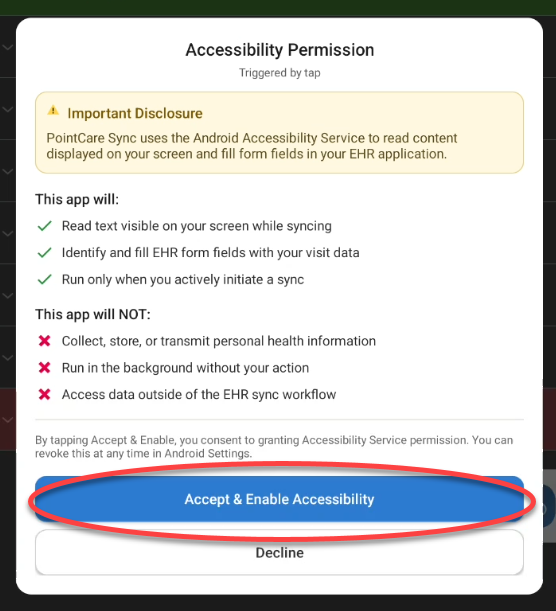
When you tap the buttont an accessibility disclosure dialog is displayed. Tap Accept & Enable Accessibility to proceed. The sync process begins.
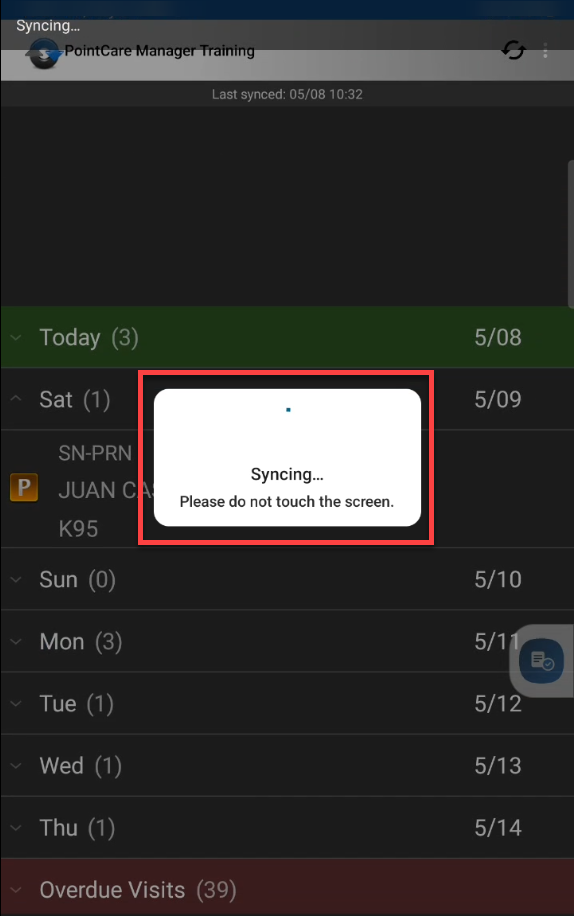
Syncing begins and will scroll through the pages. This may take several minutes. Do not touch the screen while syncing is happening.
When syncing is complete, the syncing message disappears. To see the synced data, go to Voice Assistant. (It may take up to 30 minutes to see the data in Voice Assistant.)