Before you can record a patient visit you must sync your patient visits data from PointCare.
Use the nVoq EHR Sync app to download patient visit data from PointCare to Voice Assistant. Click here for instructions.
Record a Patient Visit
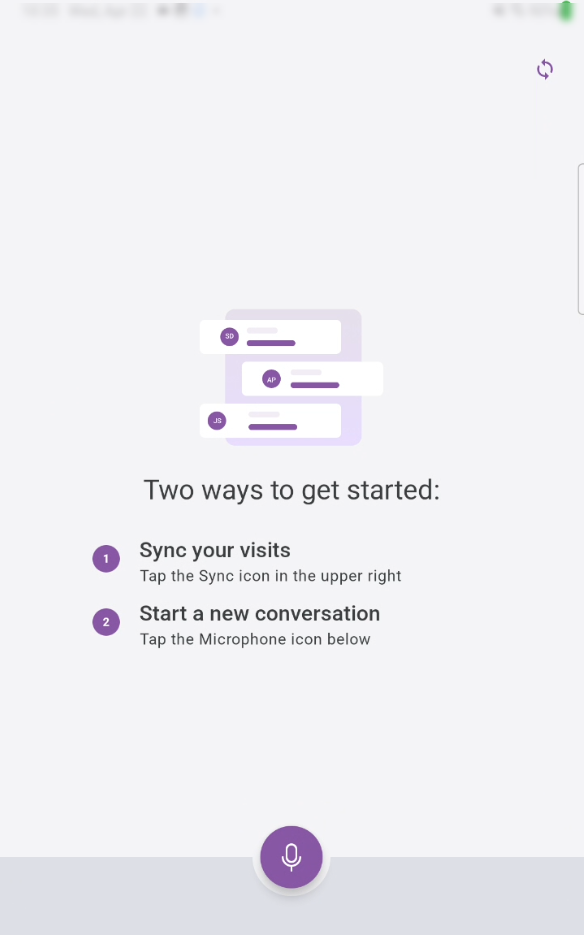
Before visits are synced with PointCare you will see this screen when you open Voice Assistant. You must sync Voice Assistant with PointCare to download the patient visit data.
After patient data has synced, open Voice Assistant.
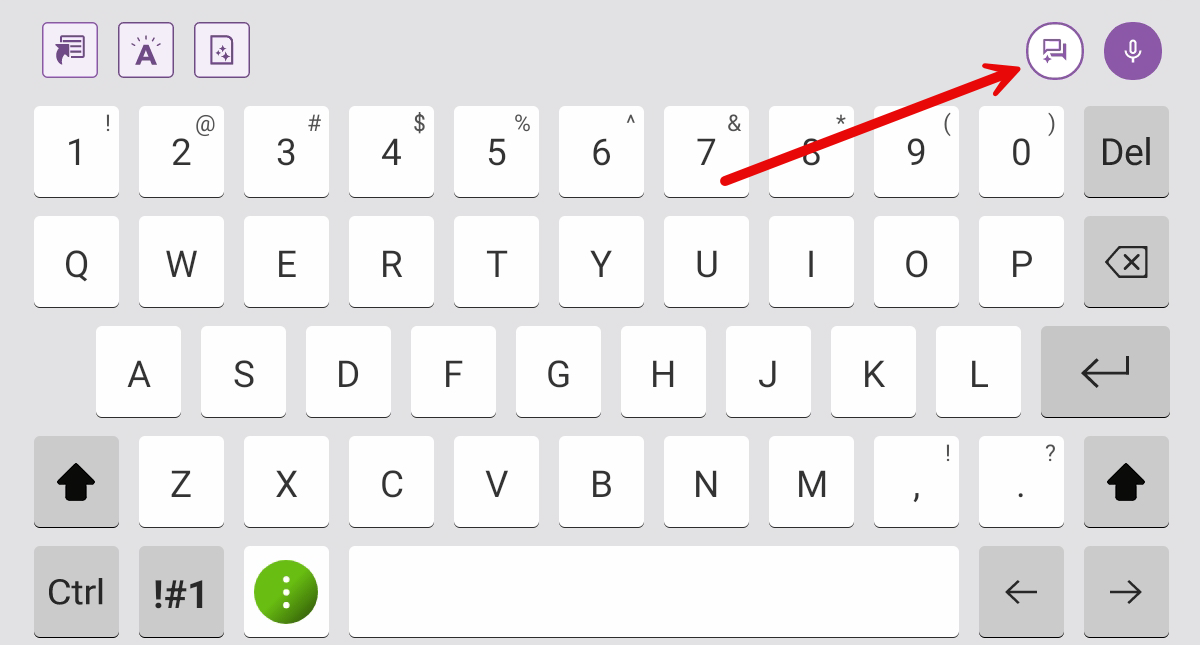
You can tap the Voice Assistant button on the keyboard.
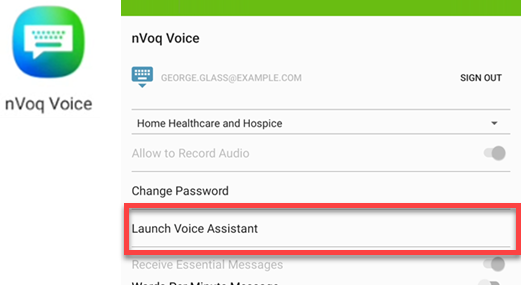
If you don't see your keyboard, tap the nVoq Voice icon on the home screen to bring up the settings screen, then tap Launch Voice Assistant.
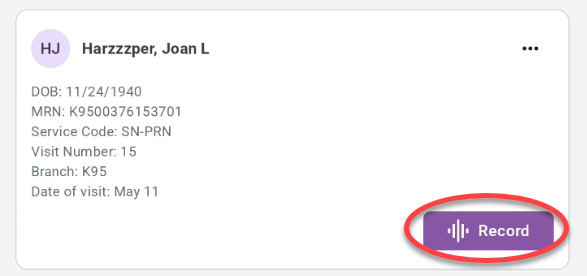
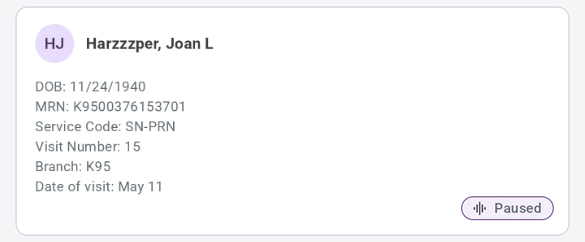
Patient visit cards appear on the Voice Assistant home screen and include patient data, such as name, date of birth, visit number, etc..
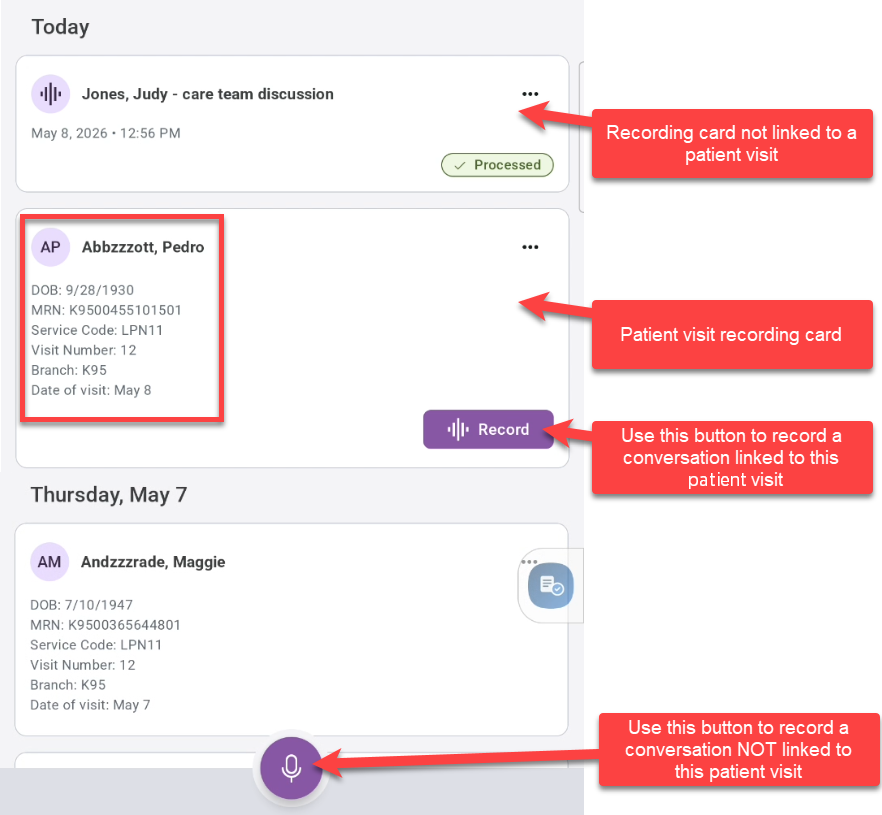
Patient visits downloaded from your EHR appear on cards on the Voice Assistant home page along with any other conversation recording cards that are not linked to a patient using the sync app.
The Record button on patient visit cards is used to start a recording linked to that patient visit.
Patient visit recording cards display a Record button when no recording is associated with the visit, including visits dated in the past.
Once a recording is associated with a visit, the Record button is replaced with the current recording status (Recording, Paused, Processing, In Queue, or Processed).
The microphone button at the bottom of the screen can be used to record a conversation that is not linked to a patient visit.
Click the Record button on a patient visit card to start a new recording for that visit.
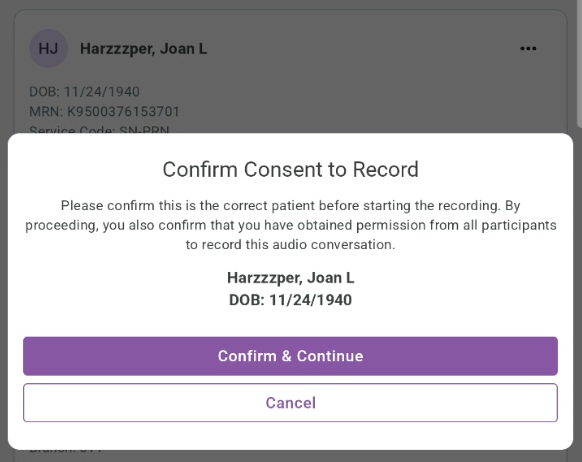
A confirmation message appears asking you to verify that this is the correct patient and that you have obtained permission from all participants to record the patient visit. If both statements are correct, tap Confirm & Continue.
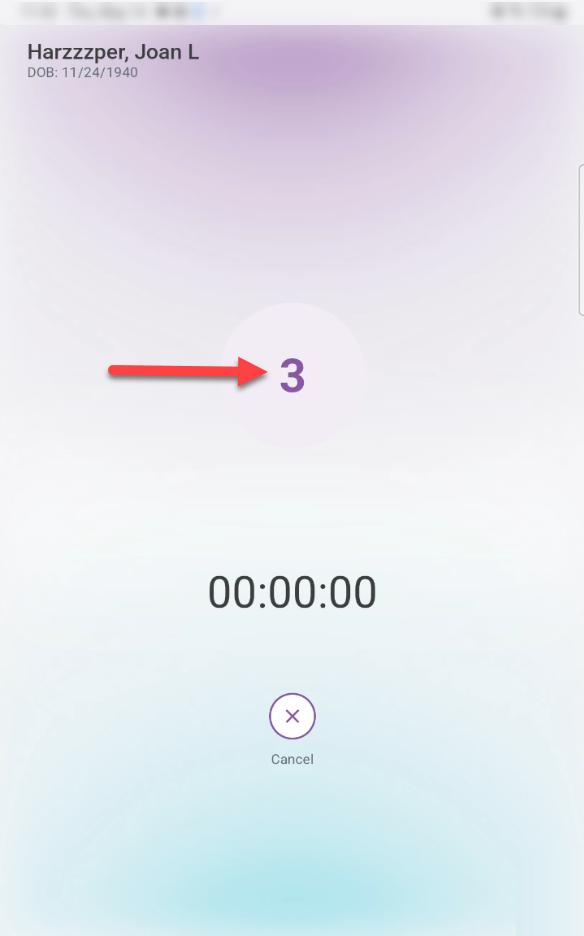
There is a countdown before recording starts. DO NOT LEAVE THIS SCREEN BEFORE RECORDING STARTS. If you do, your recording will not start.
Then a brief message about waiting for recording to start while the service is starting.
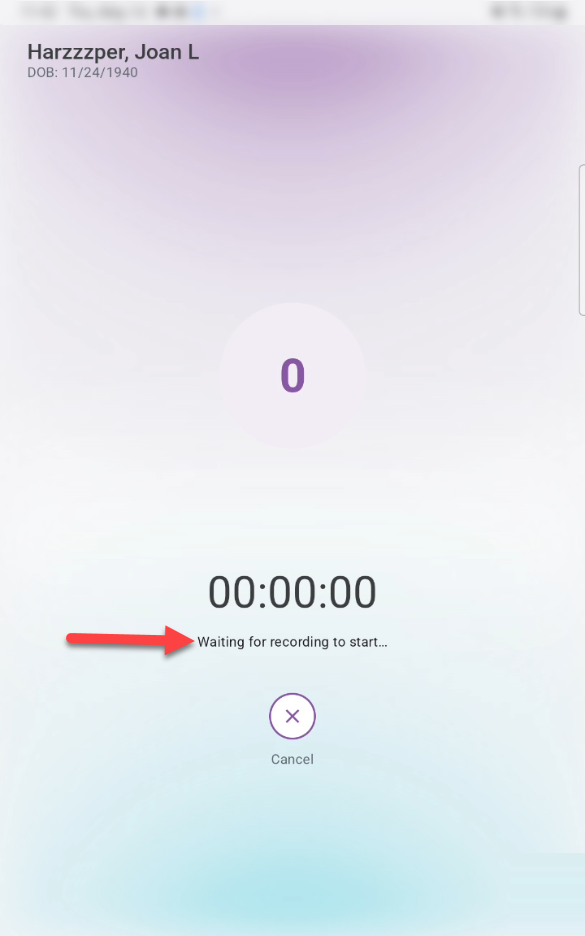
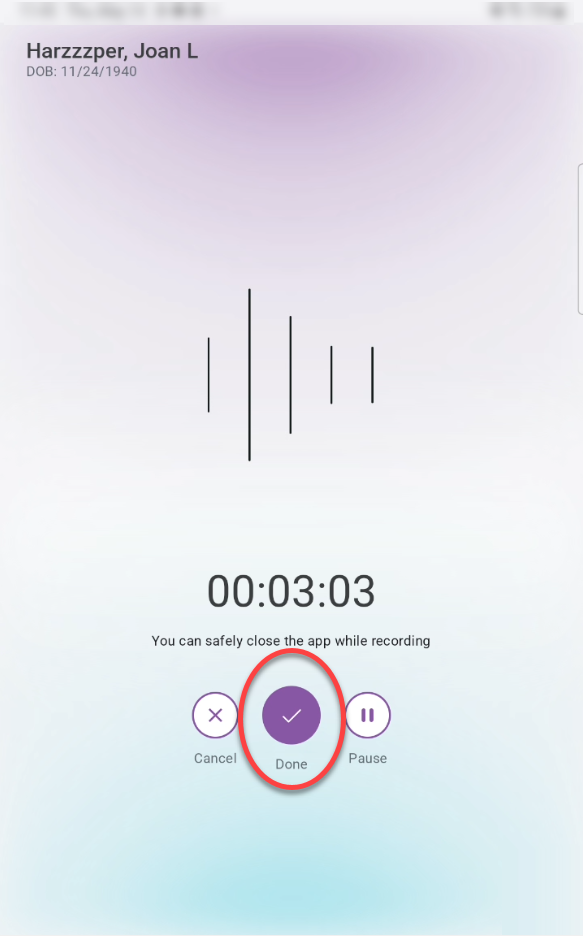
When Voice Assistant is ready to record, a timer begins. At this point, your patient visit is being recorded.
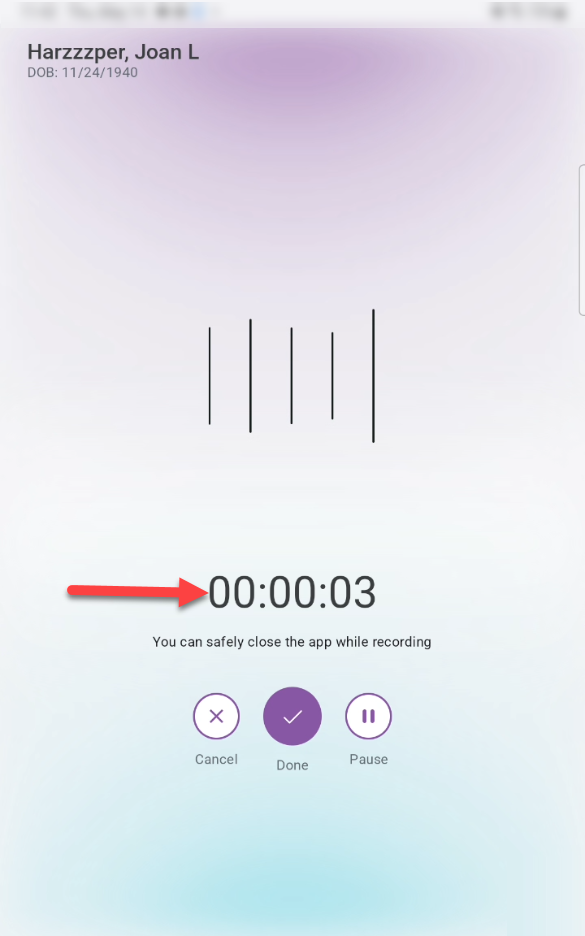
You can leave the recording screen and access other apps on your device while recording your patient visit. Recording status is displayed on the recording card. You can tap the recording card to return to the recording screen.

A notification appears in your notification panel. You can pause or stop the recording using the buttons on the notification, or stop the recording by swiping the notification left or right.

You can record for up to 3 hours (or whenever your device runs out of enough space or battery life to continue).
If your device goes offline while you are recording, a message appears at the top of the screen and remains visible until the device is back online. You can continue recording while offline, and your recording is saved locally on your device until connectivity is restored.

Talk with your patient or care team as you would normally speak (don't worry about punctuation).
Formatting commands (like "new paragraph" or "number next"), punctuation, substitutions, vocabulary, shortcuts, and sentence modeling are not supported when recording a patient visit.
Be sure to say out loud what is happening and your findings so that they will be included in your note.
The keyboard will be available when you tap into a text area. You can type and even record a regular dictation while simultaneously recording in Voice Assistant.
Return to Voice Assistant by tapping the Voice Assistant button on the keyboard.
On the Voice Assistant Home screen the recording card for the recording in progress says "Recording." Tap the recording card to return to the recording screen.
If the discussion shifts to something unrelated or is temporarily suspended, tap Pause to stop recording until you’re ready to continue.
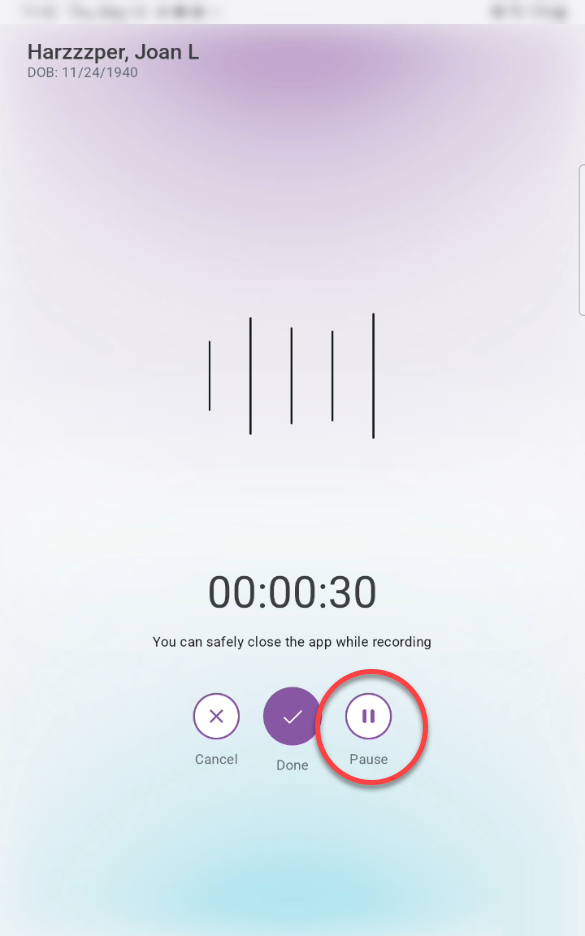
You can pause the recording for up to 24 hours. Pause as many times as you like.
If you leave Voice Assistant while paused, just tap the recording card to return to the recording screen.
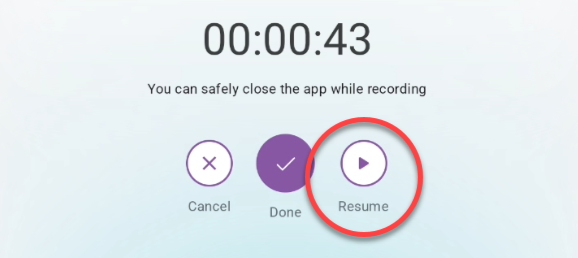
Tap Resume on the recording screen to resume recording.
Tap Done when patient visit is complete.
A confirmation will appear. Tap Stop and Finalize to end the recording.
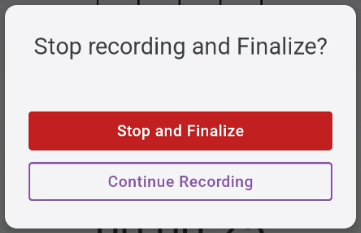
Tapping Continue Recording will resume recording.
Before the recording, transcript, and summary are finalized, the recording card shows that the recording is processing.
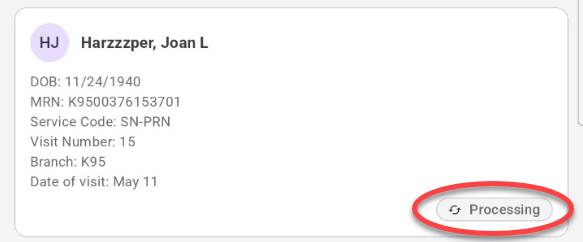
If your device is offline when the recording is finalized, the recording card displays a status of “In queue”.
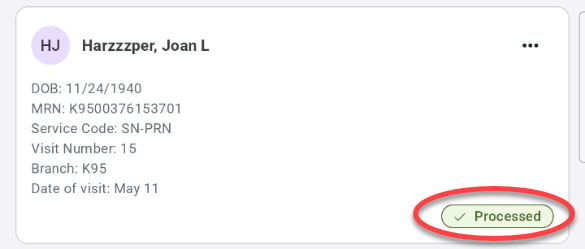
When processing is complete, a message appears at the top of the screen to let you know.

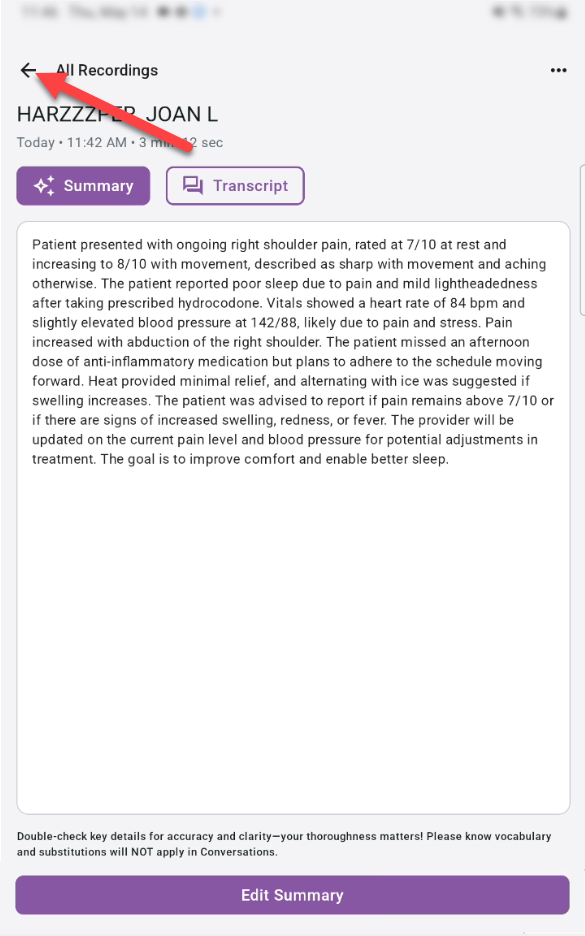
Tap the recording card of the patient visit (which now shows that it is processed) to view the transcript and summary of the recording.
The Transcript tab displays the full text of the patient visit conversation. If necessary, scroll to view the entire conversation.
An audio player below the conversation text lets you listen to the visit recording.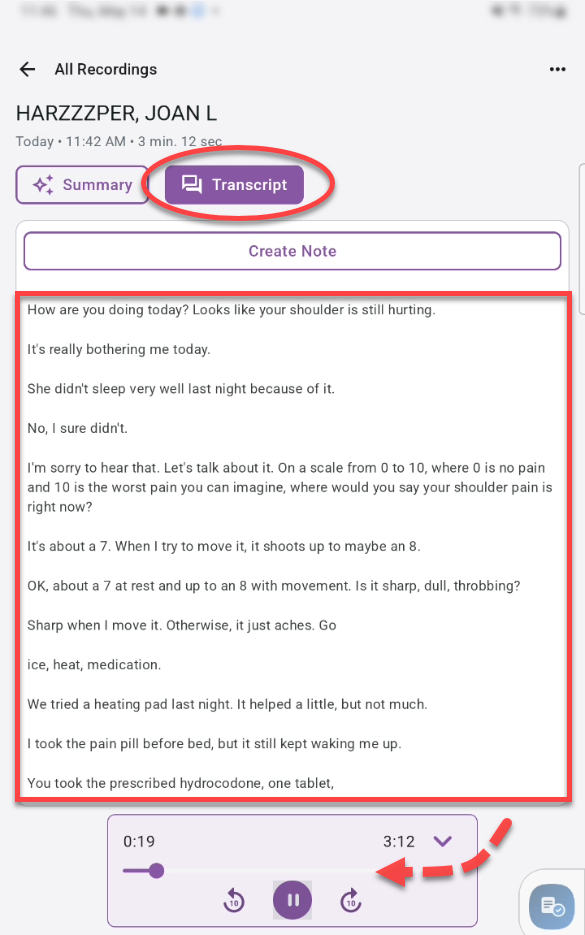
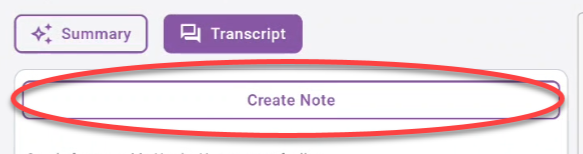
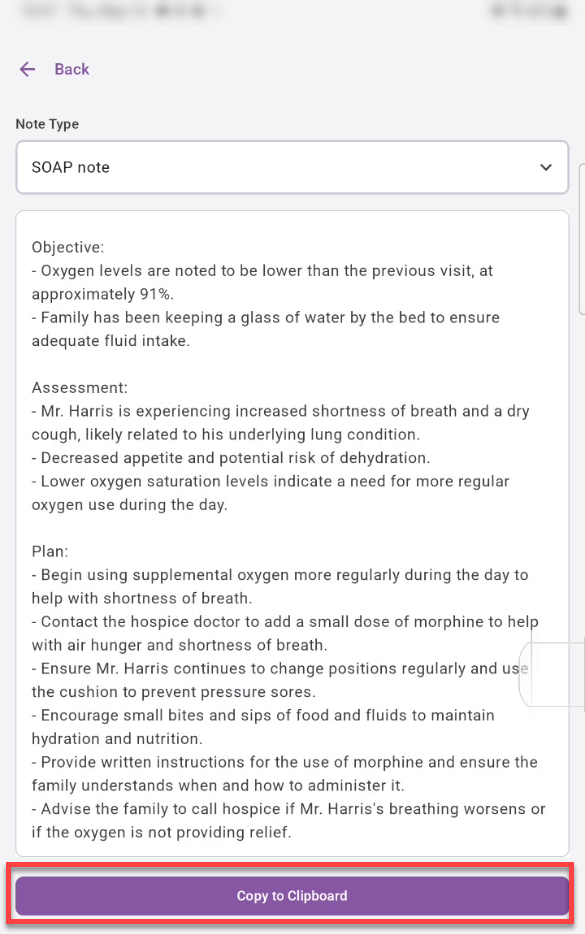
Optionally tap Create Note to to create a formatted note from the transcript using Note Compose. (The original transcript remains read-only.)
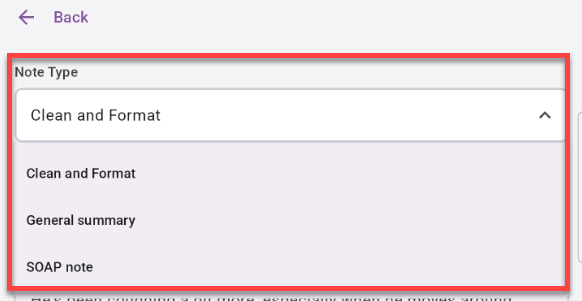
Select a formatting option from the Note Type menu.
The note is generated from the transcript with your selected formatting.

Tap into the text area to open the keyboard and make changes to the note.
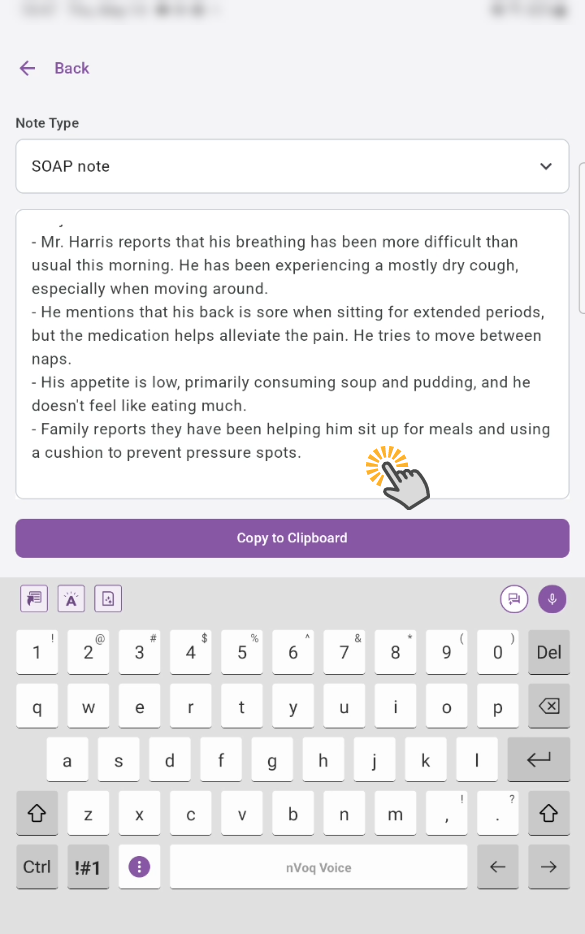
Tap the Copy to Clipboard button to copy the generated note, which you can paste into your EMR.
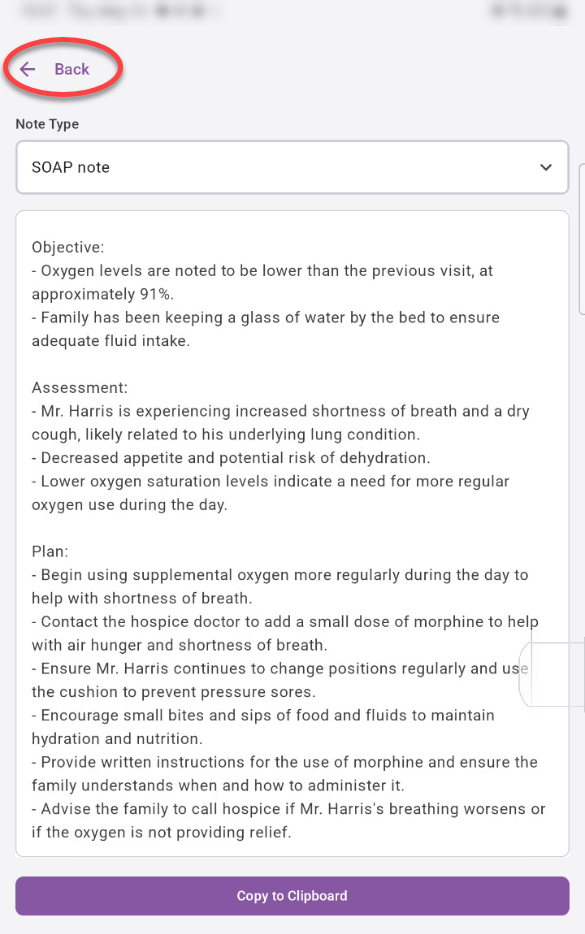
Use the back arrow to go back to the previous screen.
Tap the Summary tab to see a concise overview of the conversation.
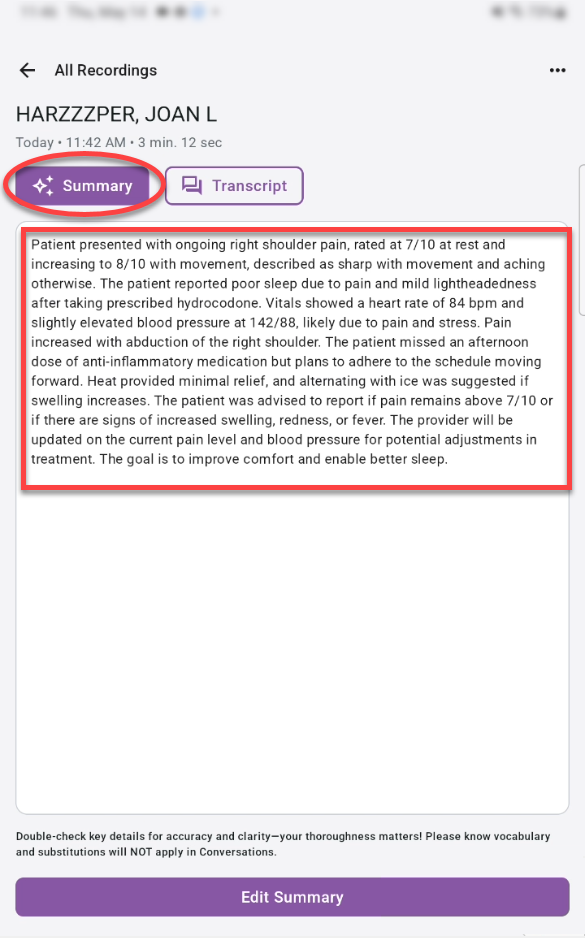
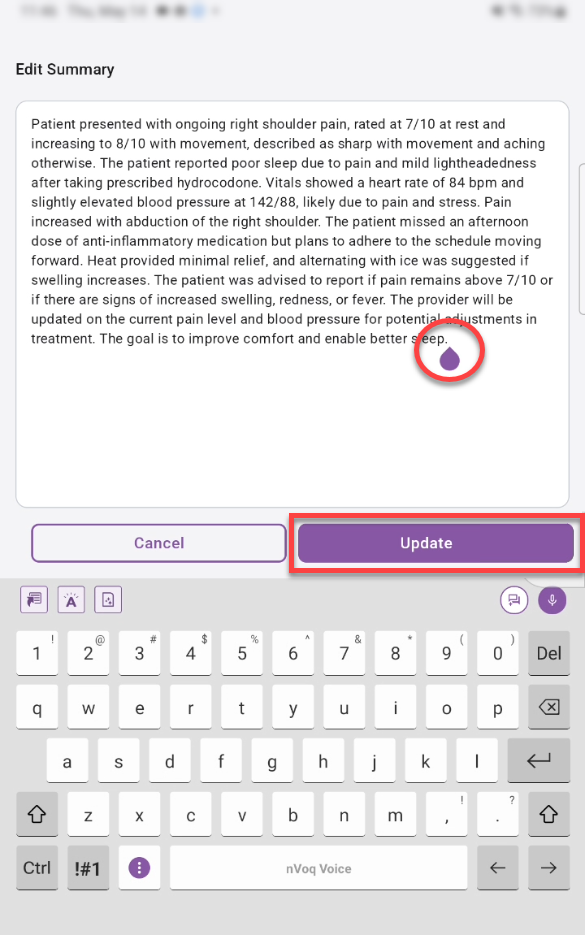
Optionally, tap Edit Summary to make changes to the summary text.
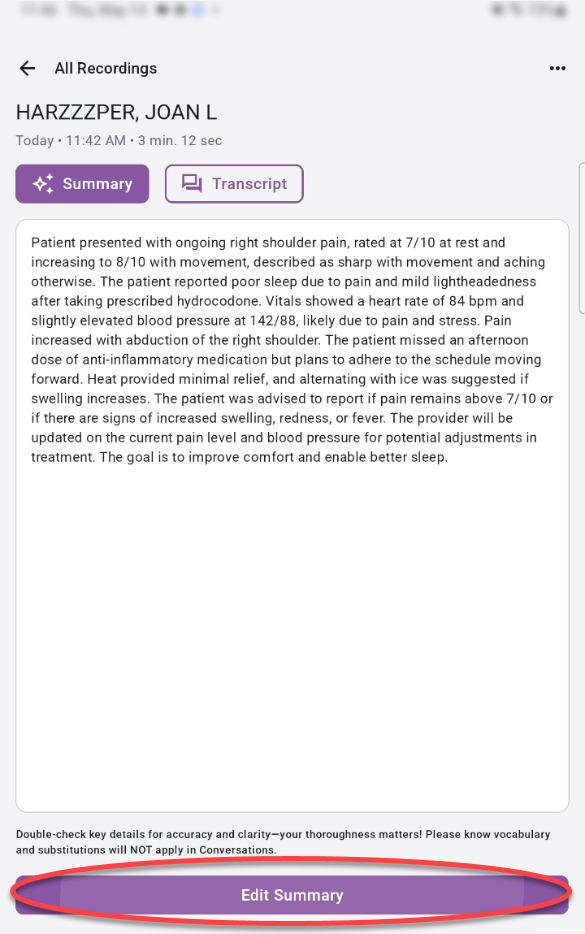
Place your cursor where you want to add or remove text.
Make changes to the summary using the keyboard or dictation.
Then tap Update to save your changes.
Tap the All Recordings arrow to go back to the recording card list.
Canceled Recordings
If you cancel a patient visit recording, the recording is removed from the visit and the visit card returns the pre-recording state (with a record button, allowing you to start a new recording for that visit.
Canceled recordings are automatically deleted from the device, but do still appear in nVoq Administrator Review & Correct.
Delete a Visit Card
You can delete visit cards that either have no associated recording or for which an associated recording has finished processing.
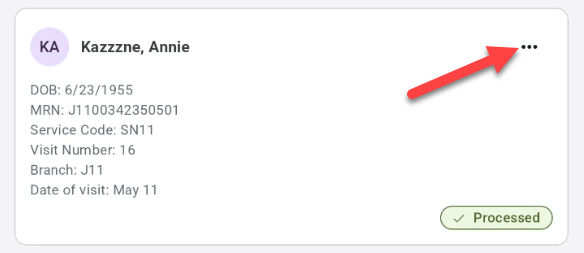
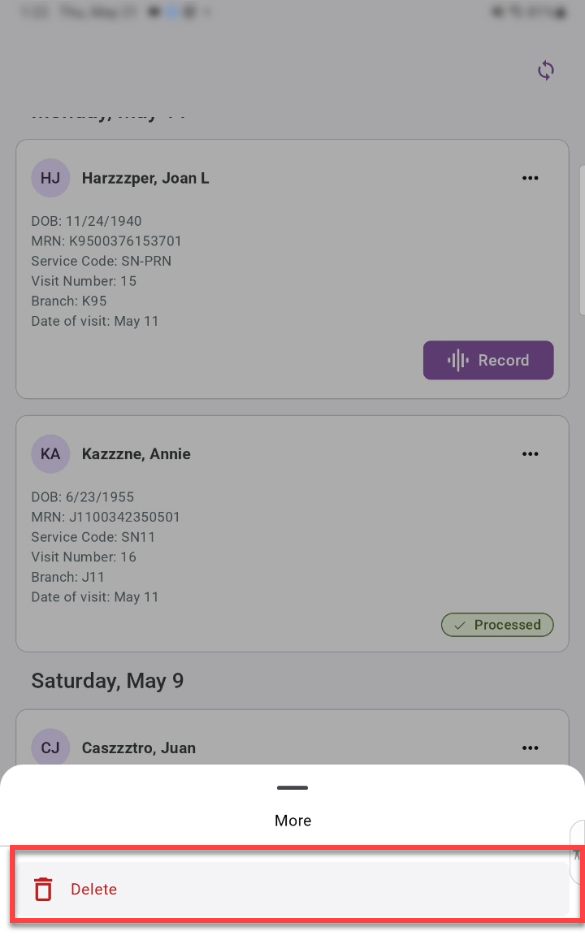
Tap the 3-dot menu on the patient visit card. (This menu is only available if the recording card has a Record button or a Processed tag.)
Tap Delete.
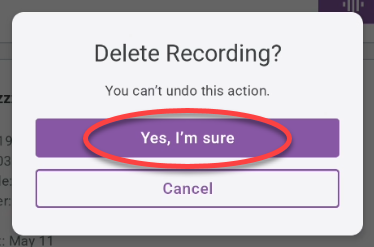
A Delete Recording? confirmation appears. Tap Yes, I’m sure to delete the recording card and associated recording (if any).
Note: Resyncing restores the patient visit card by removing previously downloaded visit information and downloading the latest visit data again.