When creating a new shortcut or editing an existing shortcut, the shortcut opens on the View tab. This is where you'll add or update the shortcut name, description, and configure what the shortcut does (like paste text, open a web page, or open a form to send an email).
Click into the Name field and enter a shortcut name.
If using voice shortcuts, this is the name to say to run the shortcut.
This name will display in the nVoq Voice popup shortcut menu, in the shortcut list in nVoq Mobile Voice and nVoq Wireless Microphone apps, and on the Shortcuts page in nVoq Administrator.
You can create an account shortcut with the same name as an organization shortcut. The account shortcut will take precedence. If you create a shortcut with the same name as a user's account shortcut, that user will not see the organization shortcut of the same name. Only the account shortcut will be available to that person.
The shortcut name can contain only alphanumeric characters, spaces, hyphens, underscores, or apostrophes.
Use a short phrase made up of just a few words.
Words that you can look up in a dictionary work best for voice shortcut recognition.
If you attempt to create a shortcut with the same name as a shortcut that already exists in the account or organization you're viewing, you may see a message saying "Duplicate name" below the name field. Note: This message will only appear after you have clicked out of the Name field. If you don't see the "Duplicate name" message, you should see a popup notification after you try to save the shortcut letting you know that the shortcut could not be saved.
This field can accept up to 100 characters. If you attempt to create a shortcut with a name that exceeds 100 characters you will see a message saying "Too long" below the name field.
You cannot have two shortcuts with the same name with the only difference being that one includes a hyphen (follow-up) and one has an underscore (follow_up).
Click into the Description field (just to the right of the name field) to enter a description. (Optional)
This field can accept up to 512 characters, so descriptions can include information about the shortcut, like how or where it works.
The shortcut description is displayed on the Shortcuts page in nVoq Administrator, and when viewing shortcuts from the Manage Shortcuts screen in Mobile Voice.
Create or make changes to the shortcut functionality.
All shortcut types include a Written Form text area. The maximum number of characters that can be entered into this text area is 90,0000.
Insert Text
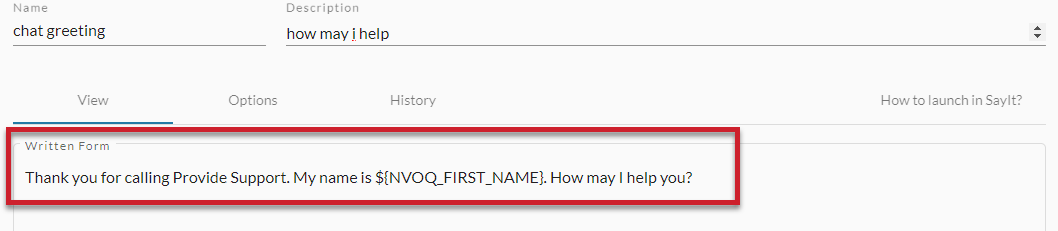
For Insert Text shortcuts, enter the text that the shortcut should paste in the Written Form text area on the View tab.
This is the only type of shortcut that can be run by nVoq.Voice or nVoq Mobile Voice.
For more information about shortcuts that Insert Text, see Insert Text in the Shortcut Guide.
For examples of different ways Insert Text shortcuts can be used, see Shortcut Examples.
Open Web Page
For Open a Web Page shortcuts, enter the URL (web address) that the shortcut should open in the Written Form text area on the View tab.

For more information about shortcuts that Open a Web Page, see Open Web Pages in the Shortcut Guide.
Open an Application or File
For shortcuts that Open an Application or File, enter the file location of the file, folder, or application that the shortcut should open in the Written Form text area on the View tab. You can include optional application parameters in the Application Parameters field (for example,
/c ipm.appointment). The Application Parameters field has a maximum character limit of 10,000. The Save key is disabled when a validation error occurs in the text area or Application Parameters field.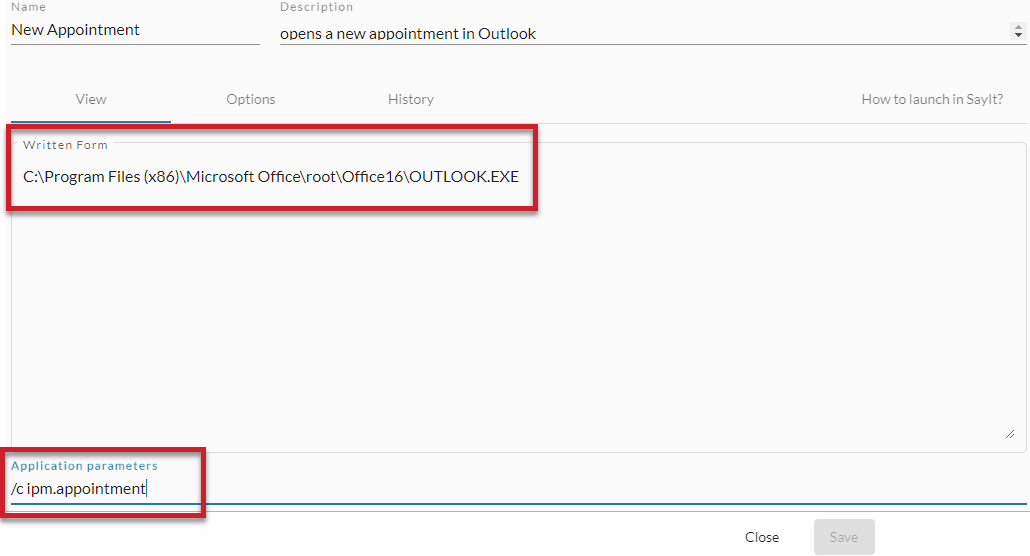
For more information about shortcuts that Open an Application or File, see Open Files, Folders, and Applications in the Shortcut Guide.
Keyboard Automation
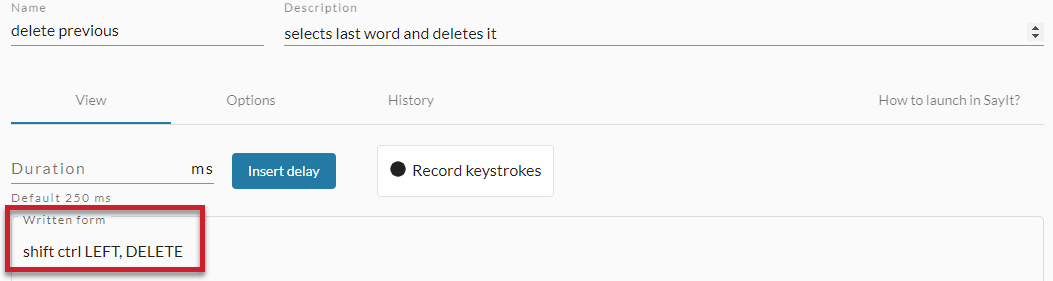
For Keyboard Automation shortcuts, enter the keystrokes that you want the client to "type" when you run the shortcut into the Written Form text area. You can manually enter keystrokes OR you can record keystrokes to create the shortcut.
For more information about Keyboard Automation shortcuts, see Keyboard Automations in the Shortcut Guide.
To manually enter keystrokes:
Tap the Record Keystrokes button to the OFF (not recording) position.
Type (or copy and paste) key combinations separated by a comma in the Written Form text area on the View tab.
If you need to, you can click the Insert Delay button to add a default delay (250 milliseconds).
For a longer delay, enter a time parameter (in milliseconds) into the Duration field and THEN click the Insert Delay button (delay=1000). Alternatively you could add multiple "delays" in a row for a longer delay (
delay, delay, delay, delay, delay). Each "delay" is 250 milliseconds.Click the Save button.
You cannot paste text into the Written Form field while Record Keystrokes is recording.
To record keystrokes:
Ensure that the Record Keystrokes button is in recording mode. (pulsating red dot = recording)
Place your cursor in the Written Form text area on the View tab.
Press they keys on your keyboard needed to run your automation.
The key recorder will automatically a comma between each keystroke.
You can hold down multiple keys at once.
While running a keyboard automation you may need to add a delay to pause your shortcut to let your application or computer catch up.
There are some key combinations that would steal focus from the key recorder if pressed on the keyboard themselves while recording your shortcut. Therefore there is a special menu above the Written Form text area that allow you to toggle these keys on and off while you record the keystrokes. These keys can be used one at a time (Control+A), or simultaneously (Control+Shift+Escape).
This special menu of buttons does NOT appear if not in record keystrokes mode.If you make a mistake and need to remove or change a keystroke, turn the key recorder OFF, delete or change the keystrokes in the Written Form field, and then turn the key recorder back on to continue recording.
Click the Save button.
ADD A DELAY
A delay causes a brief pause before sending the next key strokes.
Place your cursor in the Written Form text area.
Click the Insert Delay button to add a default delay. (250 milliseconds)
For a longer delay you can you can enter a time parameter (in milliseconds) into the Duration field and THEN click the Insert Delay button. (
delay=1000)You can also add multiple "delays" in a row for a longer delay. (
delay, delay, delay, delay, delay= 1000 milliseconds or 1 second)
INCLUDE THE SHIFT KEY
The Shift key is a keyboard modifier key that allows a user to type a single capital letter.
Tap the Shift box (next to the key record button) to turn recording for this key on. (Gray = ON)
Place your cursor in the Written Form text area.
Press the key or keys on the keyboards that you want to record while the Shift key is on.
 The Shift key can be recorded by itself by selecting the Shift box and then clicking the Insert "shift" only button.
INCLUDE THE CONTROL KEY
Control is a modifier key. NOTE: On Windows keyboards the key says Ctrl.
Tap the Control box (next to the key record button) to turn recording for this key on. (Gray = ON)
Place your cursor in the Written Form text area.
Press the key or keys on the keyboards that you want to record while the Control key is on.
 The Control key can be recorded by itself by selecting the Control box and then clicking the Insert "ctrl" only button.
INCLUDE THE ALT KEY
Alt is a modifier key most often used to in a key combination to perform certain actions.
Note: Apple computer keyboards use the option key in place of the Alt key.
Tap the Alt box (next to the key record button) to turn recording for this key on. (Gray = ON)
Place your cursor in the Written Form text area.
Press the key or keys on the keyboards that you want to record while the Alt key is on.
 The Alt key can be recorded by itself by selecting the Alt box and then clicking the Insert "alt" only button.
INCLUDE THE META KEY
The meta key is a key on some keyboards that can be used to perform special functions when combined with another key. Keys such as the Windows key (on Windows keyboards) or cloverleaf key (on Apple keyboards) fulfill the traditional function of a meta key.
Tap the Meta box (next to the key record button) to turn recording for this key on. (Gray = ON)
Place your cursor in the Written Form text area.
Press the key or keys on the keyboards that you want to record while the Meta key is on. The Meta button enters the word
WINDOWSin the Written Form field.
 The Meta key can be recorded by itself by selecting the Meta box and then clicking the Insert "WINDOWS" only button.
Insert Template
For Insert Template shortcuts, enter your text and bracketed (and/or double-bracketed) fields into the Written Form text area on the View tab.

For more information about shortcuts that Insert Templates, see Insert Template (for Select and Say) in the Shortcut Guide.
Workflow Automation
For Workflow Automation shortcuts, enter AutoIt script code into the Written Form text area. AutoIt scripts can be written in any text editor, and then copied and pasted into the Written Form field.
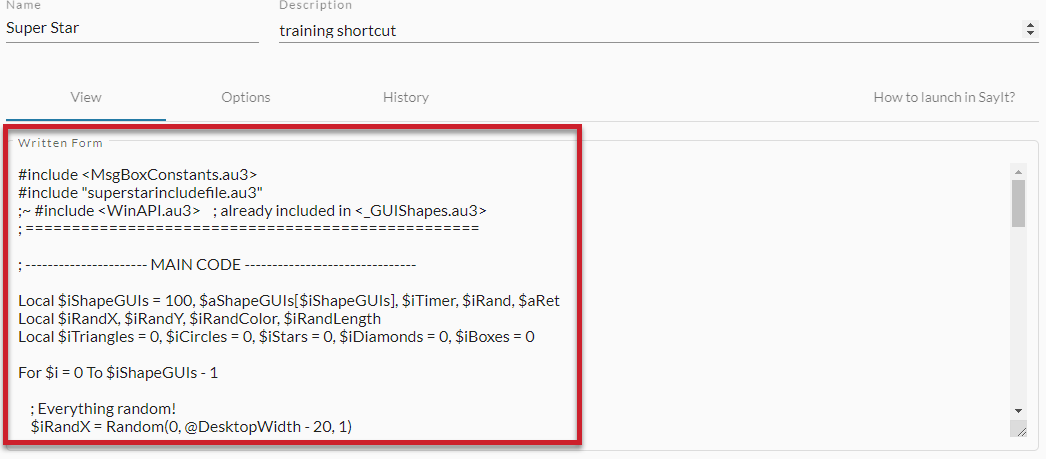
For more information about shortcuts that run Workflow Automations, see Workflow Automations in the Shortcut Guide.
Configure the shortcut options on the Options tab, such as adding an internal note about the shortcut, or whether the shortcut should be active or not.
Click the Save button at the bottom-right of the screen to save your work.
Newly added shortcuts are updated in user accounts asynchronously, which means that after adding the shortcuts in nVoq Administrator, affected user accounts are updated in the background. Dictation client users can still perform dictations while shortcuts are being updated on the server. Wait a few minutes for the shortcuts to be updated in user accounts before testing them.
If the shortcut could not be saved, a red popup notification will appear. Click on the Notification icon
 for more information about why the shortcut could not be saved.
When you're done making changes, click the Close button to go back to the shortcut list.