You can now use the Wireless Microphone even if you sign into Voice using an Okta or Microsoft SSO account! You will still need to sign into the Wireless Microphone with your nVoq account that has the same username as your SSO account. Your dictations will be matched up to your username as long as you sign in on the same system with the same username on both the Wireless Mic and Voice.
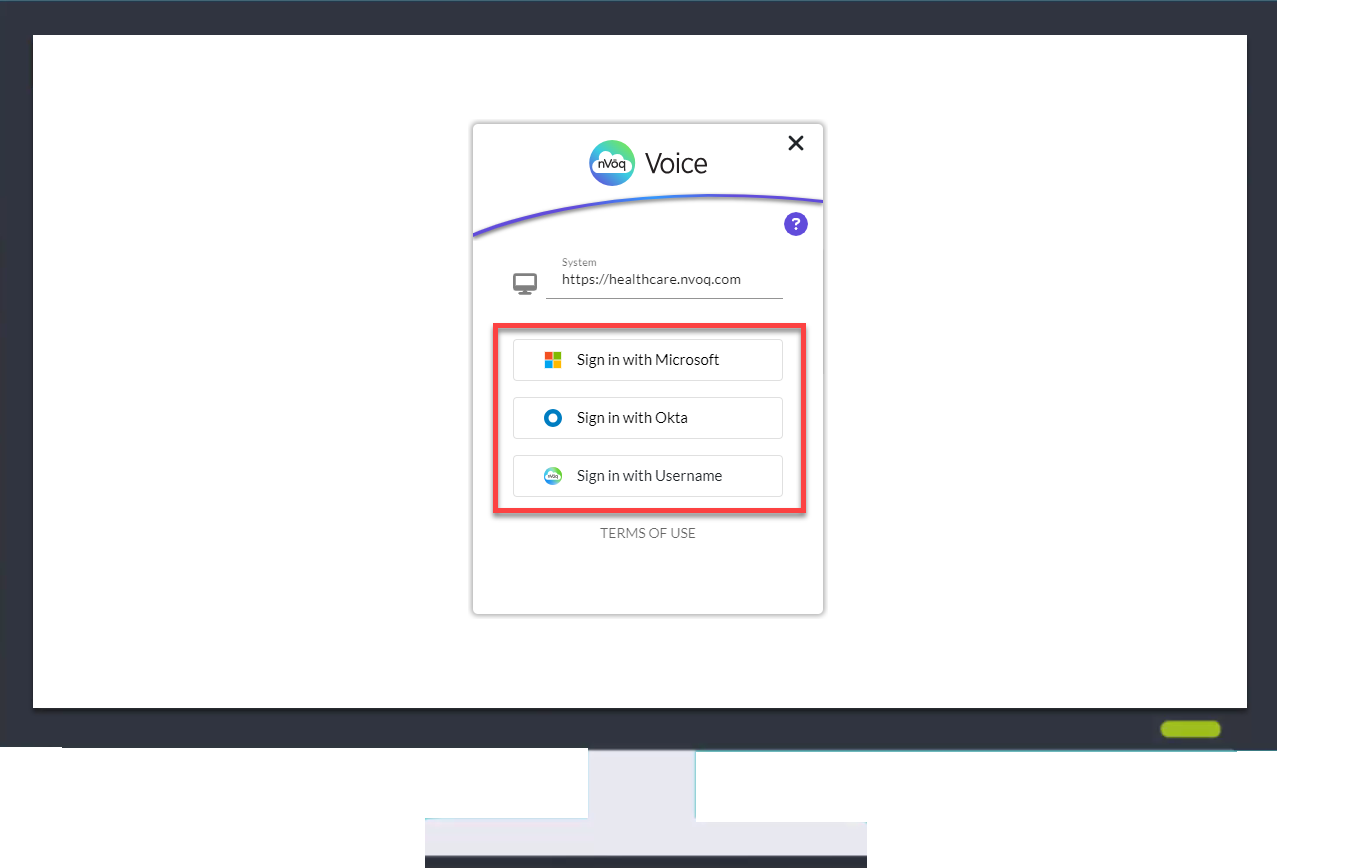
- On your computer, sign in to your dictation client. If nVoq Voice is your dictation client, sign in as you normally would either with an nVoq account or an Okta or Microsoft SSO account.
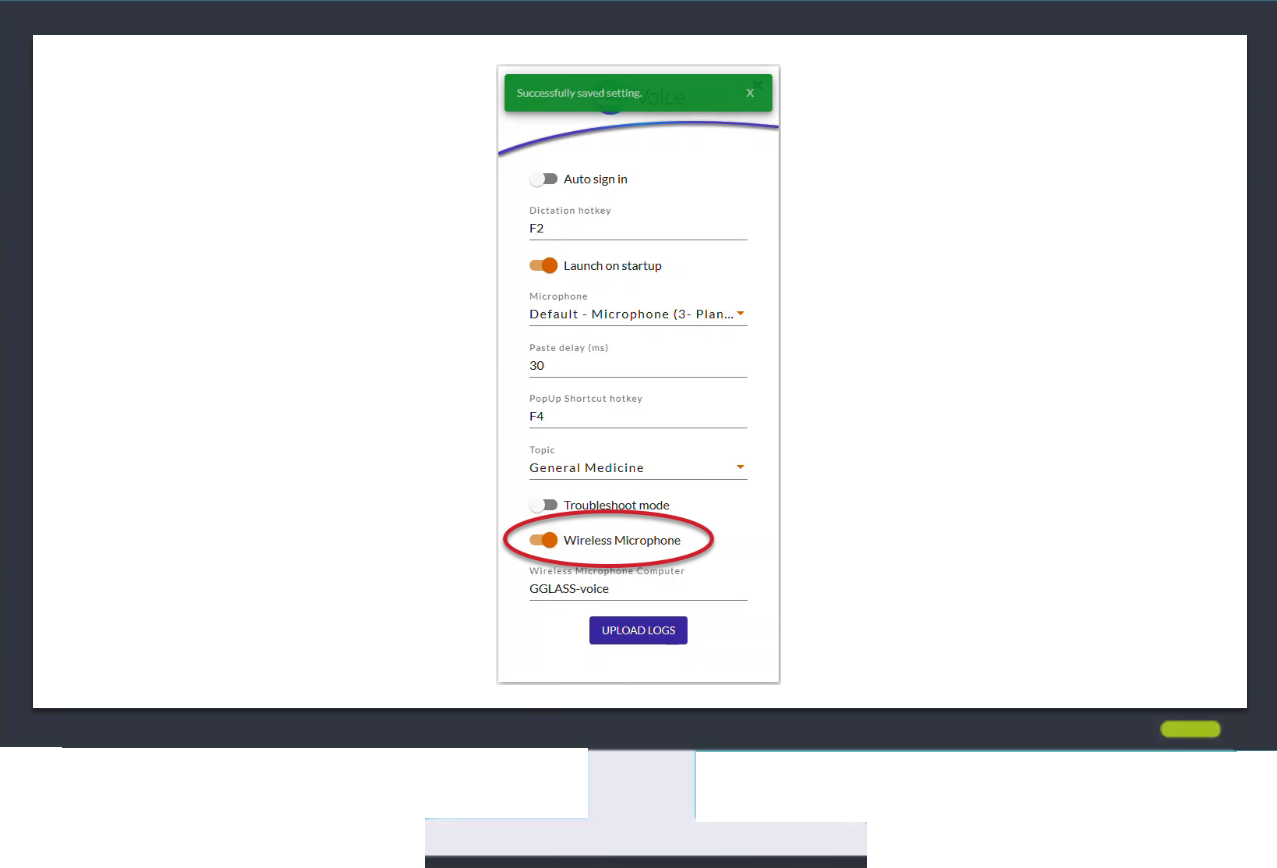
- Make sure your dictation client is configured to use the Wireless Microphone as the recording device. See Setup in nVoq Voice for more information.
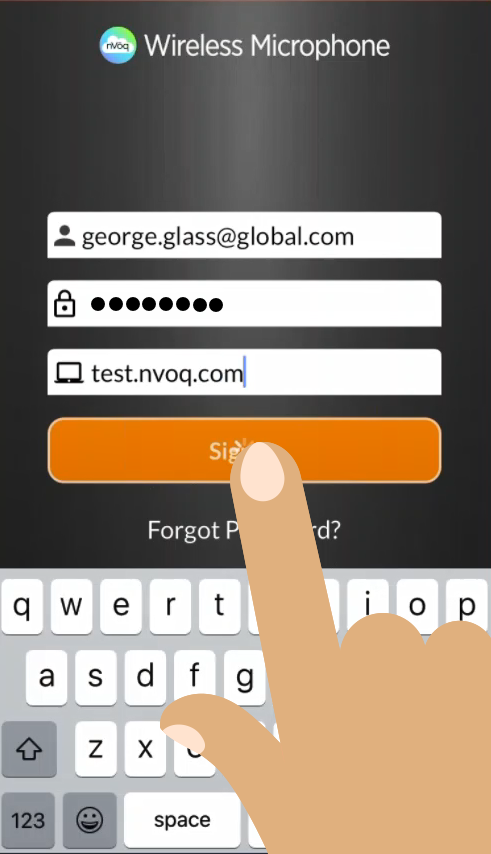
- On the Wireless Microphone sign in screen enter your nVoq Username and Password. Make sure you sign in with the SAME USERNAME you used to sign in to Voice. (If you signed in to Voice with a Microsoft or Okta account, the password may be different.)
 Forgot password?If you don't know your Username or Password, you can tap the Forgot Password? link on the sign in screen and follow the instructions (see Forgot Password).
 - Make sure you sign in to the SAME SYSTEM that you used to sign in to Voice.
- Accept the system that is listed (healthcare.nvoq.com by default) or tap the field to open a menu of previously added systems and choose (tap) a different system.
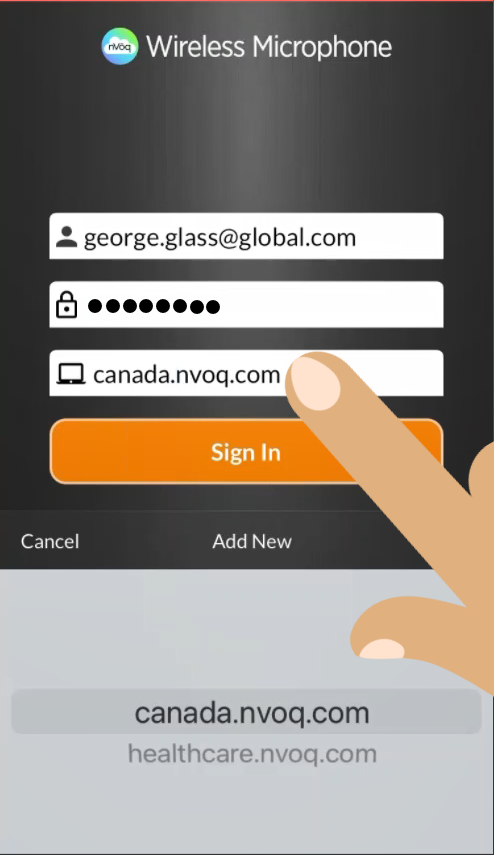
If you need to sign in to a system that is not listed, tap Add New and type in a new system name (i.e. test.nvoq.com).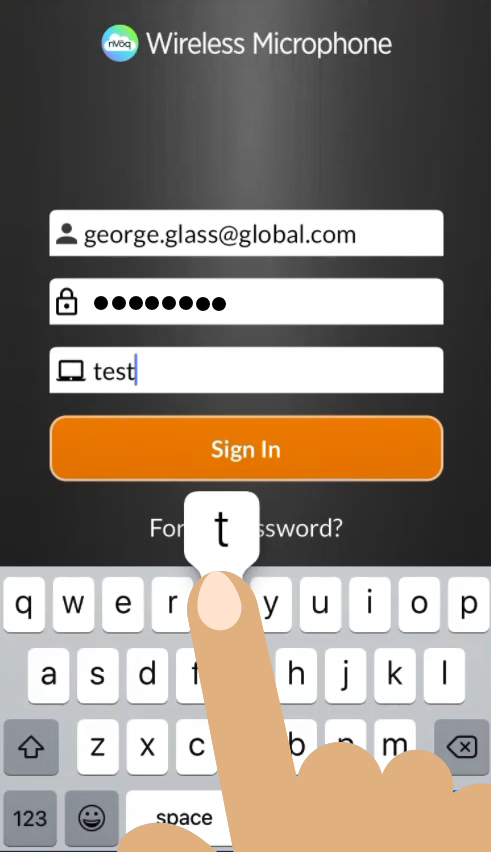
- Accept the system that is listed (healthcare.nvoq.com by default) or tap the field to open a menu of previously added systems and choose (tap) a different system.
- Tap the Sign In button.
Some possible error messages:
- Something went wrong. Try again later. - This may indicate that a connection cannot be made to the server. Make sure you are connecting to the Internet.
- Looks like you don't have the right privileges for using our dictation service. - This indicates that the account does not have client access. You must have client access configured for your account to use this application.
- Your account is temporarily locked. Please try again after 15 minutes or reset your password for immediate access. - Your account becomes locked when an incorrect password has been entered too many times. You can either wait 15 minutes to try to enter the correct password again, or you can tap the Forgot Password link on the sign in screen to change your password for immediate access. If you change your password be sure to sign out of ALL applications to which you sign in with an nVoq account (including Voice or your nVoq partner dictation client, Mobile Voice, and/or nVoq Administrator) and sign back in with your new password.
- This device appears to be jailbroken, which may compromise data security. For your protection, this application cannot be used on modified devices. Please use another device or contact your administrator for more information. - You will not be able to log in on a jailbroken device. nVoq recommends that customer organizations use a Mobile Device Management (MDM) tool that detects and prevents jailbreaking and rooting of their mobile devices.
- If your account was configured to require a password reset the first time you sign in, you will automatically be taken to the change password screen. Enter your given (old) password, and then enter a new password twice, and then tap the Change button.
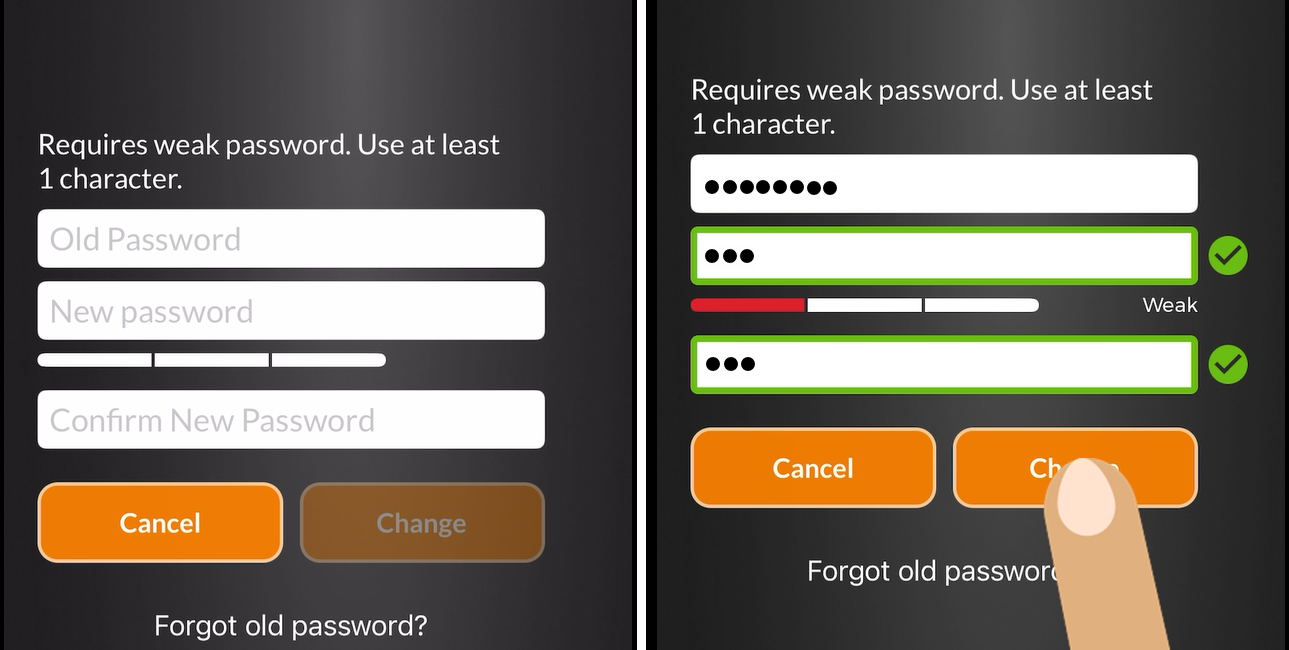
- The strength requirements for your new password are listed above the Old Password field.
- As you type into the New Password field, the outline of the field changes from red to green and a green checkmark appears when you have entered an acceptable password.
- As you type into the Confirm New Password field, the outline of the field changes from red to green and a green checkmark appears once you have entered a password matching the one you entered in the New Password field.
- A message may appear letting you know that we are required to ask for your permission to track your usage in the Wireless Microphone app. Click the Continue button, then tap Allow to allow nVoq to track your usage activity so that we can provide you with better support.
nVoq only tracks your usage for support and application improvement, so we recommend that you allow this. If you do not want to allow this you can tap Ask App Not to Track.
You will NOT see this message if the "Allow Apps to Request to Track" setting is disabled under your device Settings > Privacy.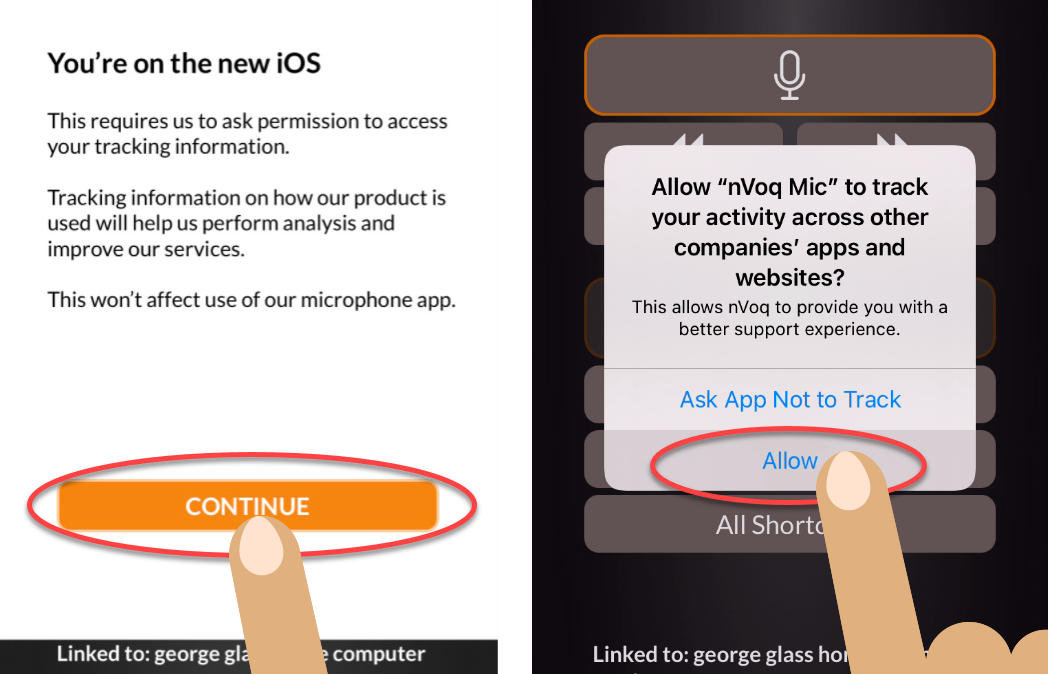
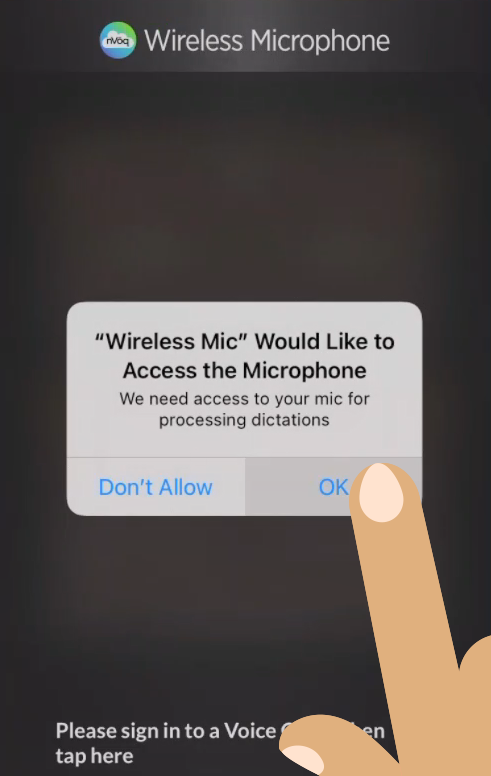
- A message tells you to grant access to the microphone so that you can get all of the functionalities of the app. If you don't grant access, the app won't work. Tap the Grant Access button.
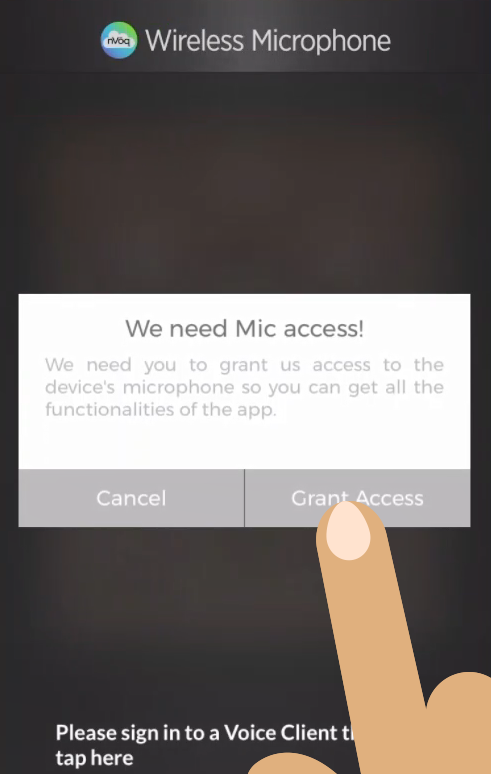
- Then the iOS operating system will ask you to confirm that the Wireless Mic should be allowed to access the microphone on your device. Tap OK.
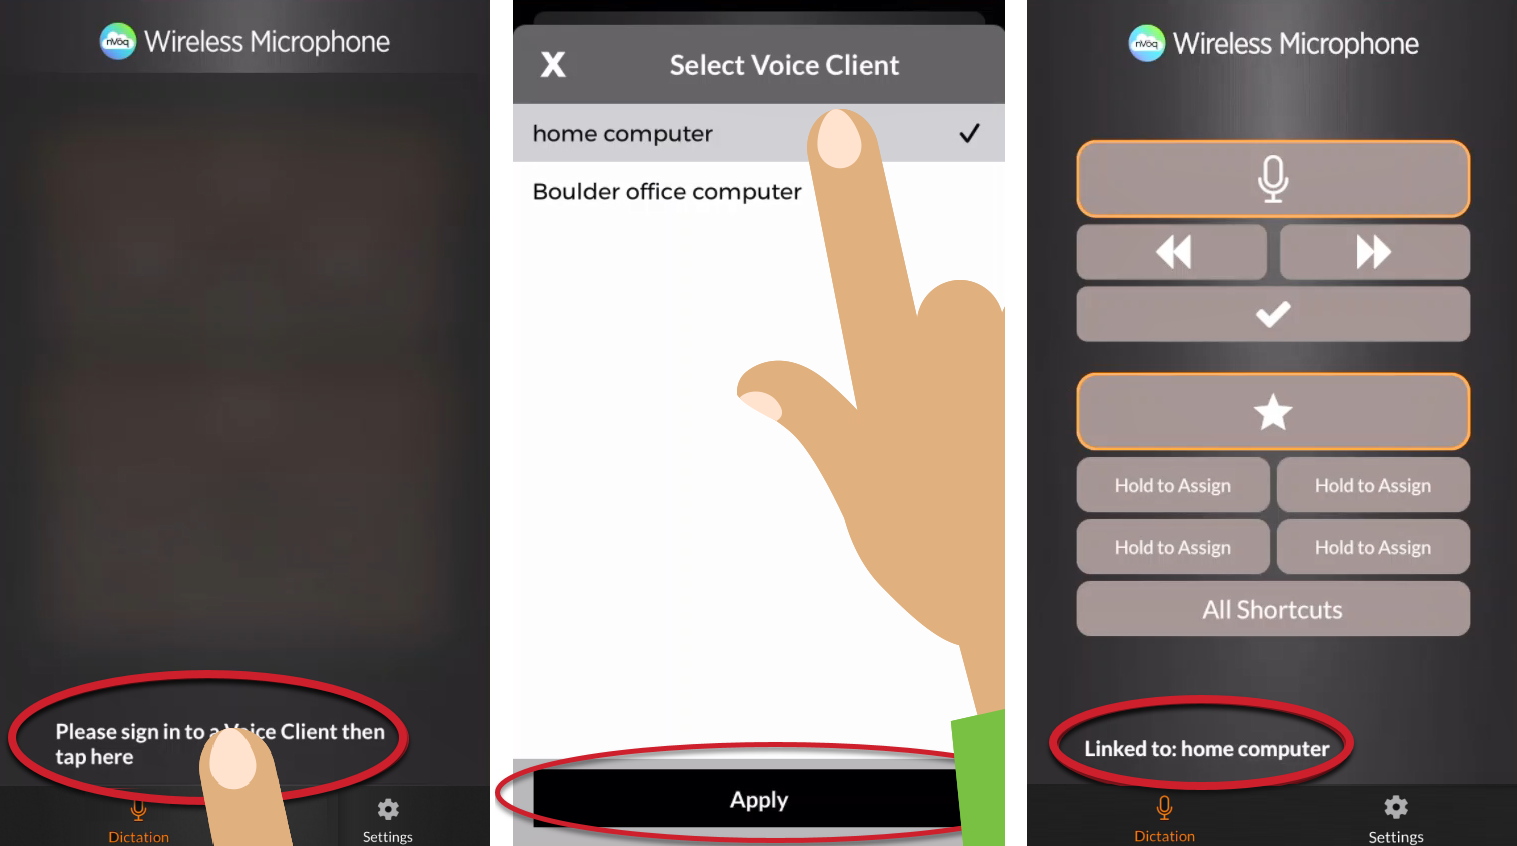
- If you are NOT already logged in to a dictation client, a message at the bottom of the screen will say, "Please sign in to a voice client and then tap here".
If you haven't already done so, before you can sign in to an nVoq dictation client you will also need to configure the dictation client to use the wireless microphone as the recording device. See Setup in nVoq Voice
Sign in to a dictation client and then tap that message to select a computer/dictation client to use with the Wireless Microphone.
- If you be using the Wireless Mic for dictation, log in to a voice client on your computer, and then tap the message.
- You'll be taken to a screen that lists all the voice clients to which you are currently logged in. Tap the client name you want to use to put a checkmark beside it, and then tap Apply.
- If there are NO voice clients listed on this screen you are either not logged in to a voice client OR you may not have enabled the voice client to use the Wireless Microphone as the recording device. See Setup in nVoq Voice
You can dictate to a client in a different location, you would just need to be signed in on the dictation client with the same username and password that you used to sign in on the Wireless Microphone app. For example, you can run the dictation on your computer at your office, then connect to it on the Wireless Mic app from home, and your dictation transcripts will appear on your office computer.
- Once you are logged in to a dictation client, the app will show some tips to help you get started with dictation and voice shortcuts. Tap the screen to advance through the tips. You must be logged in to a voice client to see this. This will only appear when you log in the first time.

Next Step...Use Dictation