These are the steps to follow if you need to switch to a new computer that you use with nVoq Voice and the nVoq Wireless Microphone (Android or iOS):
- Before turning off the old computer, make sure to sign out of nVoq Voice on the old computer *and* sign out of the nVoq Wireless Microphone.
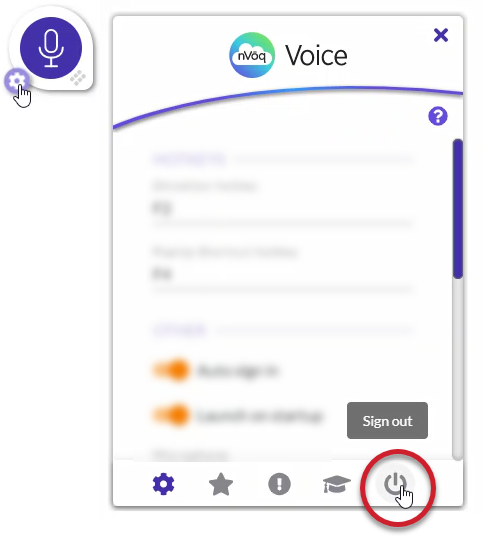
- Sign Out of Voice:
- Click the gear icon next to the dictation button to open the Settings.
- On the Settings screen, click the Sign Out icon.
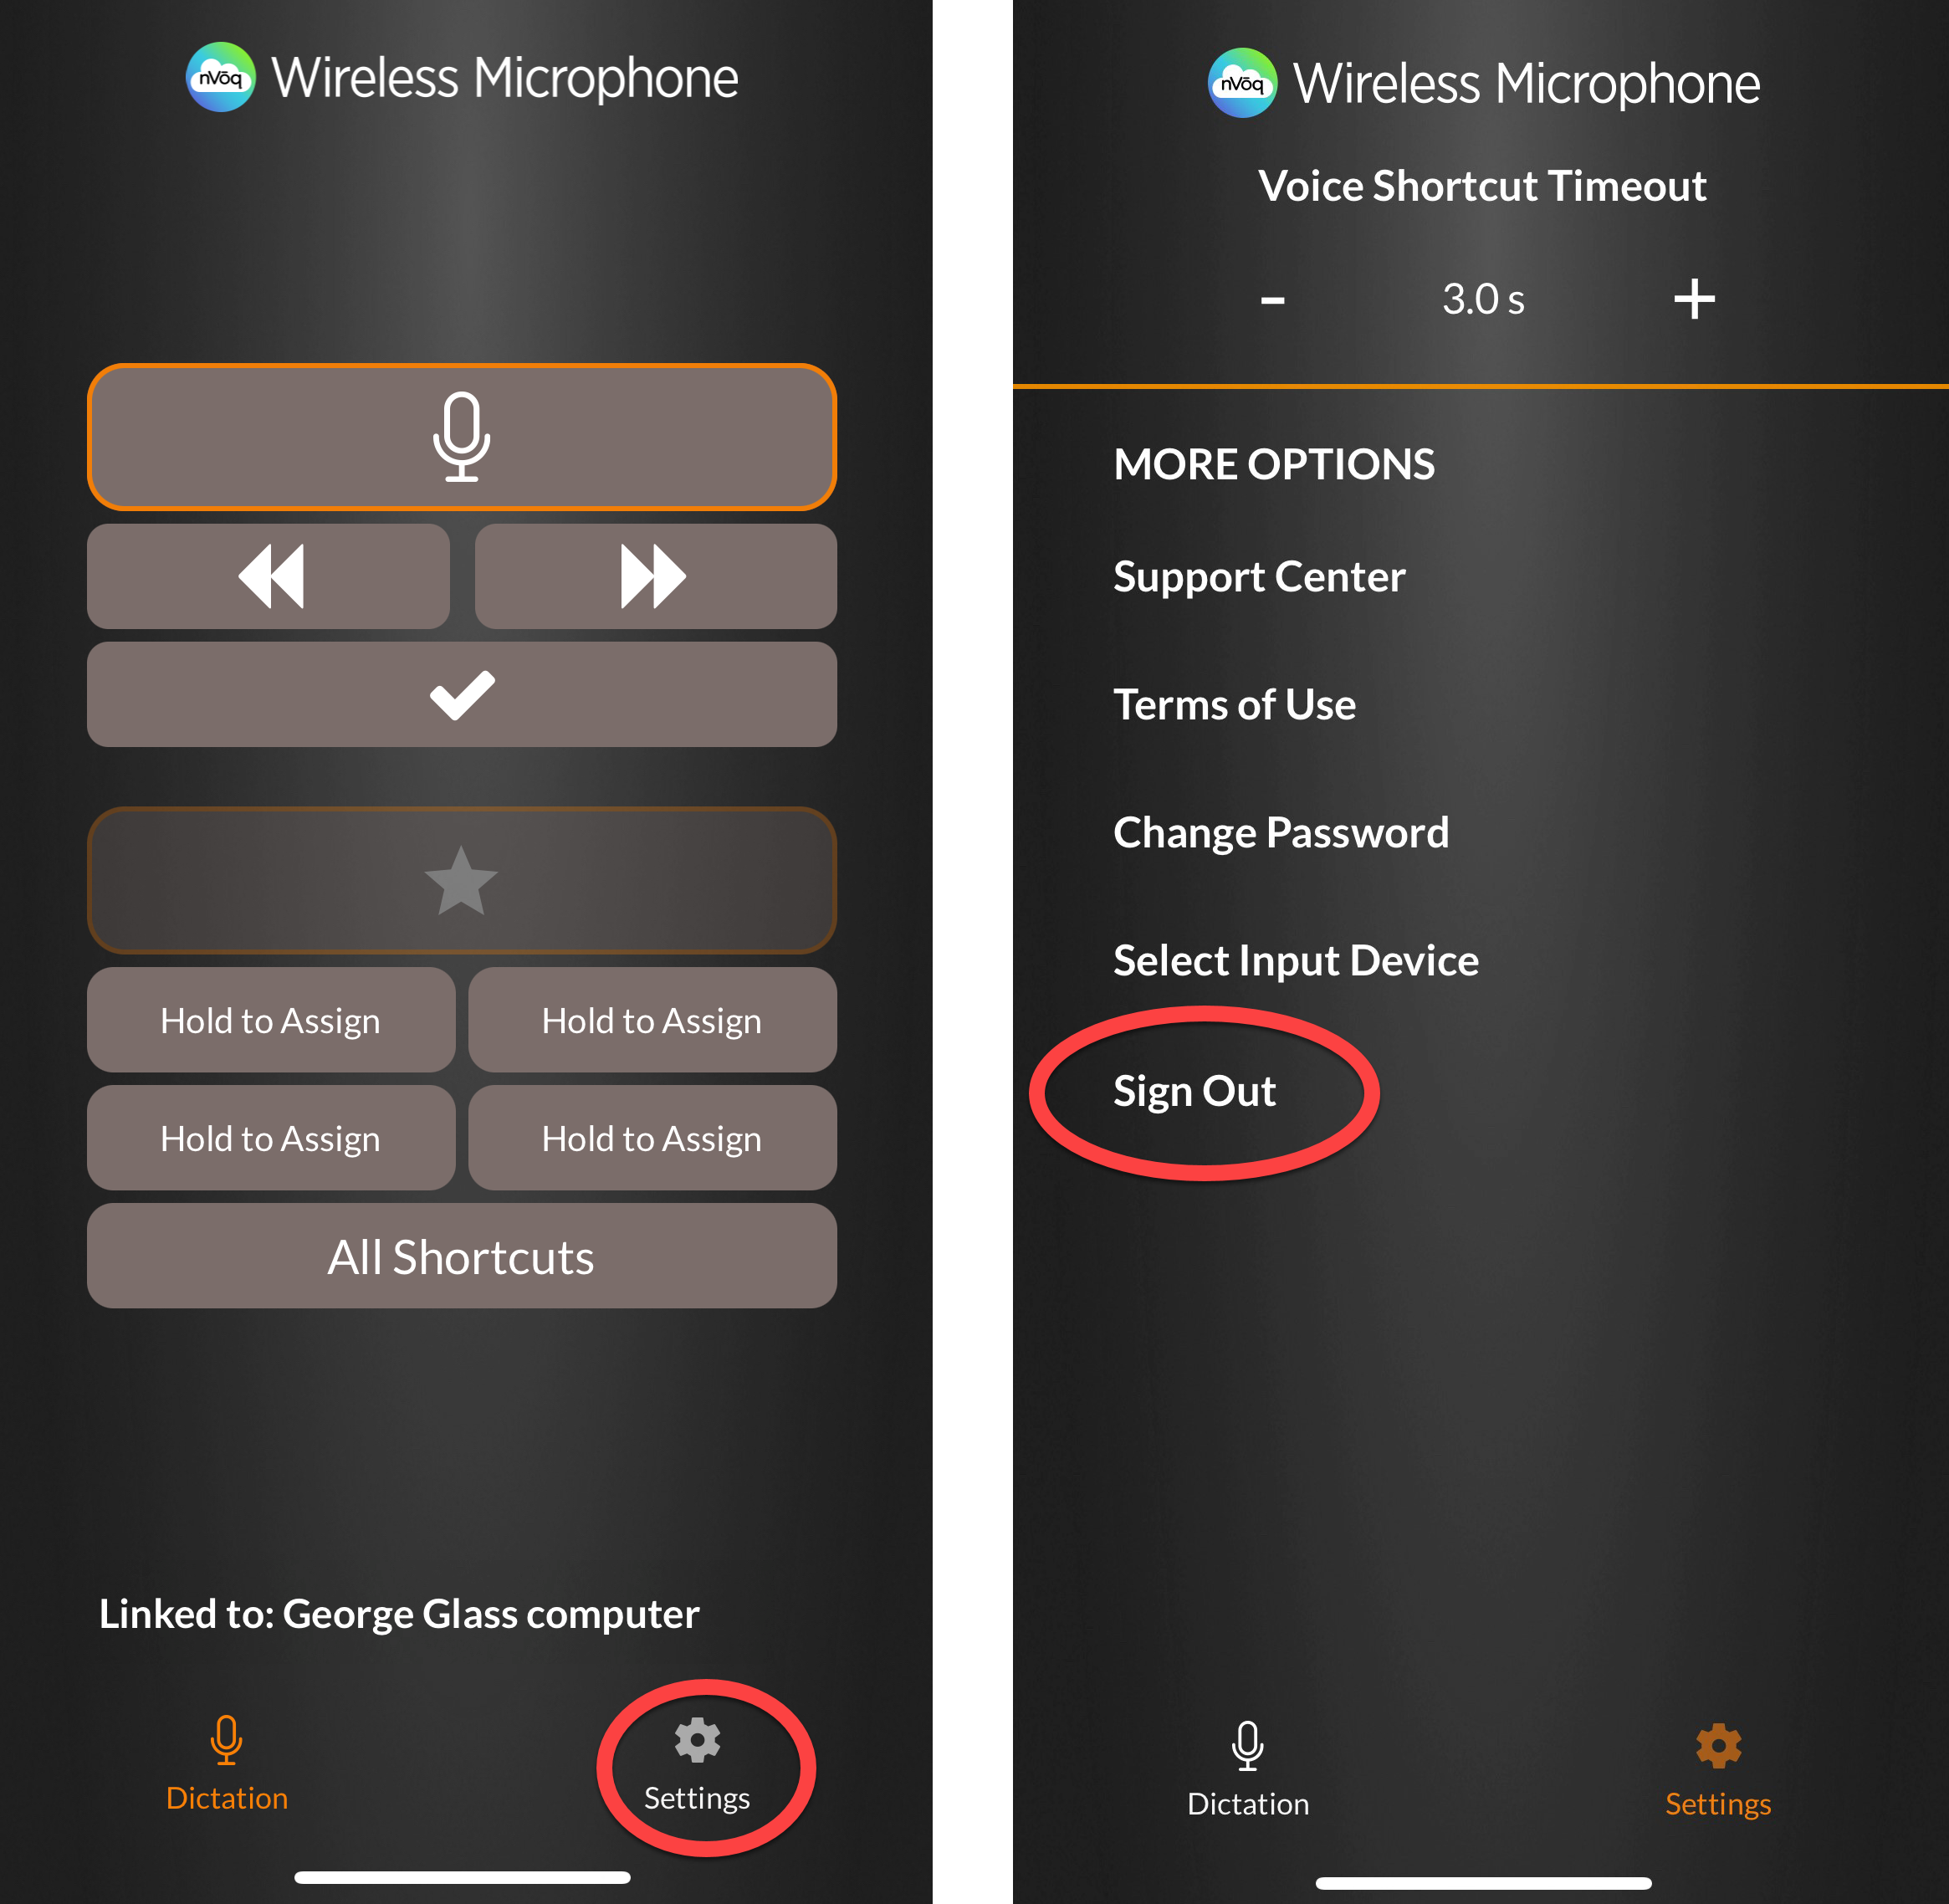
- Sign Out of Wireless Microphone:
- Tap the gear icon at the bottom of the screen to open the Settings.
- On the Settings screen, tap Sign Out.
- Sign Out of Voice:
- Install nVoq Voice on the new computer. (See Voice: Download & Installation)
- Sign in to nVoq Voice on the new computer. (See Voice: Launch & Sign In)
- In Voice, click the gear icon next to the dictation button to open the Settings.
- On the Voice Settings screen, enable the Wireless Microphone setting (toggle will be orange) and under Wireless Microphone Computer give the new computer a name. (See Voice: Settings)
TIP: To make possible troubleshooting easier, make this computer name something different than the name of your old computer.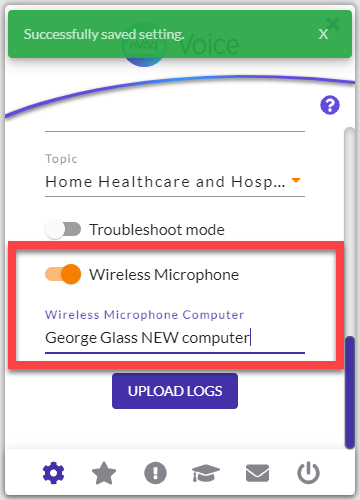
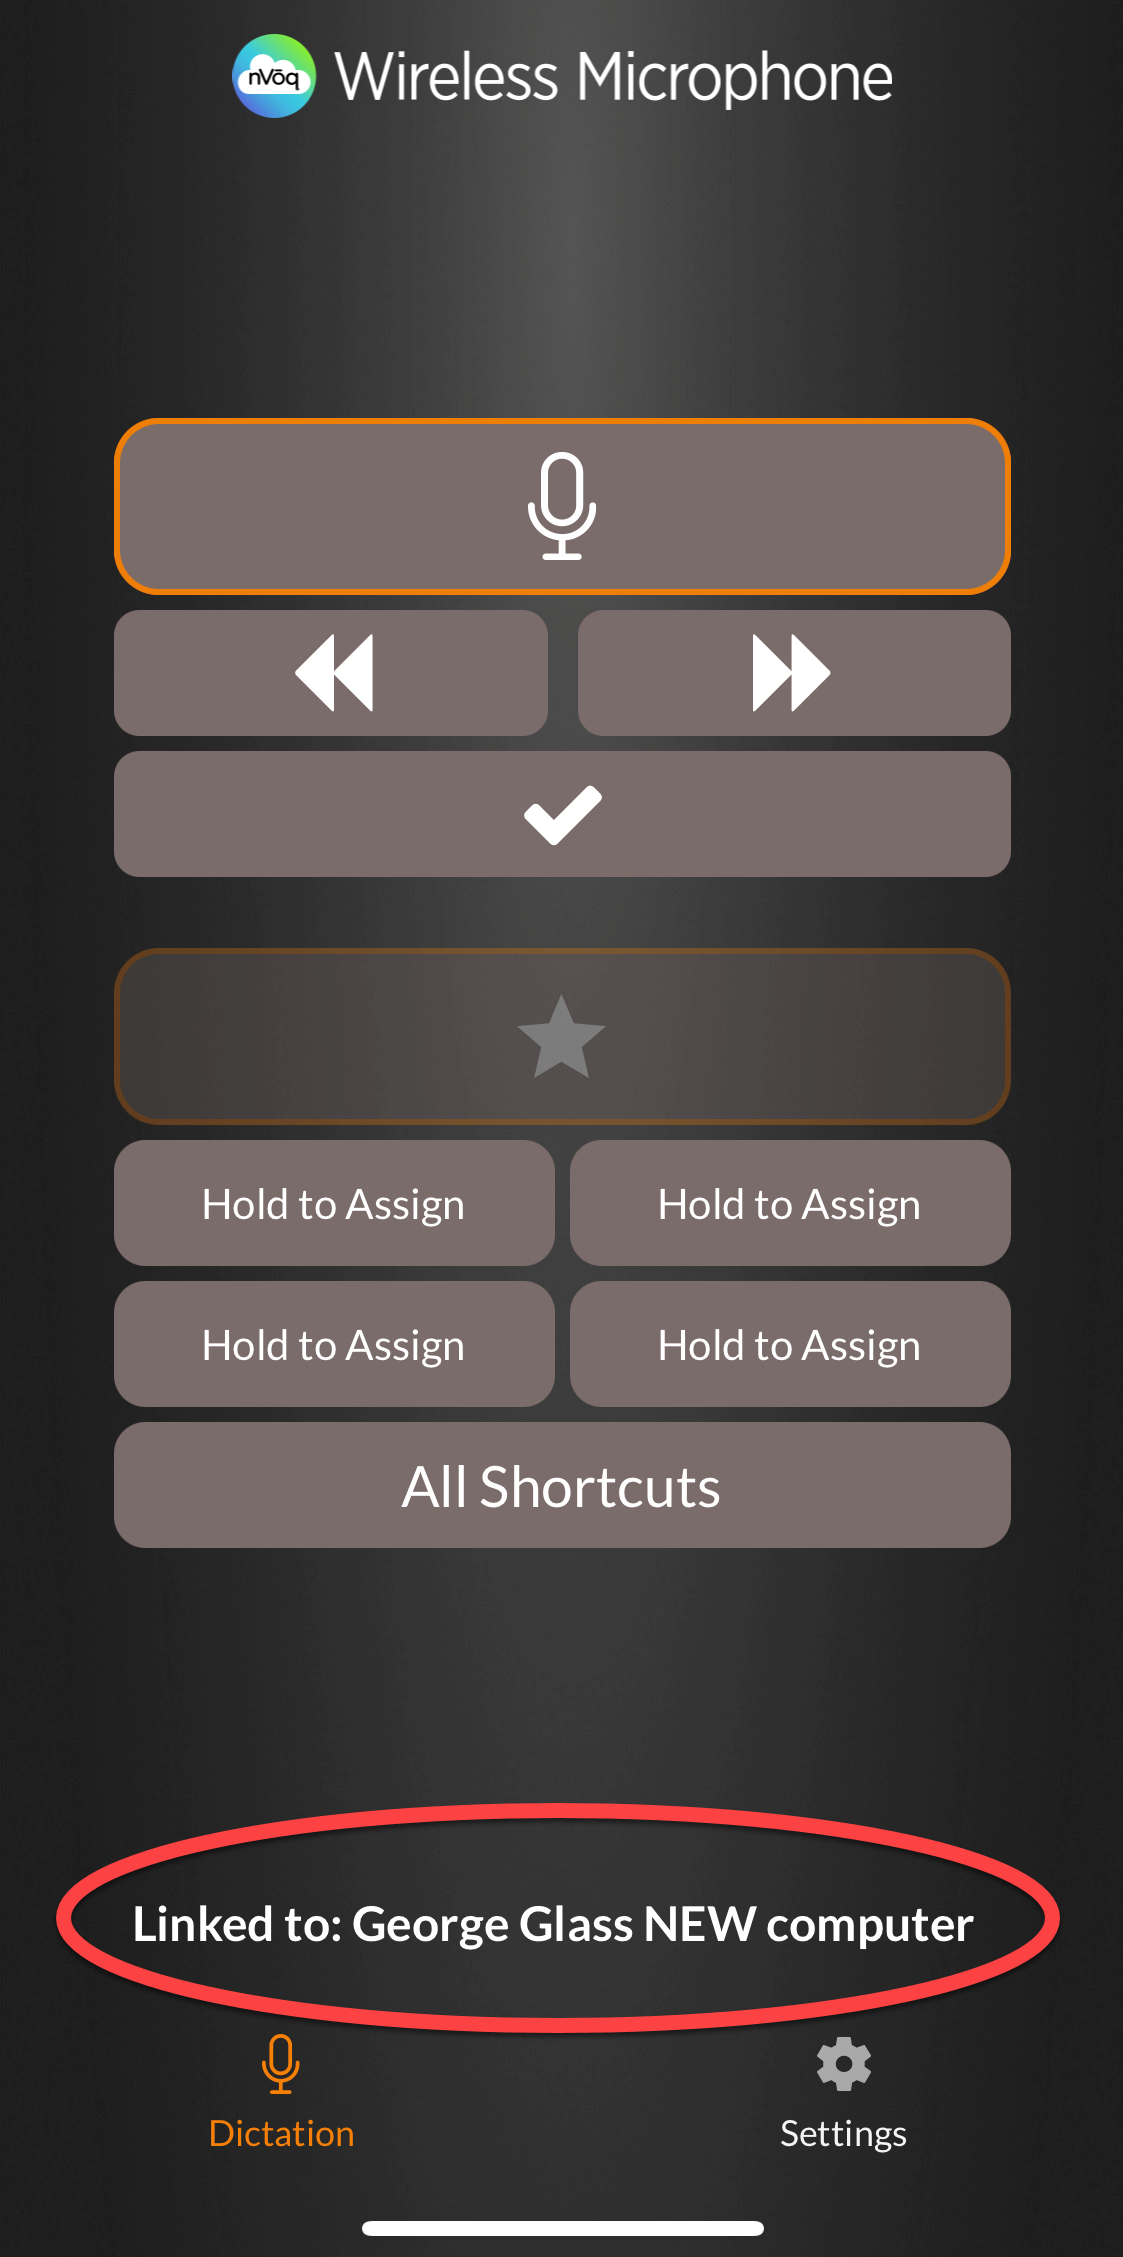
- On your Android or iOS device, sign in to the nVoq Wireless Microphone with the same username and password and on the same system that you used for nVoq Voice on the new computer. (See Android Wireless Mic: Sign In -or- iOS Wireless Mic: Sign In)
- There you should see the new computer name at the bottom of the dictation screen.
For more information about manually connecting to a computer running nVoq Voice on the nVoq Wireless Microphone, see https://support.nvoq.com/docs/wireless-microphone-android-help-buttons-on-dictation-screen#linked-to-computer-name -or- https://support.nvoq.com/docs/wireless-microphone-ios-help-buttons-on-dictation-screen#linked-to-computer-name