On the System Accounts page you can add, remove, download, or send username/password emails to SYSTEM level accounts.
System Accounts Page Toolbar

Actions
When one or more accounts is selected using the checkmark to the left of the list, the actions menu icon will appear in the toolbar. Click the icon to see the actions you can take with selected accounts:
Enable Two-Factor Authentication
Select this option to require the selected accounts to use two-factor authentication when logging in to nVoq Administrator. The current Two-factor Authentication status of accounts is displayed in the list view. After you select this option you will see a notification message letting you know that the two-factor status of the account has been enabled (or that it is already enabled).
Disable Two-Factor Authentication
Select this option to remove the requirement for the selected accounts to use two-factor authentication when logging in to nVoq Administrator. The current Two-factor Authentication status of accounts is displayed in the list view. After you select this option you will see a notification message letting you know that the two-factor status of the account has been disabled (or that it is already disabled).
Delete 
When one or more accounts is selected using the checkmark to the left of the list, the trash can icon will appear in the toolbar. Click the trash can icon to delete the selected accounts.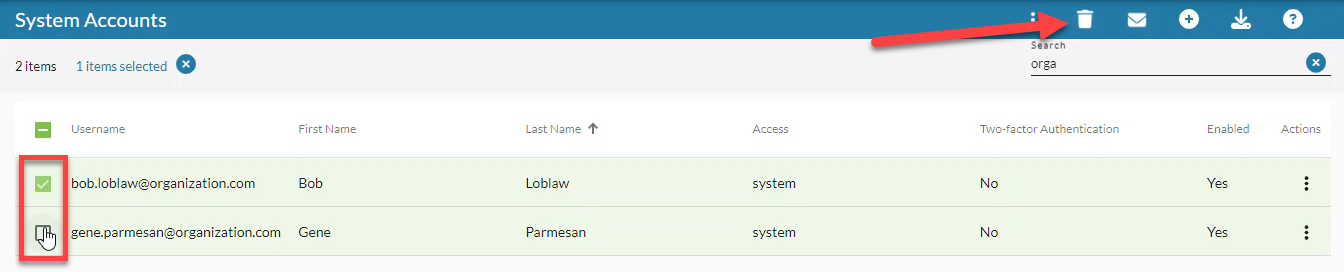 A confirmation will let you know how many system accounts you are deleting and that deleting a system account will permanently remove it. Click the Yes, delete system accounts button to delete the accounts.
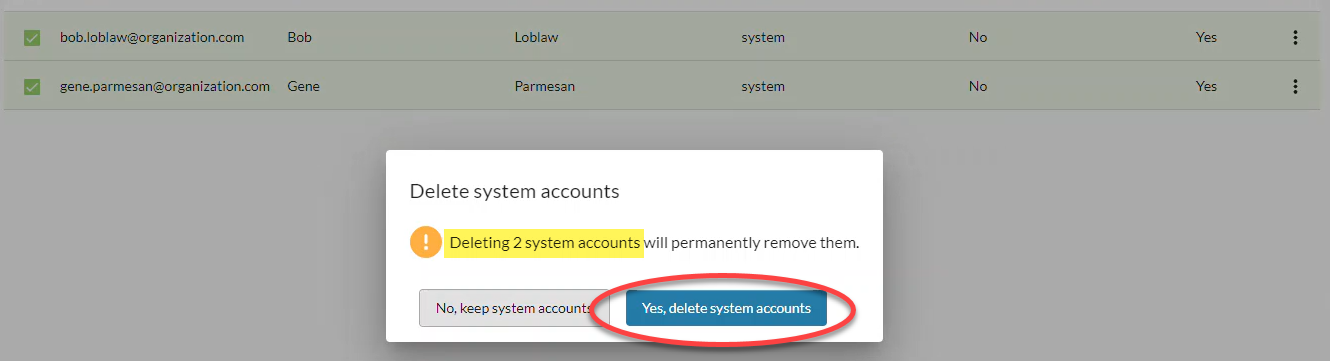
Email Account 
When one or more accounts is selected using the checkmark to the left of the list, the envelope can icon will appear in the toolbar. Click on the envelope icon to send a username email or a password email to the selected account(s). The email is sent immediately, no confirmation is presented. If the email was sent successfully, you'll see a green message near the top right of the page say, "Sent (username or password) email to [username]. " If multiple accounts were selected the success message says, "Sent (username or password) email to [#] accounts."
New 
Click on the plus symbol to create a new system account. See Add or Edit a System Account
Download 
Click on the download icon to download a .csv file spreadsheet that includes all system accounts or the accounts included in search results. If on the Edit Account page, this icon will download a .csv file that includes just the one account shown on the page.
Support Center 
Click on the question mark icon in the blue bar to go directly to the online documentation for the page. (The black question mark icon at the top right goes to the nVoq Administrator main help page.)
Search
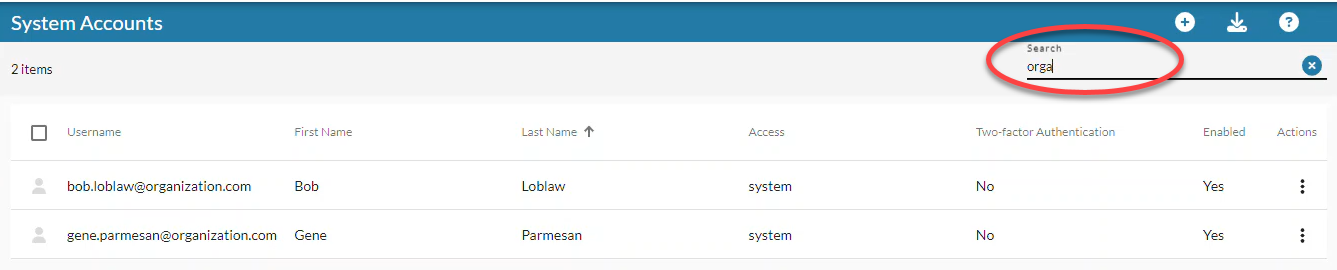
Use the Search field near the top-right (in the gray area) to search for an account by information in the any of the columns visible on the screen. Enter all or part of a word or name. Click the X next to the field to clear the search parameters.
System Accounts Page Columns

Account Icon / Checkbox
Hover your mouse over the account icon ![]() and click to put a checkmark in the box to select the account in order to perform an action on it from the blue toolbar. Once selected, the row turns green and has a checkmark on the left.
and click to put a checkmark in the box to select the account in order to perform an action on it from the blue toolbar. Once selected, the row turns green and has a checkmark on the left.
- You can select multiple accounts by clicking on each icon and then perform actions available from the icons in the blue toolbar on all selected accounts..
- You can select all accounts in the list by putting a checkmark in the box on the left side of the column headers (above the account icons).
Username
This is the username for the account that is used to log in to nVoq. Administrator.
- You can use the Search field near the top-right (in the gray area) to search for an account by information in the columns on the screen, including Username.
First Name
This is the first name of the user who holds this account. You can use the Search field near the top-right (in the gray area) to search for an account by information in the columns on the screen, including First Name.
Last Name
This is the surname of the user who holds this account. You can use the Search field near the top-right (in the gray area) to search for an account by information in the columns on the screen, including Last Name.
Access
This lists the Administrator Access that was granted, either System or Customer. You can use the Search field near the top-right (in the gray area) to search for an account by information in the columns on the screen, including the Access column. See Administrative Access for more information about the difference between these two roles.
Two-factor Authentication
This column displays a "Yes" or "No" depending on whether the user account is required to use two-factor authentication when logging in to nVoq Administrator.
Enabled
This column lists a "Yes" or "No" depending on whether the user account is active (Yes) or disabled (No).
Actions
Click on the Actions icon in the account row![]() to open a menu and select an action to take with the account. Possible actions may include:
to open a menu and select an action to take with the account. Possible actions may include:
- Edit Account: Open the account to see details and make changes. See Add or Edit a System Account
- Send Username Email: Send a username retrieval email to the email address that is associated with the account. The email is sent immediately (no confirmation is presented). If the email was sent successfully, you'll see a green message near the top right of the page say, "Sent username email to [username]".
- Send Password Email: Send a password reset email to the email address that is associated with the account. The email is sent immediately, no confirmation is presented. If the email was sent successfully, you'll see a green message near the top right of the page say, "Sent password email to [username]".
- Delete: Select this to delete the account. You will see a confirmation letting you know that deleting a system account will permanently remove it. Click the Yes, delete system account button to delete the accounts.